Sponsored
Hyper-V USB Passthrough: Everything you need to know
Master virtual machine optimization with our concise guide to Hyper-V USB Passthrough.

Just a heads up, if you buy something through our links, we may get a small share of the sale. It’s one of the ways we keep the lights on here. Click here for more.
Unlocking the full potential of your virtual machines can significantly enhance productivity, especially when using USB devices.
For users leveraging Microsoft’s Hyper-V for virtualization, one of the more advanced features is Hyper-V USB Passthrough.
Despite its advantages, setting it up can be tricky. Here’s a comprehensive guide to help you navigate through the process.
Why Hyper-V USB Passthrough?
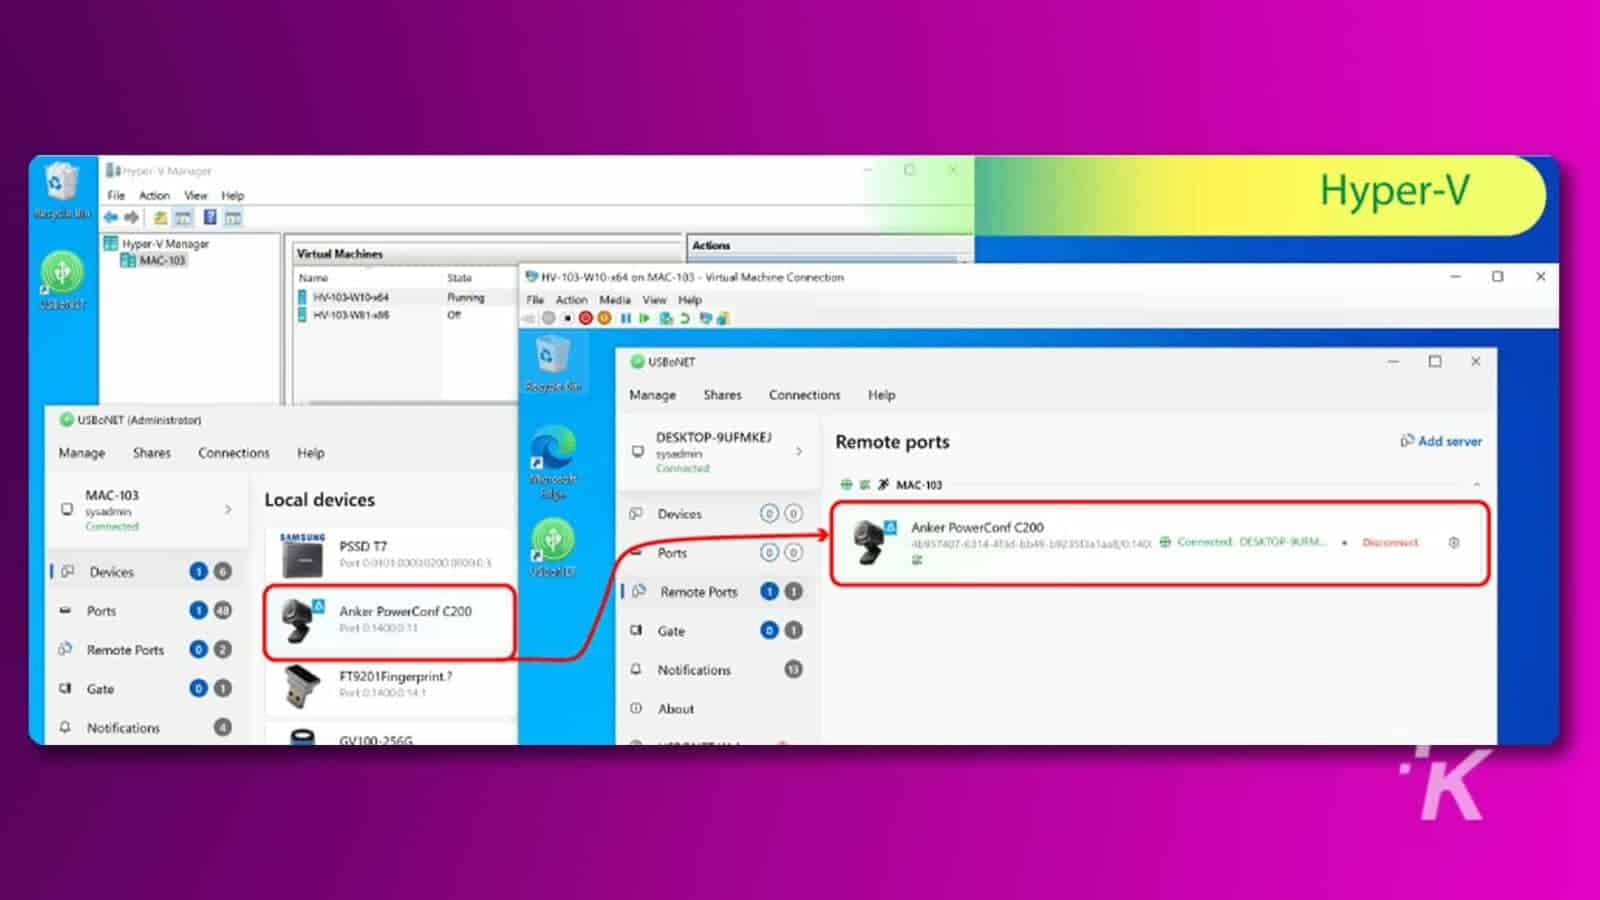
Hyper-V is a robust virtualization platform allowing the creation and management of virtual machines on Windows servers and desktops.
However, one drawback is the difficulty of accessing USB devices from within a VM. This is where USB passthrough comes into play, allowing virtual machines to directly access USB devices connected to the Hyper-V host.
This is particularly useful for applications that require physical USB dongles, storage devices, printers, or any other peripherals.
Key methods for Hyper-V USB Passthrough
There are several methods to achieve USB passthrough in Hyper-V. Here’s a breakdown of the most effective techniques:
Server-side method via SCSI Controller
This method involves configuring the USB device as a physical hard disk in Hyper-V, allowing it to be accessed by the virtual machine.
Here are the steps:
- Open Disk Management by pressing Windows + R and typing diskmgmt.msc.

- Right-click the USB drive and set it to offline.

- Open Hyper-V Manager and access the VM settings.

- Under the SCSI Controller, add the offline USB disk.

While effective, this method can be complex and may be limited to storage devices only.
Client-side method (Enhanced Session Mode)
Enhanced Session Mode allows for an easier setup and supports a broader range of USB devices, making it a preferred method for many users.
Follow these steps:
- Run the Hyper V Manager on the host machine.
- Click the host system name and opt for the Hyper V Setting in the context menu.

- Start with the Server menu on the left. Click “Enhanced Session Mode Policy” and enable it by ticking the corresponding field in the main window.

- In the User menu below the Server settings, choose “Enhanced Session Mode” and also allow its usage.

- Finish all sessions on HyperV VM.
- Go to “Hyper V Manager” and double-click the VM name.
- Choose “Show Options” → “Local Resources” → “More” → “Local Devices and Resources.”
- Enable “Other supported plug & play devices” and “Devices that I plug in later” by pressing OK.
- Save the newly created configuration in the “Display” menu and tap “Connect.”
- Launch the Hyper V virtual machine. The available devices will be visible in “File Explorer.”
This allows for real-time access to USB devices attached to the client machine.
Remote Desktop Protocol (RDP) approach
Using RDP, you can access USB devices connected to the client machine from within the VM.
Here are the steps:
- Enable remote connections on the VM.
- Use the RDP client to redirect local devices and resources to the VM.
This method is useful for users who need to connect devices that are not directly attached to the Hyper-V host.
Network redirection using USBoNet
For a seamless and user-friendly solution, the USBoNet software simplifies the process of Hyper-V USB passthrough.
Follow these steps:
- Download & install USBoNet from HighFigure on both host and virtual machines.
- Run the app and opt for Device.
- Choose gadgets to share.
- On your VM, launch USBoNet.
- Find shared peripherals in the Device menu.
- Press Allow Access to start using them.
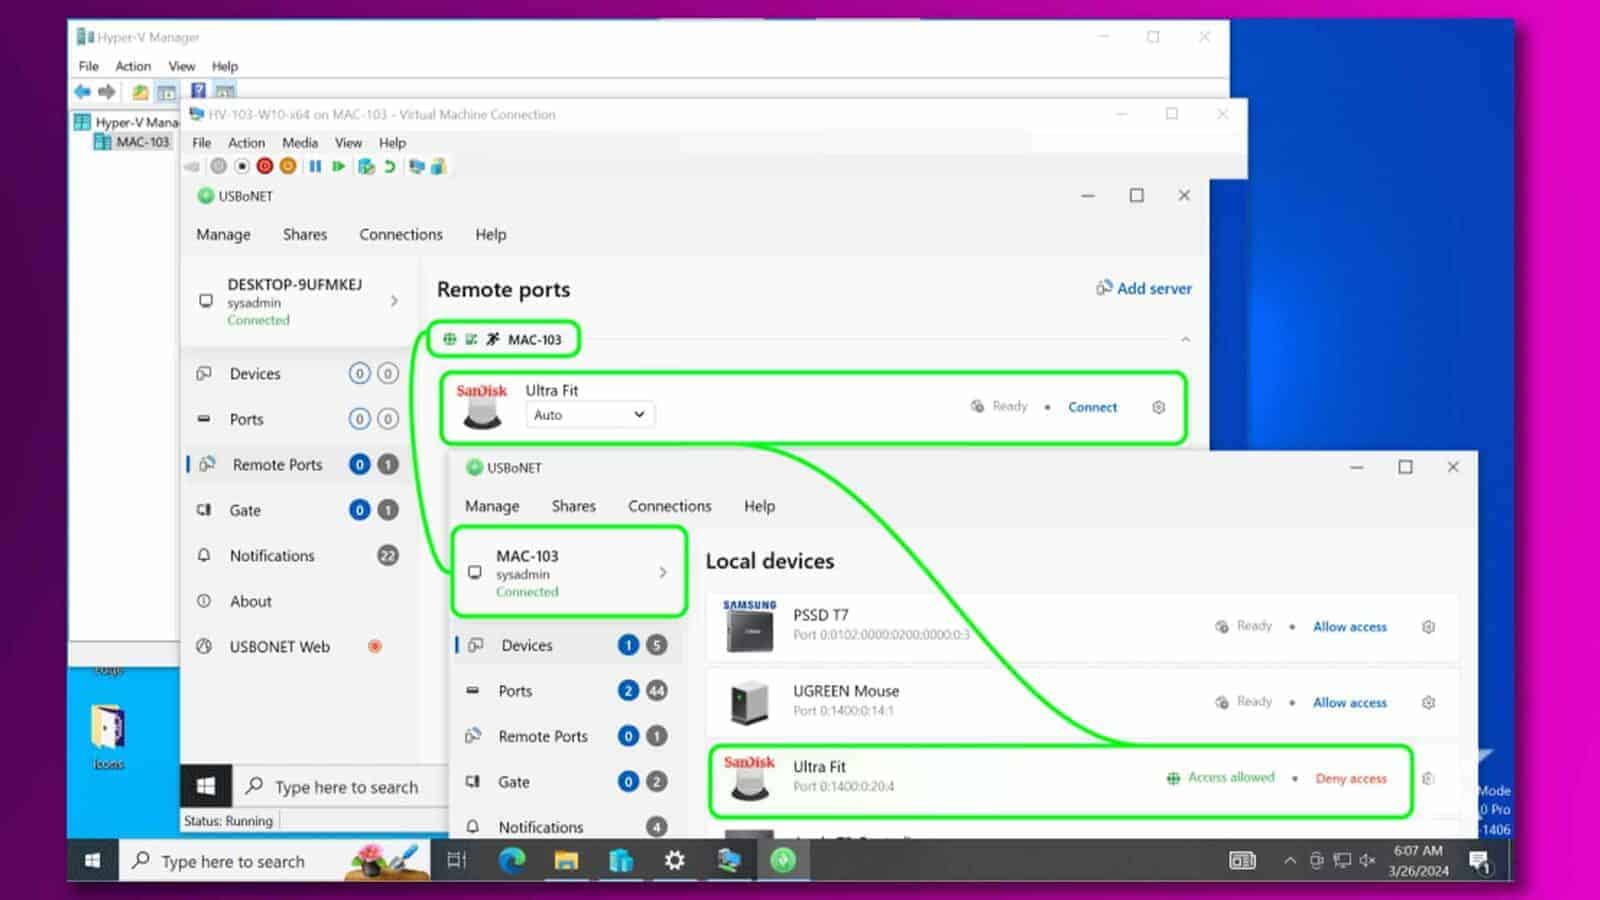
Using USBoNet, you can connect a wide range of USB devices, not limited to any specific operating system.
Choosing the right method
The best method for setting up USB passthrough in Hyper-V depends on your specific requirements.
- Simplicity: Enhanced Session Mode and USBoNet offer straightforward setups.
- Versatility: USBoNet supports a wide array of devices and operating systems.
- Technical Capability: The SCSI Controller method is powerful but requires a more advanced setup.
Security considerations
When configuring USB passthrough, always consider security risks associated with physical and virtual devices.
Ensure you’re using reliable software and apply necessary security measures, such as restricting access and using anti-malware tools.
Final thoughts
Hyper-V USB passthrough significantly enhances the versatility of virtual machines by allowing direct access to USB devices.
Whether you opt for built-in features like Enhanced Session Mode or leverage third-party tools like USBoNet, each method provides unique benefits tailored to different use cases.
Explore these methods and choose the one that best suits your virtualization needs. For detailed steps and more information, visit this link.
Have any thoughts on this? Drop us a line below in the comments, or carry the discussion to our Twitter or Facebook.
Editors’ Recommendations:
Disclosure: This is a sponsored post. However, our opinions, reviews, and other editorial content are not influenced by the sponsorship and remain objective.


