Android
7 automated Android settings you should be using to save time
Want to streamline your Android experience? Check out some of these tips.
Just a heads up, if you buy something through our links, we may get a small share of the sale. It’s one of the ways we keep the lights on here. Click here for more.
The following blog post has some of the best automated Android settings you should be using in your daily life to save time.
Many users spend lots of the time on their smartphone doing common tasks daily. One good feature of Android phones is that you can customize it in just about any way you want. Apart from that, the operating system has various automated features, which users can employ to make life easier.
Whether you’re checking if your phone is optimized or setting up a brand-new phone, then you should try these automated functions on your Android phone.
1. Automatic Google Play updates
Updates come quick and fast, and it is always good to install them. Typically, these updates have various security fixes and add fresh features.
It’s not necessary to check for the app’s latest update daily, as you can automate this process. Here’s how you can do that:
Launch the Google Play Store app.
Tap on the Hamburger icon. In the menu bar, tap Settings.
Under the General section tap on the Auto-update apps. In the dialog box choose “Auto-update apps over Wi-Fi only.”
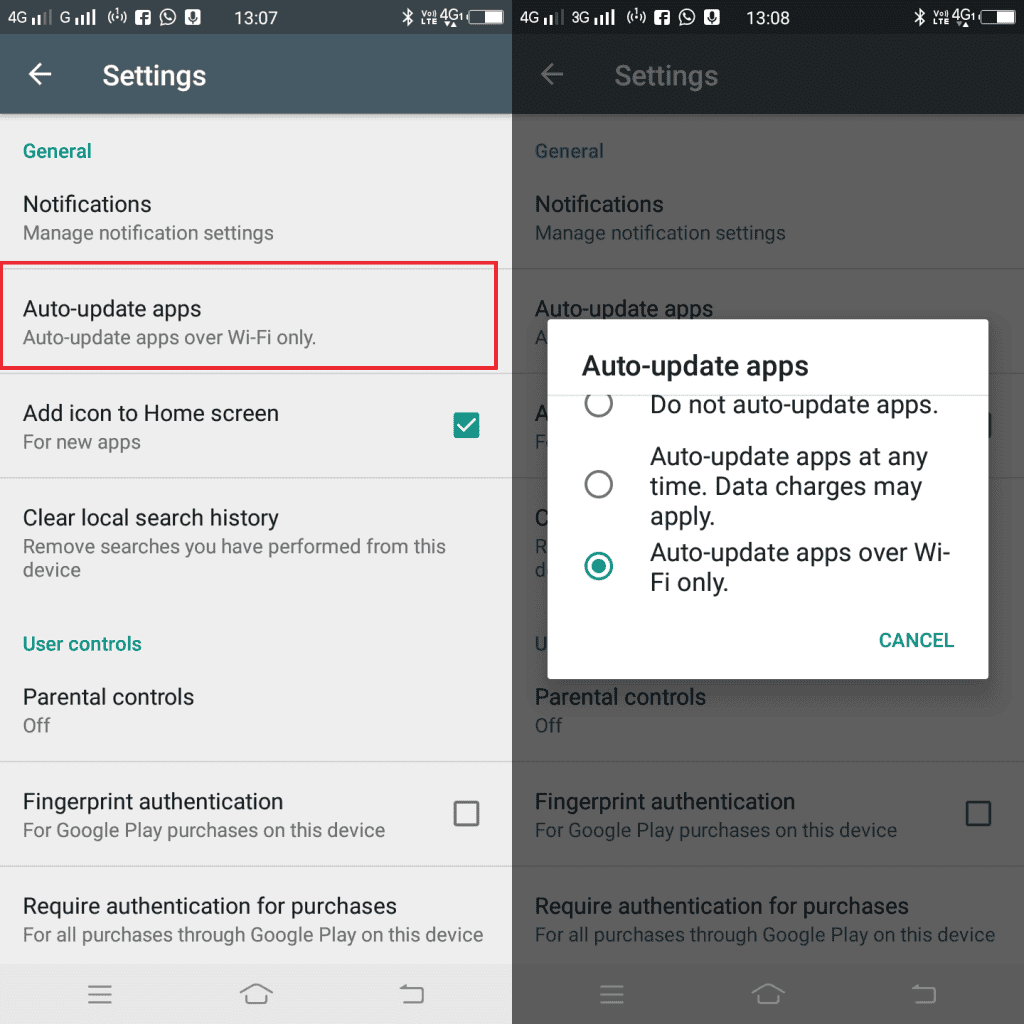
Image: Viney Dhiman / KnowTechie
If you have an unlimited data plan; then you can also go for “Auto-update apps at any time. Data charges may apply.”
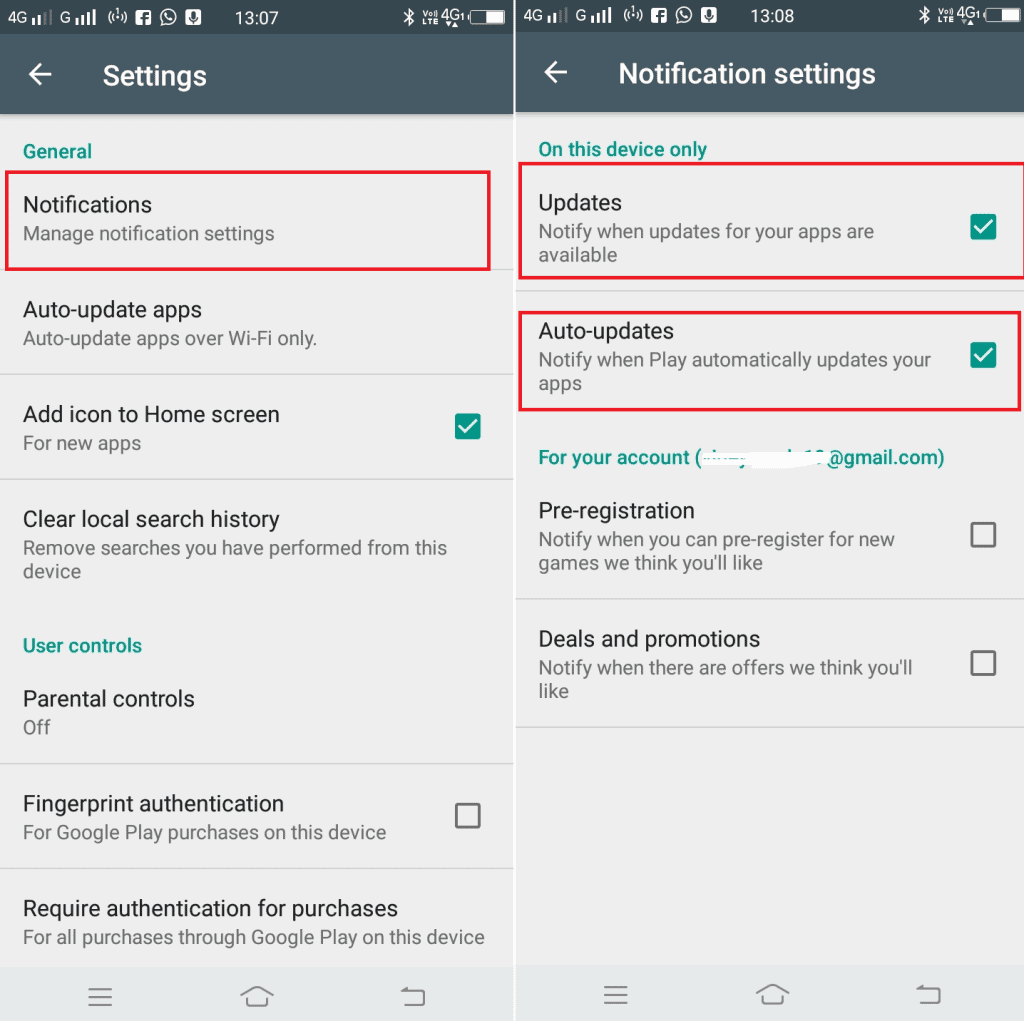
Image: Viney Dhiman / KnowTechie
After that, head back to the General section and tap Notification. Here, under the “On this device” section, select to receive notification about available updates or when apps automatically update.
2. Google Play Protect app scanning
Google Play Protect is a useful feature that scans your phone and apps for malicious content. Run the scan whenever you wish too, but automating the process will save some time.
Launch the Google Play Store.
Tap on the Hamburger icon and select Play Protect.
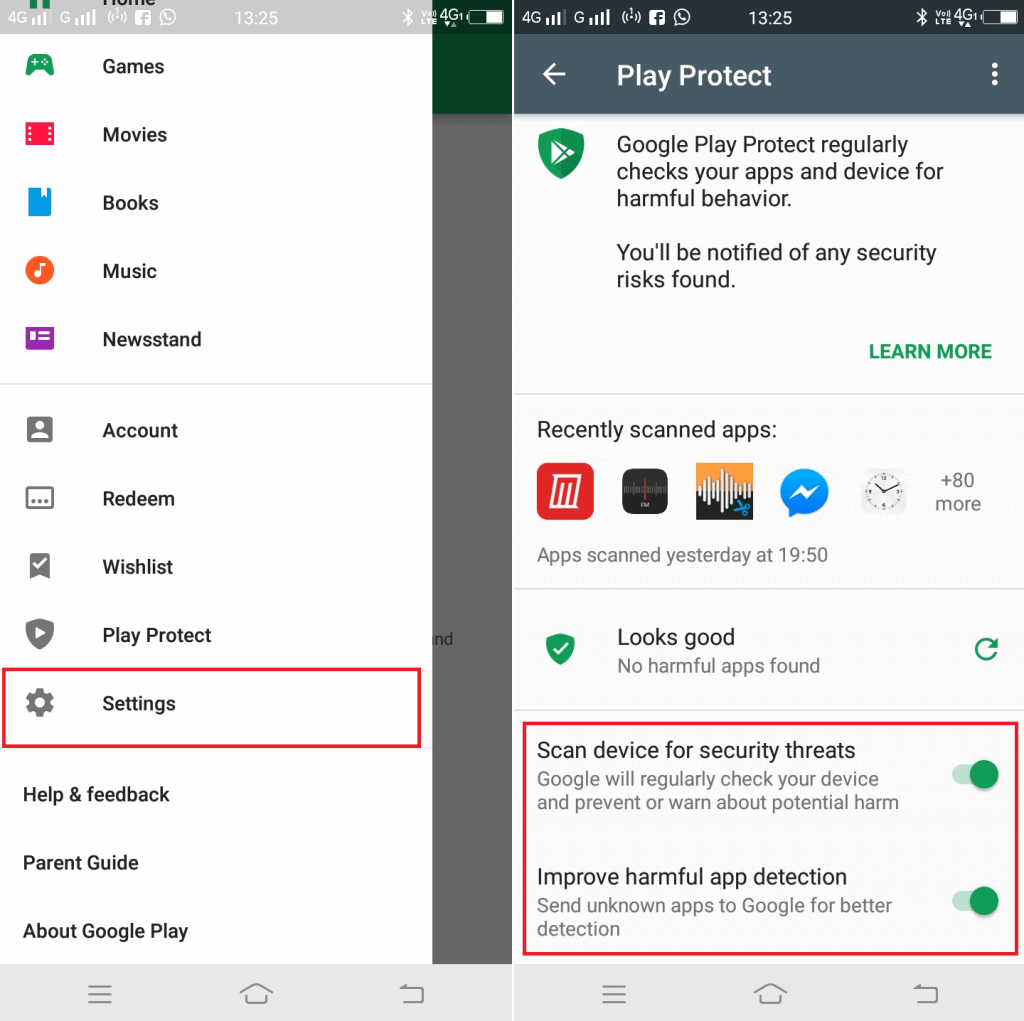
Image: Viney Dhiman / KnowTechie
Here, you need to turn on the option for “Scan device for security threats.”
Also, you can enable “Improve harmful app detection.” This will inform Google about unknown apps. But it is all your decision whether you want to use this function or not.
3. Automatic screen brightness
The chances are high that your smartphone brightness is not adjusting according to you. When you’re in a dark room, it’s so shiny that it dazzles you. On the other hand, when you’re outside, the phone screen dims drastically. And due to this, it sometimes becomes impossible to see or read anything on your phone.
In this situation, you can adjust the Android automatic brightness feature. Here’s how to enable it:
Go to “Settings” -> “Display.” Here, move the slider to turn on “Adaptive brightness.”
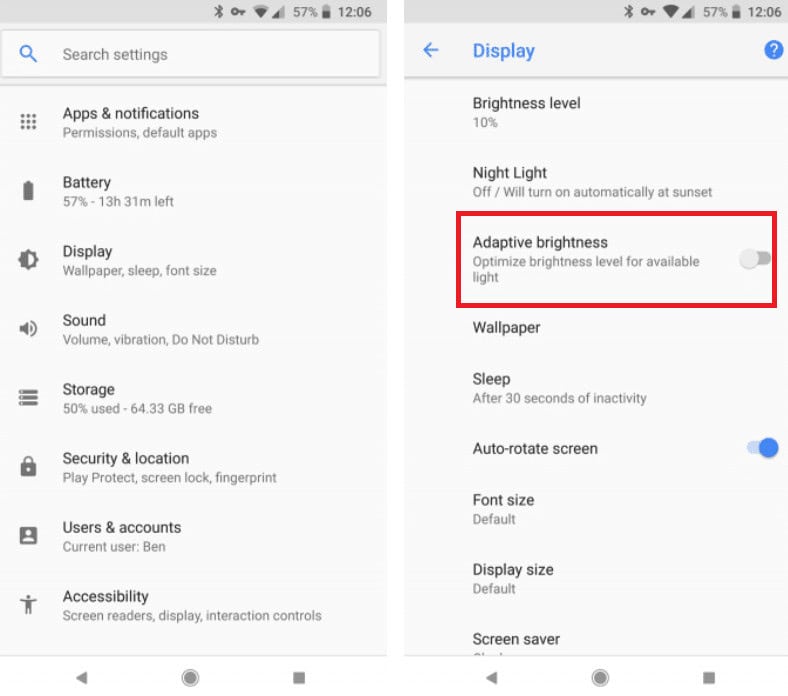
Image: Viney Dhiman / KnowTechie
When you enable this feature, it will automatically adjust the brightness according to available light.
4. Reclaim device space using Smart Storage
Running out of storage on the phone is awkward, as finding and deleting old photos, apps, and other contents take time.
Luckily, Android Oreo has a new feature that automatically deletes old pictures from the device. Photos and videos consume lots of phone storage for nothing, and due to this reason you might have seen Low Storage notification often. Here’s how to enable the Smart Storage feature:
Launch “Settings” -> “Storage.” Here move the slider to turn on the “Smart Storage.” After that, you need to select how old picture and videos you want to clean up. You can select from 30, 60, or the 90 days.
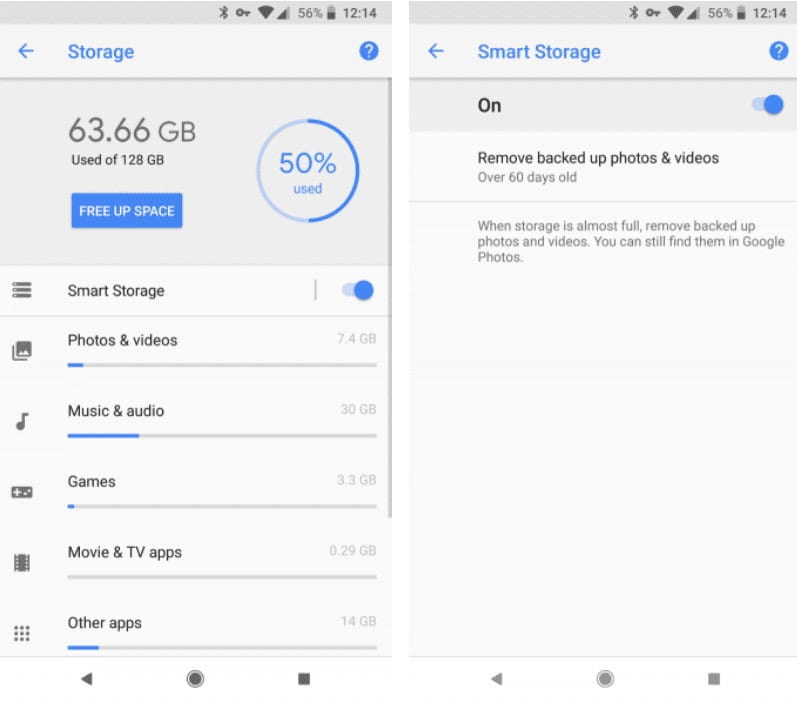
Image: Viney Dhiman / KnowTechie
This feature will automatically delete old photos and video and reclaim lots of phone storage regularly.
5. Join Wi-Fi networks automatically
Using Wi-Fi can save lots of mobile data, right? Thankfully, many places now offer free Wi-Fi and it can be wise to connect to public Wi-Fi networks nearby.
Most of the time, the users manually connect Wi-Fi connection, but the good thing is that you can automate the process. Here’s what you need to do:
Launch “Settings” -> “Network & Internet” and then tap on Wi-Fi option.
In the next screen, under the list of available wireless network, you need to tap on “Wi-Fi Preferences.”
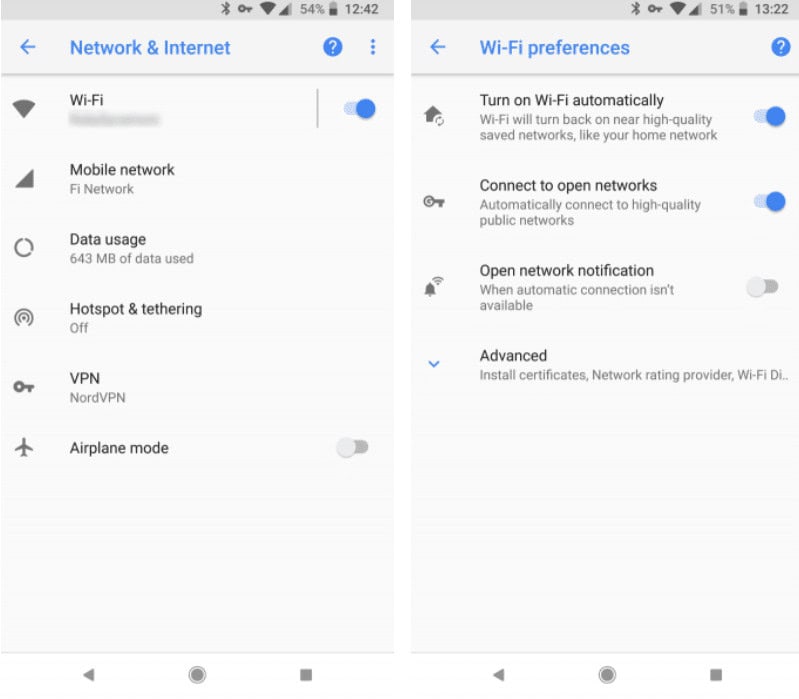
Image: Viney Dhiman / KnowTechie
Here, turn on the option “Turn on Wi-Fi automatically.” This option will automatically re-connect to the nearby home network. Also, if you turn on “Connect to open networks” then the phone will automatically connect to a public wireless network having strong signal strength.
6. Always on VPN for Android
There are lots of reason why users must use a VPN, and one of them is to keep browsing secure, mainly when you connect the phone to a public network like a coffee shop.
If you often visit these types of public places, then it is wise to turn on the Always-on VPN setting on your Android phone. This way there is no need to connect to your VPN app each time you restart your phone. Here’s how to enable the setting:
Launch Settings -> Network & Internet -> VPN. You need to tap on the gear icon next to VPN. Here, you need to turn on Always-on VPN option.
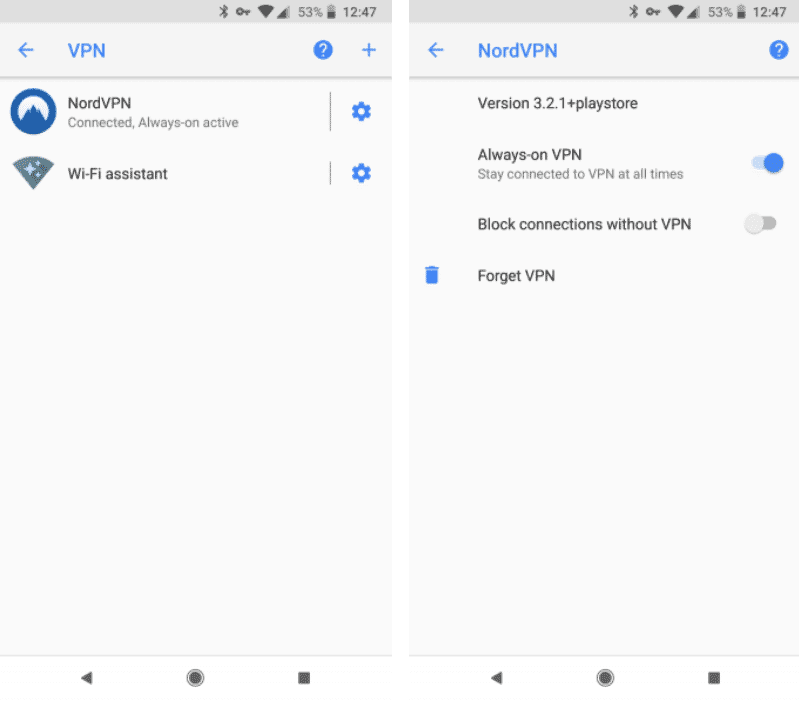
Image: Viney Dhiman / KnowTechie
Also, you can select “Block connections without VPN.” This, as a result, will prevent you from surfing the internet without a VPN app.
7. Use Do Not Disturb Mode
The Android operating system comes with a Do Not Disturb mode. With the help of this feature, you will start receiving silent alerts so that you can entirely focus on the work. This feature is handy when you’re attending a meeting, or in the middle of something.
In this situation, Do Not Disturb helps in achieving a distraction-free environment. Here’s how to enable it.
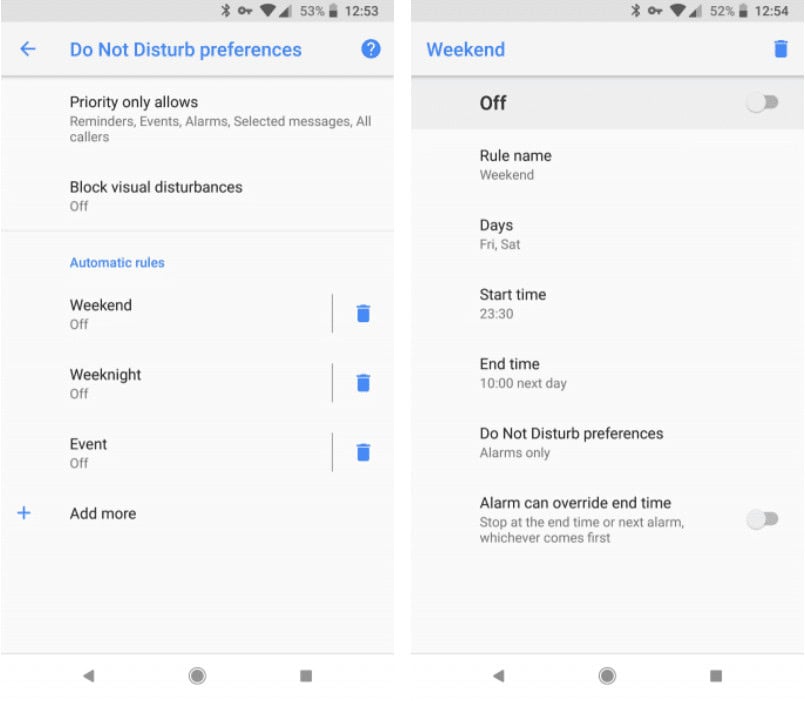
Image: Viney Dhiman / KnowTechie
Launch Settings -> Sound -> Do Not Disturb preference. On this screen, you will find various settings accompanied by Automatic rules.
In the settings, you can set how you want the Do Not Disturb feature to run on your phone. On the other hand, with the help of Automatic rules, you can make changes like when you wish to run DND, what time of day it should run and lots more.
These are some of the most popular functions which you can use to automate your Android phone and make life easier entirely.
Apart from that, there are more advanced apps like IFTTT, Tasker, and MacroDroid which you can use for a higher level of automation.
What is your favorite automation function on an Android phone? Find this blog post useful? We would like to hear from you in the comments.
For more how-to guides, check out:
- Here’s how to download and install Amazon Alexa for Windows 10
- How to find the signal strength of your wireless connection in Windows
- How to make your IoT apps more resilient against hacking attempts