Apps
Want the best gaming experience with Windows 10? Here’s 7 tips to power up
Need to get that gaming rig up to speed on your Windows 10 machine? Check out these 7 tips to get you to blazing fast speeds.

Just a heads up, if you buy something through our links, we may get a small share of the sale. It’s one of the ways we keep the lights on here. Click here for more.
Need to get that gaming rig up to speed on your Windows 10 machine? Check out these 7 tips to get you to blazing fast speeds.
The free Windows 10 upgrade awaits you. So, you download it and start checking out the new features, especially as they relate to performance for your gaming. If you’re looking to power up Windows 10, here are 7 easy tweaks you can make to get maximum power out of your PC and not tax your already overburdened brain.
Defrag You SSD (Solid State Drive)
There’s been a lot of discussion and disagreement about this, but here’s the thing: A lot of websites will tell you to do this, but really it should only apply if you have a rotational media drive. And if you have one of those to store backups or other things, you should be doing this regularly anyway.
Image: itblog.sandisk.com
If you are a serious gamer, you should be installing your games onto a solid state drive and probably your Windows 10 installation too, just not both on the same drive. SSD’s are much faster and you won’t be in the kitchen making popcorn or playing brain test games on your phone while you wait for everything to load. And the best part? You never have to de-fragment SSD drives – Never. It’s a win-win.
The other thing about de-fragmenting an SSD drive – you shorten its life.
Even if you don’t download Windows 10, take this piece of advice seriously. Upgrade to that SSD drive – you’ll love it – especially if you play a lot of role-playing or shooter games that take a long time to load.
Dump the Unnecessary Apps and Other Junk
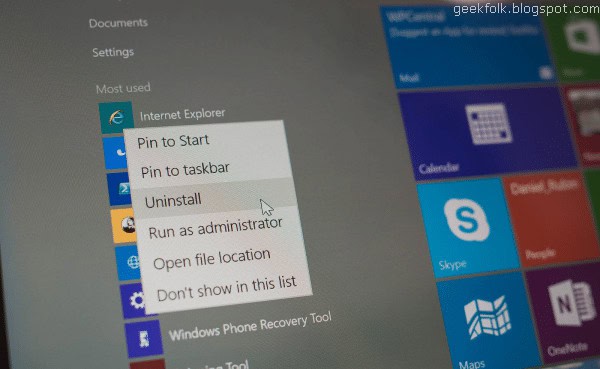
Before you upgrade to Windows 10, you will want to get rid of old programs, pieces of programs, and stuff that is just sitting there slowing down your PC and taking up memory space. Plus, there may be some little bugs or spyware that has crept in. Start with a clean slate before you upgrade – you’ll be glad you did.
There are a lot of apps, most of them free, that you can use. Here are just a few of them:
- PC Check and Tuning will go deep into your current Windows and let you get rid of everything you don’t need, perform driver updates, and streamline your installations. This is put out by MAGIX Software and is a pretty superior tool.
- SUPERAntiSpyware is free and lets you get rid of all of those pesky bugs that re slowing down your system.
- Piriform’s CCleaner will clean out all dead installs and files, along with your current Windows Registry.
- AVG has a combination uninstaller and a program deactivator.
Overclock Your System but be Moderate About it
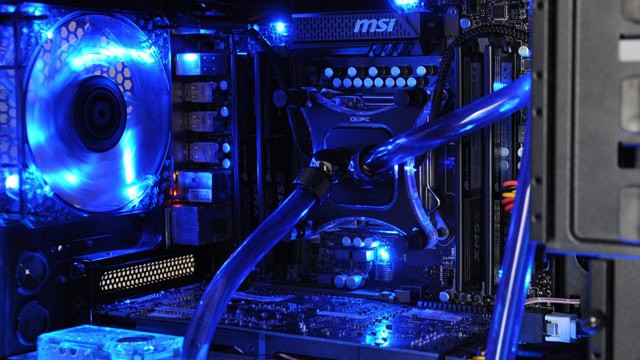
The biggest risk here is overheating your system. If it is already running hot, you will need to be very careful. However, you should be able to go 5-10% over the default overclock without damage. To do this, you will either need to use your gaming video card – it should have some software that you can use to alter clock speed – or if you don’t have a card, go to the manufacturer’s website and see what software they recommend and how much they say you can safely overclock. Just remember – your system is like a car engine – if it overheats too much, it’s toast.
Install User Mods to your Games
A lot of people have made modifications to your favorite games, and these can improve loading times, overall performance, and also add some fidelity. Most of them are available for free at the Windows Store. Some are available through your communities on social media. You can add the mods, test them out, and always dump them if you decide they aren’t for you.
Disable Windows Services that You Won’t Use
Services are automatic features that Windows 10 has embedded with its installation. A lot of them, you will find you don’t need. You can look through the services and pick and choose those you want to disable. Then test and see what the effect is. You can always re-enable if you find you want them. The point is to get rid of those you don’t want so load times are faster. Here’s how to do this:
- Go to “Start” and right click
- Then click on “Task Manager”
- Click “Services”
- Right-click a service you don’t want and then choose “Stop”
It doesn’t get much easier than this.
Turn Off the “Fluff” – Shadows and Animations
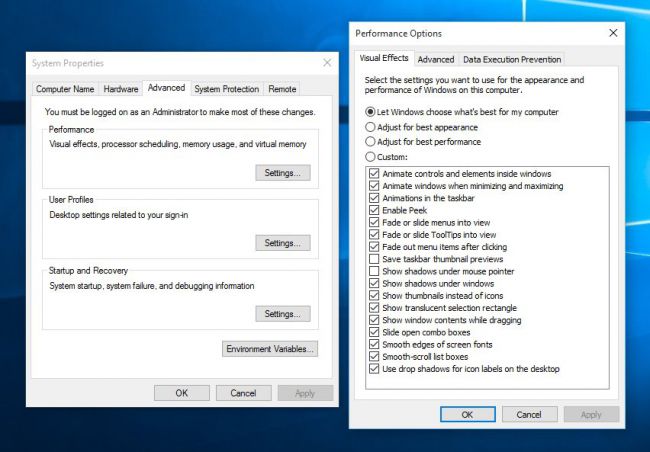
Image: PCGamer
These are some special effects that you may find just useless. Both shadows and animation slow down your system and for a CPU that is primarily for gaming, you don’t need them. Here’s how to do this:
- Choose “system” after right-clicking start button
- Click on “Advanced System Settings” and then the “Advanced” tab
- Look for the settings button under the “Performance” selection
- Now click “adjust for best performance – all of the fluff will be removed. Your other option is to pick and choose which specific ones you want to disable.
Turn On “Fast Startup”
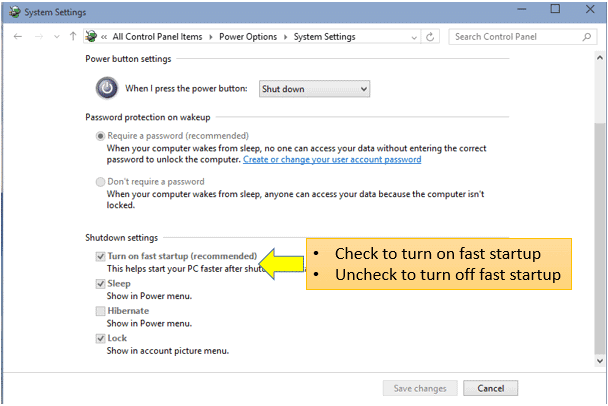
Image: Windows10Update.com
Most Windows 10 users don’t know that this exists. But you can opt for a faster startup pretty easily:
- Choose “Control Panel” after right-clicking on “Start” button
- Click on “System and Security”
- You will see an option for “Power Options.” Click it
- Now click on “choose what the power buttons do”
- Click the “Turn on fast startup” at the bottom where you find the “Shutdown settings.”
- Save the change and you’re finished.
Bonus Advice:
Perform disc cleanups regularly. The Windows tools for this does a good job of getting rid of the stuff you begin to accumulate over months of use. If you do this on a scheduled basis, you will notice that load times pick up.
- Click on “File Explorer Link” from the Start menu
- Right-click on “Local Disk C” and then choose “Properties” among the options.
- Click “Disk Cleanup” button
- Now click “Unnecessary Files” and OK


