Apple
macOS Sequoia finally gets window snapping – how to use it
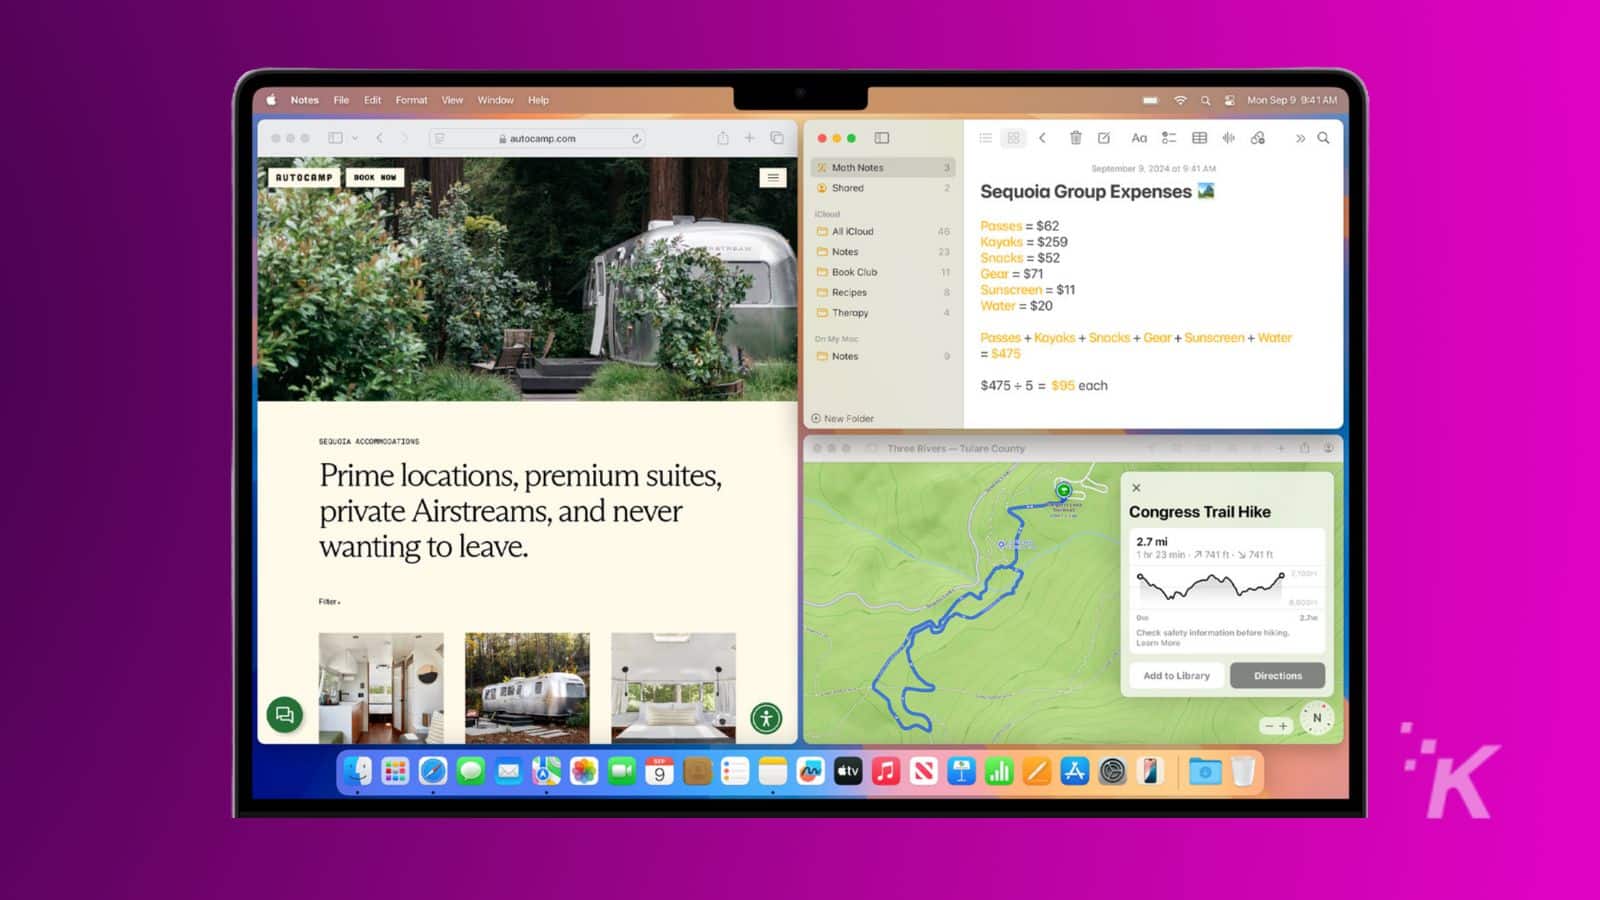
macOS Sequoia has introduced Window Tiles, a feature that automatically arranges app windows into organized screen sections, allowing for more efficient multitasking and productivity.
Just a heads up, if you buy something through our links, we may get a small share of the sale. It’s one of the ways we keep the lights on here. Click here for more.
macOS Sequoia has finally brought window snapping to the Mac, and it’s a total game-changer for productivity.
Keeping your apps organized is key, whether you’re researching alongside your notes or jamming out to tunes while you email. Here’s how to get the most out of this killer feature.
But first, what exactly are Window Tiles?
Window Tiles are a feature in macOS Sequoia that automatically arranges app windows into organized screen sections.
Think of it like a digital version of dividing up a physical desk. Instead of windows overlapping and getting cluttered, you can snap them into predetermined zones.
This keeps your apps side-by-side for easy reference, saving you the hassle of constant resizing and repositioning.
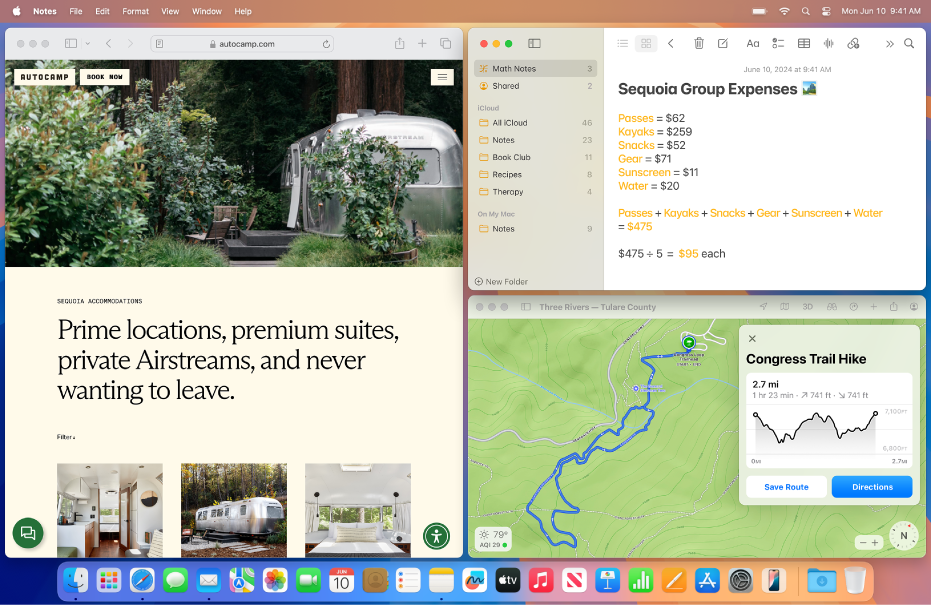
Whether you’re working on a project with multiple files, video chatting while you browse, or simply want to keep your email and music playlists visible, Window Tiles keep your digital workspace tidy and efficient.
Alright, now that we know Window tiles are, lets roll up our sleeves and see how to arrange them on your screen.
The Basics
First things first: you need to have macOS Sequoia installed. Once you’ve updated everything, it’s time to get your tile on.
Alright, for starters, there are a handful of ways to go about this. Here’s what you need to know.
The Green Button Method: Hover over that green zoom button in the corner of any window. You’ll get options to maximize, snap to the side, or claim a quarter of the screen. Pick your poison, and your other windows will auto-arrange to match.
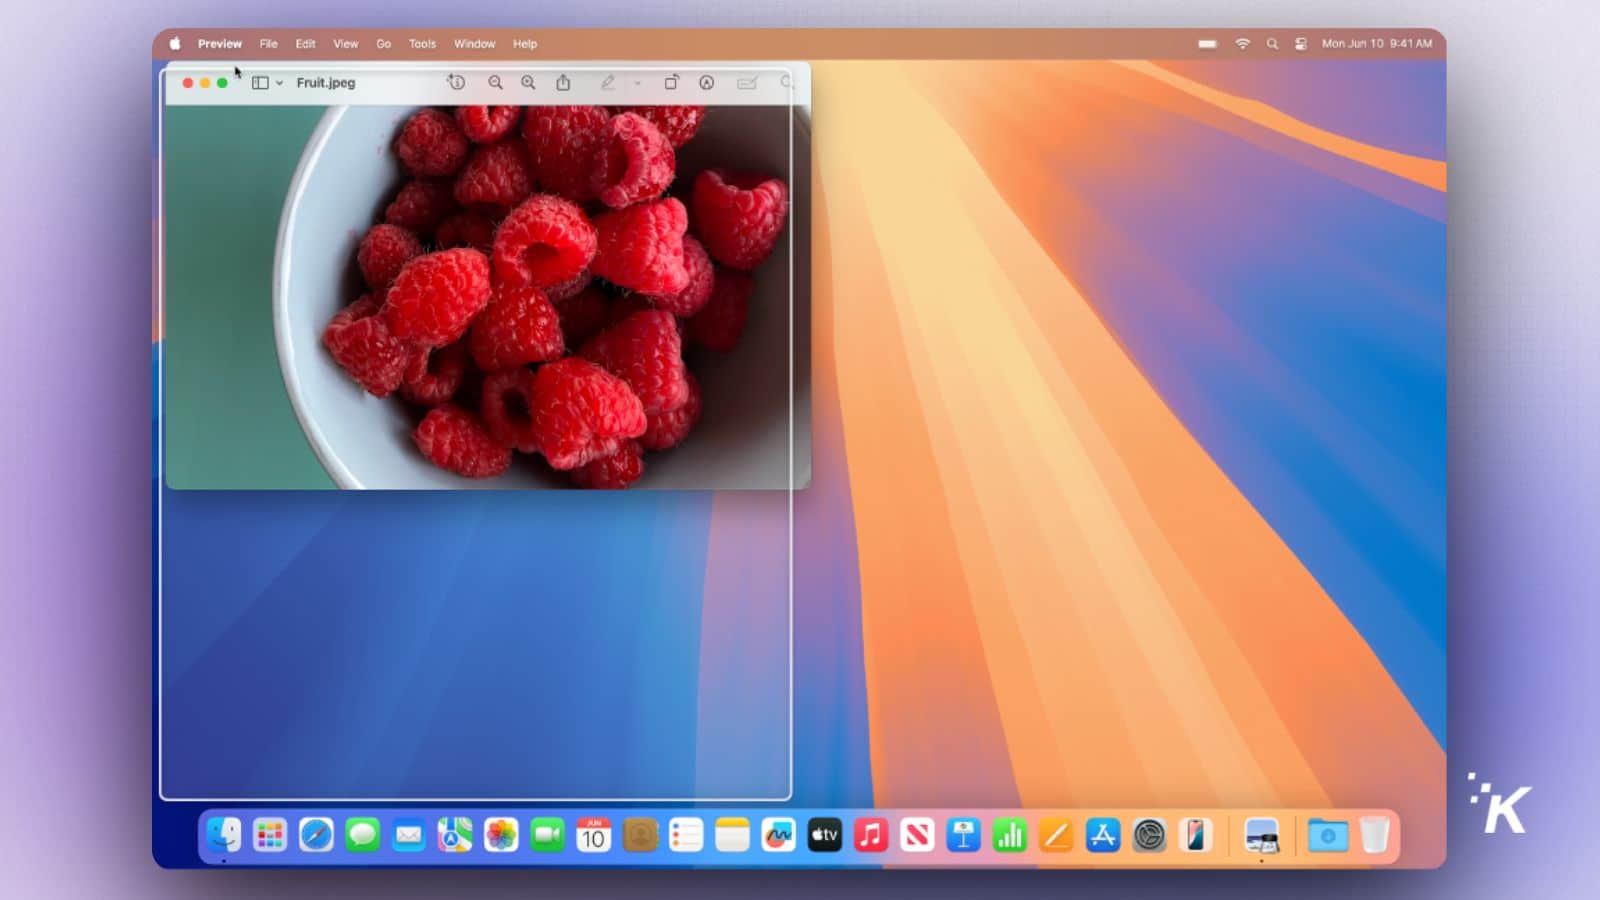
Drag and Drop: Click and drag a window to the edge for a half-screen takeover, the top for a full-screen fest, or the corners for a quarter-screen claim.
Just the window you selected will move, leaving the others in place. Hold Option while dragging to see the zones you can snap to.
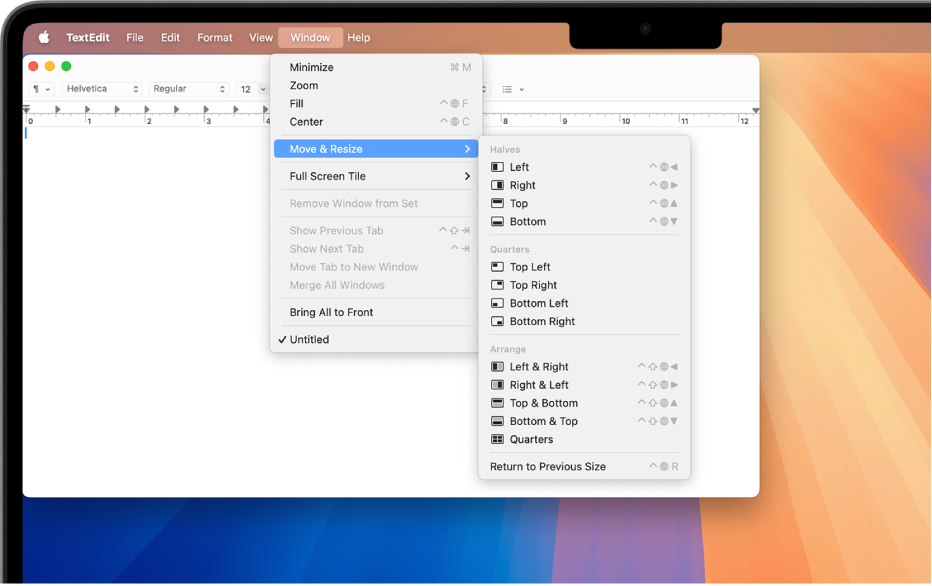
Window Menu: In any app, hit the Window menu, then Move & Resize. From there, you can snap to halves or quarters, or pick an Arrange option to have your current window snap and the others adjust accordingly.
Keyboard Ninja: If you hate taking your hands off the keyboard, here are some helpful keyboard commands:
- Fn + Control + F maximizes
- Fn + Control + C centers
- Fn + Control + arrow keys move windows around.
If you’re looking for more keyboard shortcuts, Apple has them all listed here on its support page, but here’s an overall breakdown via Apple’s support page:
| Icon | Name | Keyboard shortcut | Description | ||||||||
|---|---|---|---|---|---|---|---|---|---|---|---|
| Fill | Fn-Control-F | Expand the active window to fill the desktop. | |||||||||
| Center the Window | Fn-Control-C | Center the active window on the desktop. | |||||||||
| Left | Fn-Control-Left Arrow | Move the active window to the left half of the desktop. | |||||||||
| Right | Fn-Control-Right Arrow | Move the active window to the right half of the desktop. | |||||||||
| Top | Fn-Control-Up Arrow | Move the active window to the top half of the desktop. | |||||||||
| Bottom | Fn-Control-Down Arrow | Move the active window to the bottom half of the desktop. | |||||||||
| Top Left | n/a | Move the active window to the top-left corner of the desktop. | |||||||||
| Top Right | n/a | Move the active window to the top-right corner of the desktop. | |||||||||
| Bottom Left | n/a | Move the active window to the bottom-left corner of the desktop. | |||||||||
| Bottom Right | n/a | Move the active window to the bottom-right corner of the desktop. | |||||||||
| n/a | Return to Previous Size | Fn-Control-R | Make the active window the size it was before it was tiled. | ||||||||
For more, David Nield of the Verge article also has a helpful guide too.
Leveling Up
Now you’ve got the basics down; it’s time to take your tiling to the next level.
Customization Station: Click on the Apple menu, then System Settings, then Desktop & Dock.
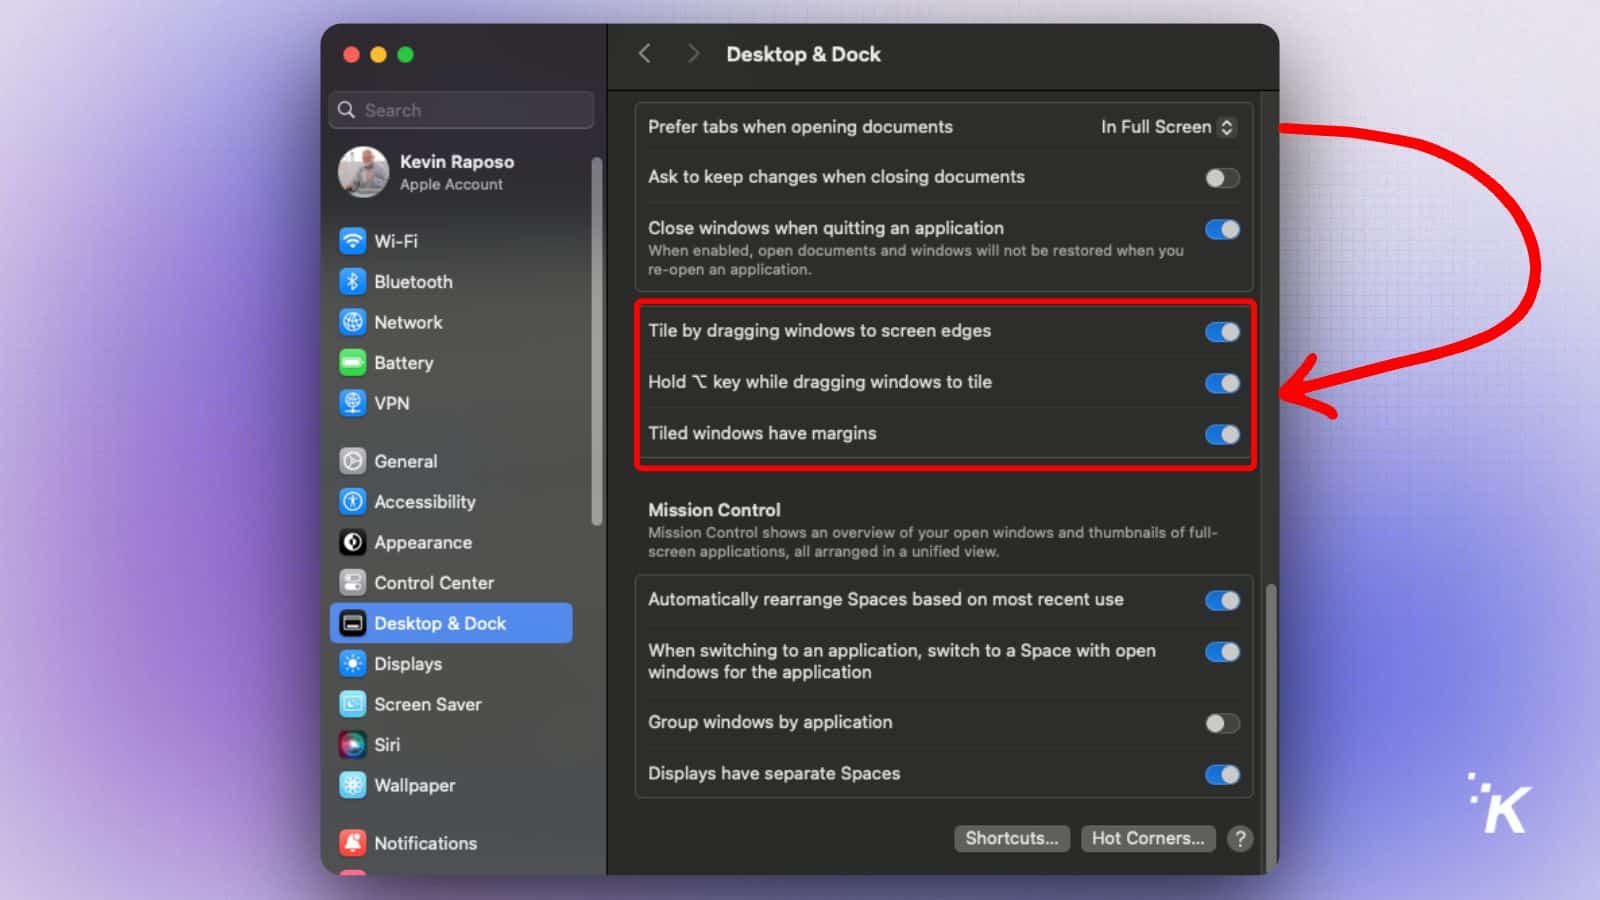
You can turn drag-to-tile and the Option key shortcut on or off and choose whether tiled windows have margins between them. MacOS Sequoia lets you adjust these settings to your heart’s content.
Third-Party Power: If you want even more control, third-party tools like Magnet are still in the game. For $9.99, you can divide the screen by thirds and sixths, set up custom triggers, and more. It’s a worthy investment if you live for multitasking.
macOS Sequoia Window Tile Cheat Sheet
A few things to keep in mind as you’re snapping away:
- The Option Key: Holding the Option key while dragging lets you see the snap zones. You can also turn off the Option key shortcut if it’s cramping your style.
- Margin Madness: By default, tiled windows have a little gap between them. If you’re a minimalism fan, head to System Settings to turn margins off.
- Quitting and Rearranging: If you quit an app, its tile stays put. You’ll need to rearrange the others manually.
Window Tiles are finally here
Window tiling in macOS Sequoia is a huge upgrade for multitaskers, but it’s not perfect. The lack of quarter-screen keyboard shortcuts stings, and power users might miss the granular control of third-party apps.
That said, for a built-in feature, it’s surprisingly robust. With a bit of practice, you’ll be a tiling master in no time. Happy snapping!
What do you think about this new macOS feature? Would you use it over third-party solutions like Magnet? We would love to hear your thoughts below in the comments, or via our Twitter or Facebook.
Follow us on Flipboard, Google News, or Apple News