Sponsored
How to install and optimize an NVMe SSD
This comprehensive guide will help you set up and optimize your new NVMe SSD for optimal speed on your computer.
Just a heads up, if you buy something through our links, we may get a small share of the sale. It’s one of the ways we keep the lights on here. Click here for more.
Disclosure: This is a sponsored post. However, our opinions, reviews, and other editorial content are not influenced by the sponsorship and remain objective.
The speed with which your computer can reach and transmit data can be greatly improved by upgrading to an NVMe (Non-Volatile Memory Express) solid-state drive (SSD).
NVMe solid-state drives (SSDs) are optimized to outperform standard SATA SSDs in both read and write rates as well as delay.
Here, we’ll show you how to set up and configure an NVMe SSD to get the most out of your computer.
Step 1: Check your system compatibility
Make sure your computer or hardware is compatible with NVMe disks before buying one. Check your hardware for a port marked “M.2” or “PCIe NVMe.”
However, you can also examine the manufacturer’s website or user instructions for your computer or motherboard to see if it is compatible.
Step 2: Choose the right NVMe SSD
Choose an NVMe SSD that satisfies your requirements in terms of price, size, and read/write rates.
Thus, Samsung, Western Digital, Crucial, and Corsair are just a few examples of well-known NVMe SSD manufacturers. Find the best component for your setup by studying evaluations and contrasting features.

Step 3: Backup your data
Back up your current storage device before adding your new NVMe SSD. This will give you peace of mind that you have a backup of your data in the event that something goes awry during implementation.
Step 4: Gather tools and materials
The following supplies are required for the assembly process:
- Something with a Phillips-head tool
- Your NVMe solid-state drive
- Hardware consisting of an M.2 slot-capable PC or chipset
- A wristband for preventing electrostatic discharge (optional, but recommended)
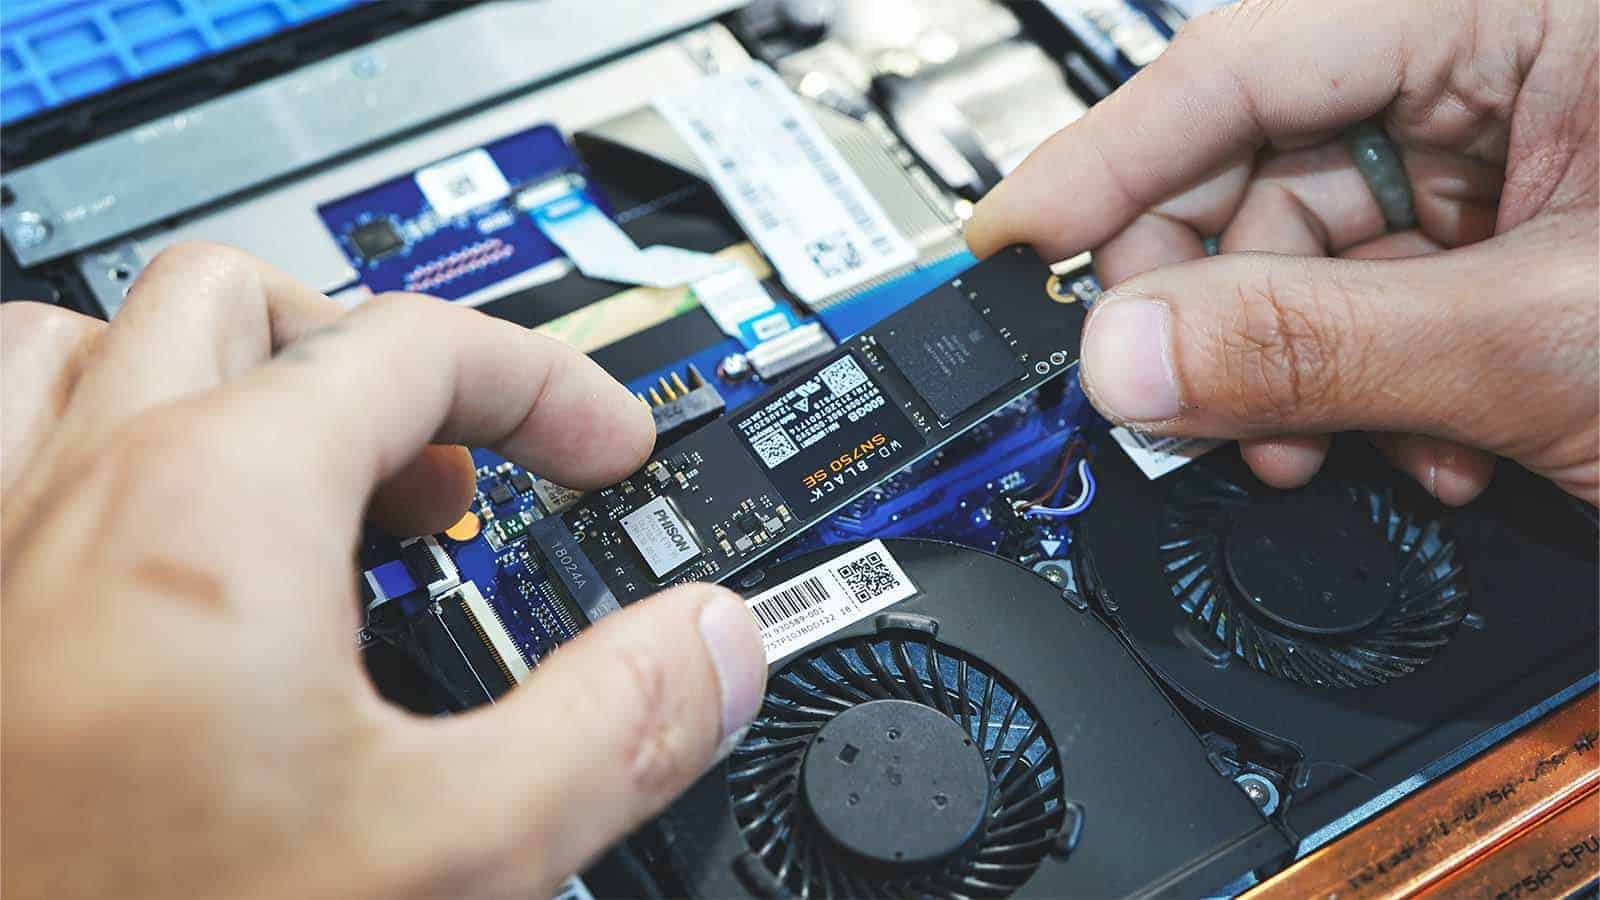
Step 5: Install the NVMe SSD
- Turn off your machine and disconnect it from the power.
- The CPU can be accessed by opening the computer enclosure. If you need help removing the box of your computer or motherboard, look there for guidance.
- Find the motherboard’s M.2 expansion port.
- Wear the ESD wristband and attach it to a grounded metal object.
- If there is a cover or substitute for the M.2 port, remove the bolt holding it in place.
- Using a 30-degree angle, carefully slide the NVMe SSD into the M.2 slot, making sure the slots on the SSD and the slot match.
- Carefully lower the SSD and replace the bolt you took out earlier to keep it in position.

Step 6: Configure your BIOS/UEFI settings
- Start up your computer and hit the appropriate key (typically F2, F10, DEL, or ESC) to access the BIOS/UEFI settings.
- Proceed to the Boot menu in the BIOS/UEFI configuration utility.
- Verify that the NVMe SSD you’re using is recognized as a usable drive. If NVMe support isn’t already enabled, you can do so by following your motherboard’s user instructions.
- Back out of the BIOS/UEFI after saving your changes.
Step 7: Install or clone your operating system

If you’re beginning from scratch, your NVMe SSD is the perfect place to put your chosen operating system.
However, to transfer your current OS to the NVMe SSD, you should use disk copying software to copy everything from your previous drive.
Moreover, to prevent data loss, be sure to read and follow the software’s documentation closely.
Step 8: Optimize your NVMe SSD
Maintaining your SSD’s peak speed over time is possible with the right combination of up-to-date drivers, hardware, and software.
Therefore, for the most up-to-date drivers, software, and optimization utilities made for your NVMe SSD model, check the SSD manufacturer’s website.
Step 9: Verify performance improvements

After you’re done with the setup and tuning, you can use testing software like CrystalDiskMark or AS SSD Benchmark to see how much faster your system is running on an NVMe SSD.
To make sure your system is operating at peak performance, check the read/write speeds and other measures against those of the prior storage device.
Step 10: Maintain your NVMe SSD
Maintaining a high-performing NVMe SSD requires frequent driver and firmware updates, as well as standard disk care procedures like cleaning, defragmenting, and error checking.
In addition, use the manufacturer-supplied tools or additional monitoring software to keep tabs on your SSD’s status.
Conclusion
As a result, upgrading to an NVMe SSD is a great way to speed up your system and enjoy a smoother working experience.
This comprehensive guide will help you set up and optimize your new NVMe SSD for optimal speed on your computer.
Furthermore, if you want your SSD to last as long as possible and operate at its best, it’s important to keep up with driver and firmware updates and other preventative upkeep.
Have any thoughts on this? Drop us a line below in the comments, or carry the discussion over to our Twitter or Facebook.
Editors’ Recommendations:
- Samsung’s best SSDs have never been this cheaper
- Review: Sabrent Rocket Q 2TB SSD
- SanDisk’s 2TB portable SSD falls to a new Amazon 30-day low, 70% off
- Store your entire digital world on this compact 1TB Netac SSD
Disclosure: This is a sponsored post. However, our opinions, reviews, and other editorial content are not influenced by the sponsorship and remain objective.
Follow us on Flipboard, Google News, or Apple News