How-To
How to selectively apply color to black-and-white photos in Snapseed
Want to add a pop of color to black & white images in Snapseed? Here’s how.
Just a heads up, if you buy something through our links, we may get a small share of the sale. It’s one of the ways we keep the lights on here. Click here for more.
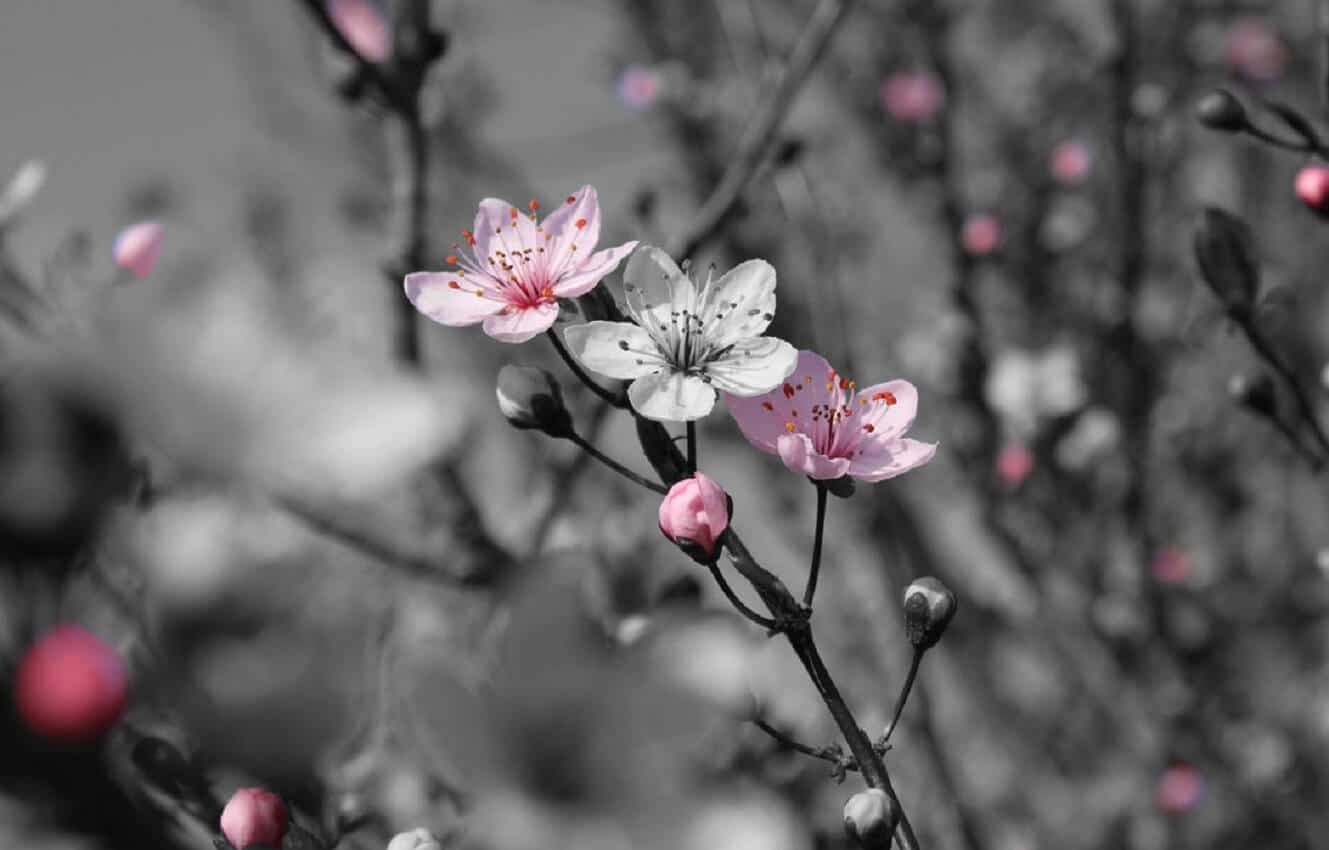
Have you ever seen a black and white picture with a small splash of color? I bet the colored area against the black and white must have drawn your attention.
Want to learn the easiest way to create a similar picture for yourself? This technique is called “Selective Coloring.” In this blog post, we will take you through the process of applying a splash of color in black-and-white photos using Snapseed (Photo editing app for Android and iOS).
Selective coloring helps in identifying the primary subject of the photo. The contrast of black and white with a color appears to be complicated, but can be done in simple, easy steps. So without further delay, let’s start coloring a picture in Snapseed.
Selectively apply color to black-and-white photos in Snapseed
1. Download (Android, iOS) and install the Snapseed app on your smartphone.
2. Launch the app.
3. Tap on the big plus icon, and it will take you to phone gallery.

Image: Viney Dhiman/KnowTechie
Here select the photo on which you want to apply the color.
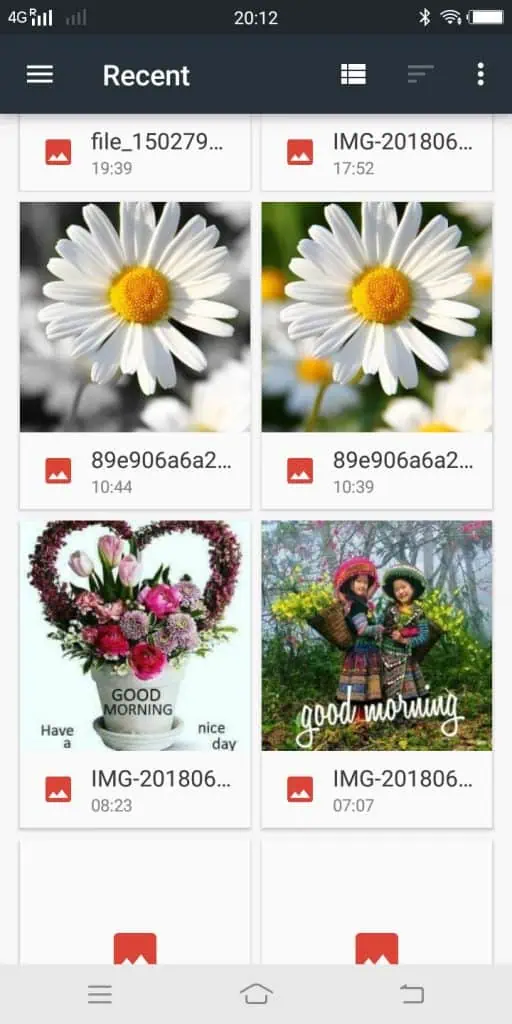
Image: Viney Dhiman/KnowTechie
4. When the selected photo opens up, switch to the Tools option available at the bottom. This will show you all the photo editing tools available in the app.
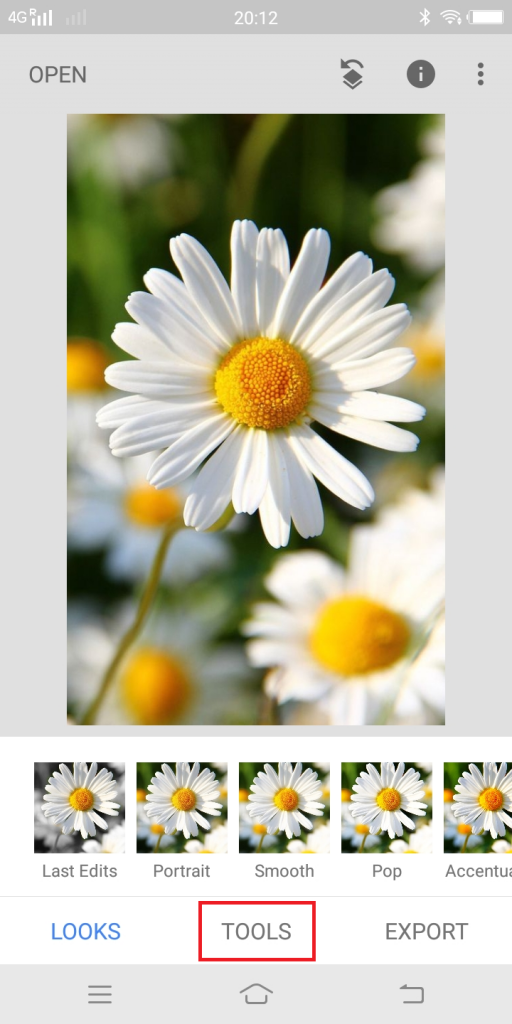
Image: Viney Dhiman/KnowTechie
You can use any out of them to fine-tune the image. In this case, the selected photo is perfect for adding color, then tap on the Black & White tool to continue the process.
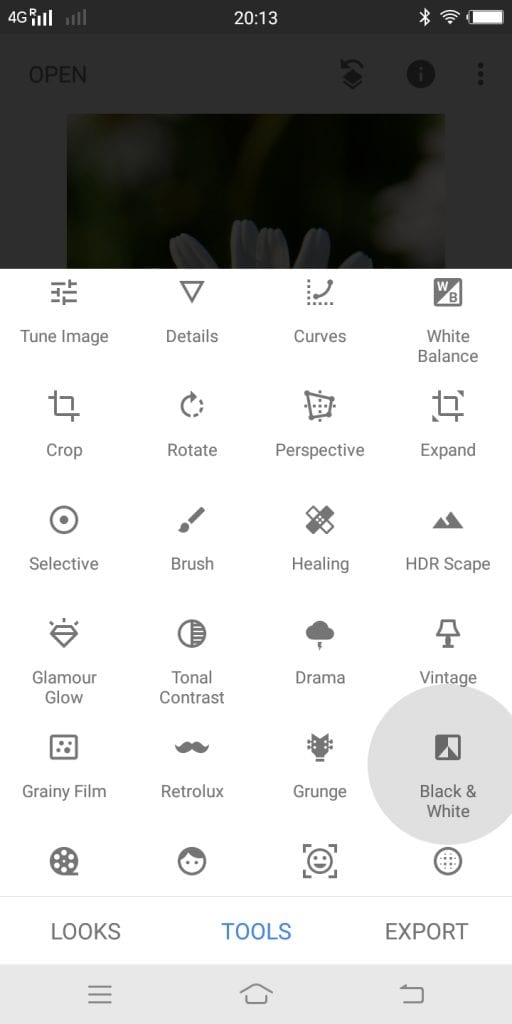
Image: Viney Dhiman/KnowTechie
This will turn the color photo in Snapseed into a black and white picture.
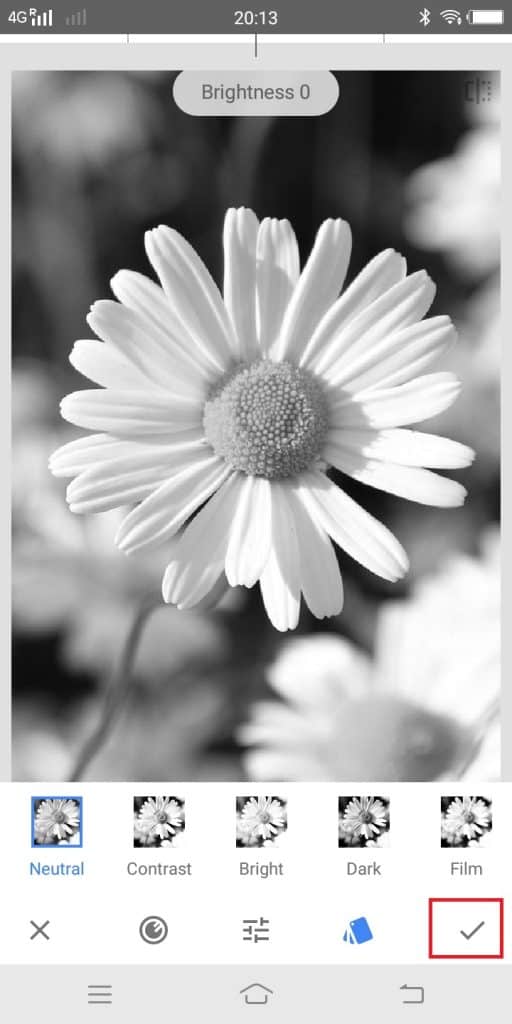
Image: Viney Dhiman/KnowTechie
Here you will get six different filters which you can use to fine-tune the image. To apply the filter, tap on Tick icon available at bottom-right side.
5. In the next screen, you need to tap Layer setting icon available at the top.
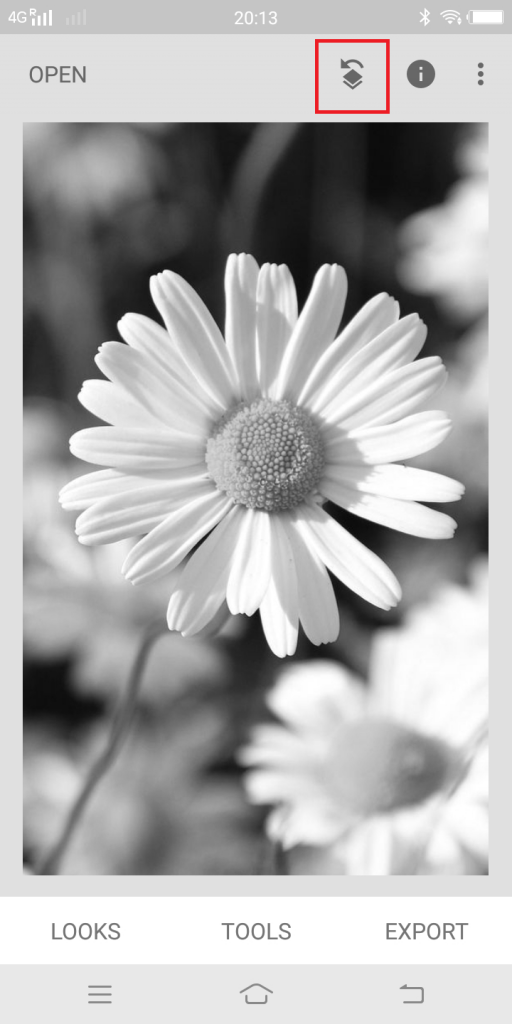
Image: Viney Dhiman/KnowTechie
After that, tap on the View edits option at the bottom.
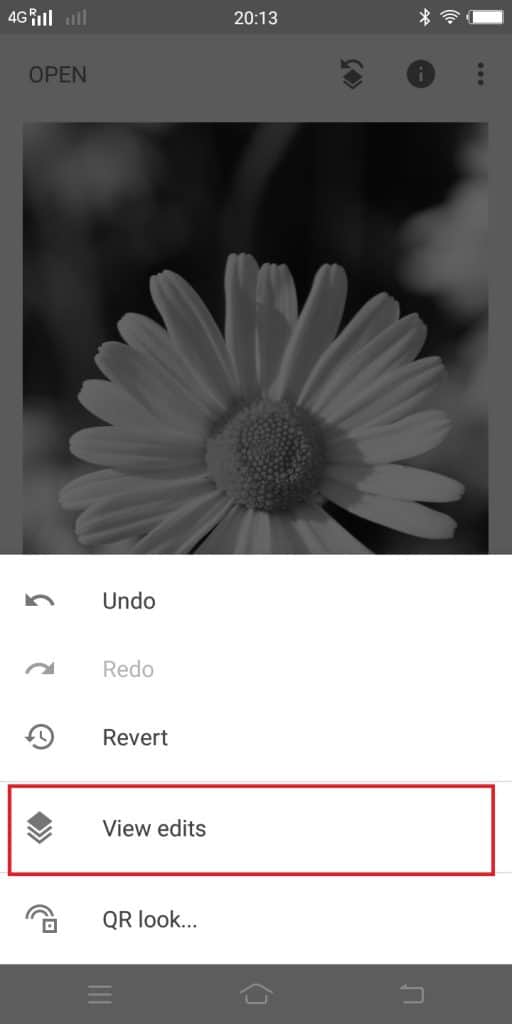
Image: Viney Dhiman/KnowTechie
Here, you will see the View edits window available at the bottom of the Snapseed app.
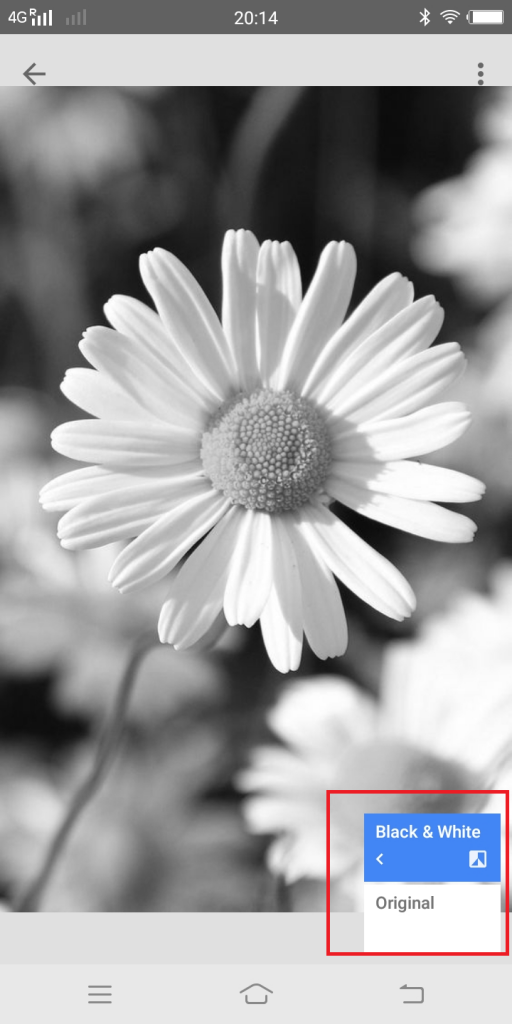
Image: Viney Dhiman/KnowTechie
You need to tap on the Black & White filter and then choose the Stack brush icon.
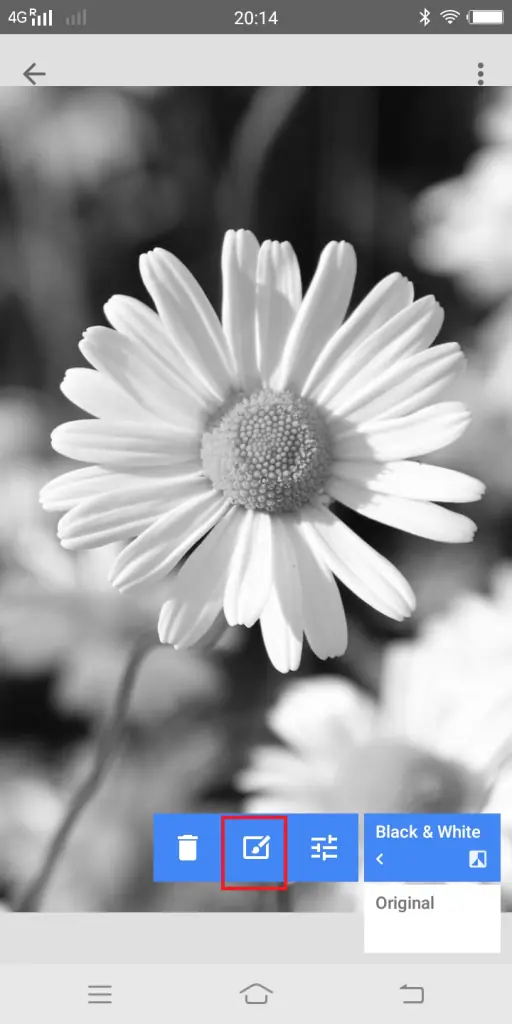
Image: Viney Dhiman/KnowTechie
In the next window, you need to tap on the Invert icon. After that, reduce black & white parameters to zero.
Image: Viney Dhiman/KnowTechie
Next tap on the Mask icon. This will turn the entire photo to a red tint. Use your finger and selectively color the particular part of the picture as you desire.
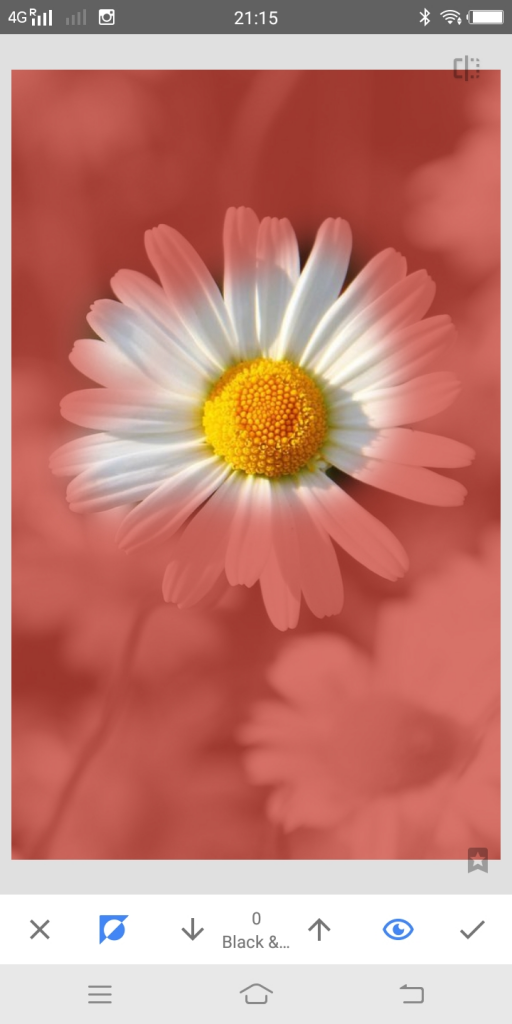
Image: Viney Dhiman/KnowTechie
Double tap on the picture to zoom in and out. This way you can increase and decrease the brush size. So if you want to paint a small area, zoom in to reduce the brush size.
Did you make a mistake? No problem, increase the Black and White parameter and again paint the red tint of the mask.
Once done with selective coloring, tap on the Check or Tick icon to finish the editing. After that tap on the Export -> Save. This will save the picture to phone gallery.
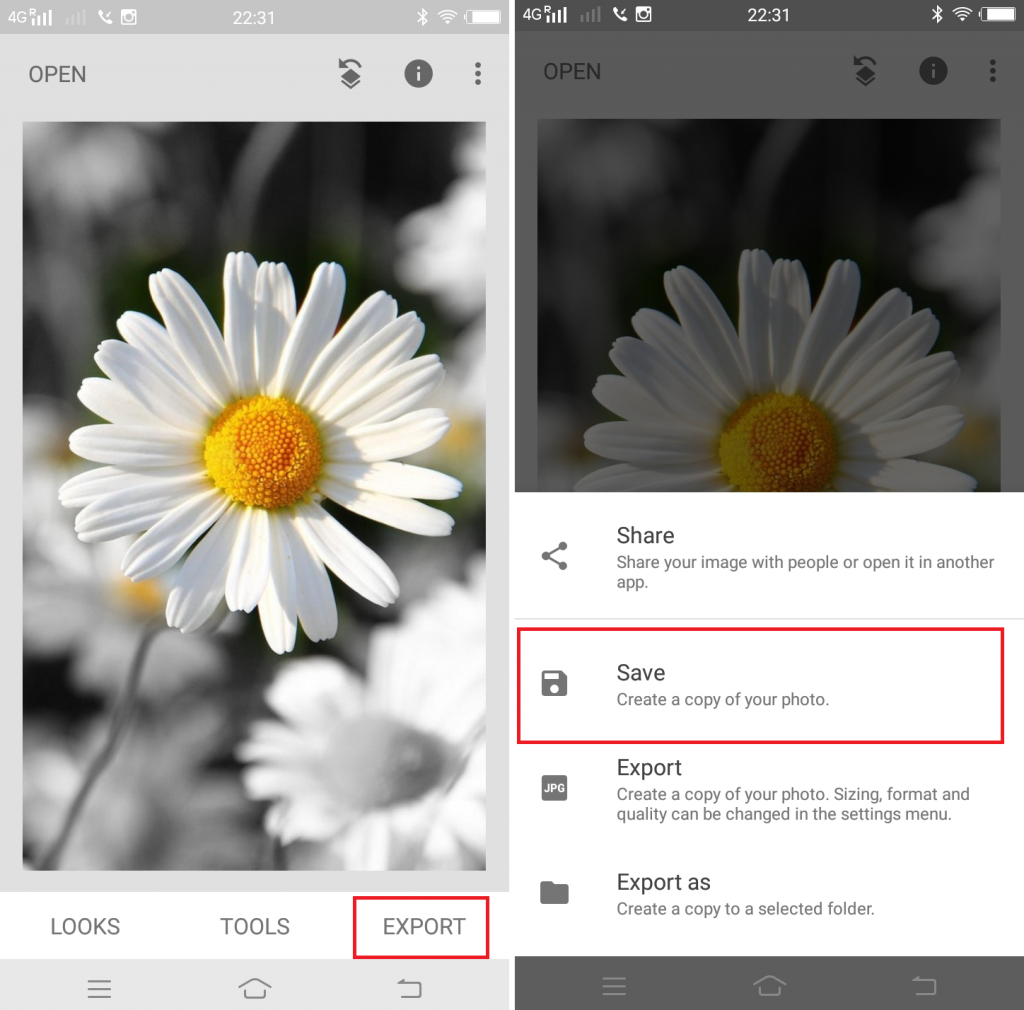
Image: Viney Dhiman/KnowTechie
That’s it!
This is what I managed to achieve using this steps in Snapseed:

Image: Viney Dhiman/KnowTechie
There are other applications available that users can use to do Selective coloring, but Snapseed offers the same thing in quick, easy steps.
Did you find this tutorial useful? Let us know in the comments.
For other how-to guides, see:
- Want to know to how to sign out of Gmail? We’ve got you covered
- Here’s how to hide your online status in WhatsApp
- Here’s how to change the voice on your Google Assistant


Dodi B
February 11, 2023 at 5:56 pm
Thanks so much for this.. very informative and straightforward
Ray Nevill
June 17, 2023 at 3:40 am
not sure what I missed here, but didn’t work for me. so much for snapseed making it so quick and easy…other apps make it SO much easier.
Frank Milnes
November 28, 2023 at 12:53 pm
Followed the instuctions and it worked perfectly. The screenshots were a great help. Thank you very much
Kevin Raposo
December 8, 2023 at 10:47 am
Love to hear it, thanks!