How to get back into Gmail if you lose access to your account
Losing access to your Gmail account is never fun, but you do have options for getting back in.

Just a heads up, if you buy something through our links, we may get a small share of the sale. It’s one of the ways we keep the lights on here. Click here for more.
Losing access to your Gmail account sucks. Our lives are inside that inbox, our dreams, our fears, our spam. Forgetting your password (or having it taken over by a hacker) is a horrible experience, one I wouldn’t wish on my worst enemy.
The good news is that these days Google has multiple ways for you to recover your account if you find yourself locked out.
If they don’t work, it’s important to prepare ahead of time, with backups of your data so you don’t find yourself in a bad situation. Here’s what to do.
Backup, backup, backup
Yeah, we know. Remembering to back up your stuff is hard, but it’s infinitely easier than trying to recreate things from scratch. Think how hard it will be to get your email contacts back together if you lose access to your account, to say nothing about the contents of your emails.
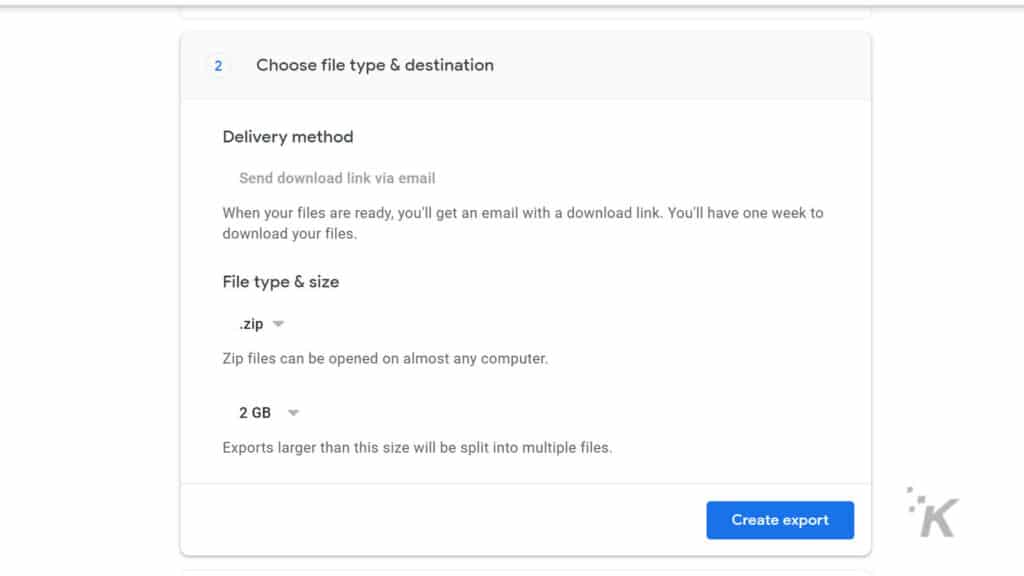
Google has a handy tool called Takeout, that lets you download any or all of your Google data. We’ve written about how to download your Google Photos archive before, and the process is the same for Gmail. Instead of Photos, select Contacts, Google Account, and Mail. That’ll give you a list of links to download the archive files. Email will be in the MBOX format, which is easily imported into any other mail client.
Keep records of any prior passwords
If you’re trying to get back into your Gmail account, one of the ways Google verifies your identity is by asking for the previous password on the account. That makes it a wise idea to save the password whenever you change it. Most password managers will keep a record of previous passwords, or you can save the updated password as its own entry then change the previous entry to say something like Gmail – previous.
You don’t have to use a password manager, but it’s still the easiest and safest way to store your credentials. You could also save prior passwords in a text file, but make sure you encrypt it so only you can access it.
Keep current with your recovery info
Before it becomes an issue, it’s a great idea to make sure Google has all the information it needs to contact you if you do get locked out of your account.
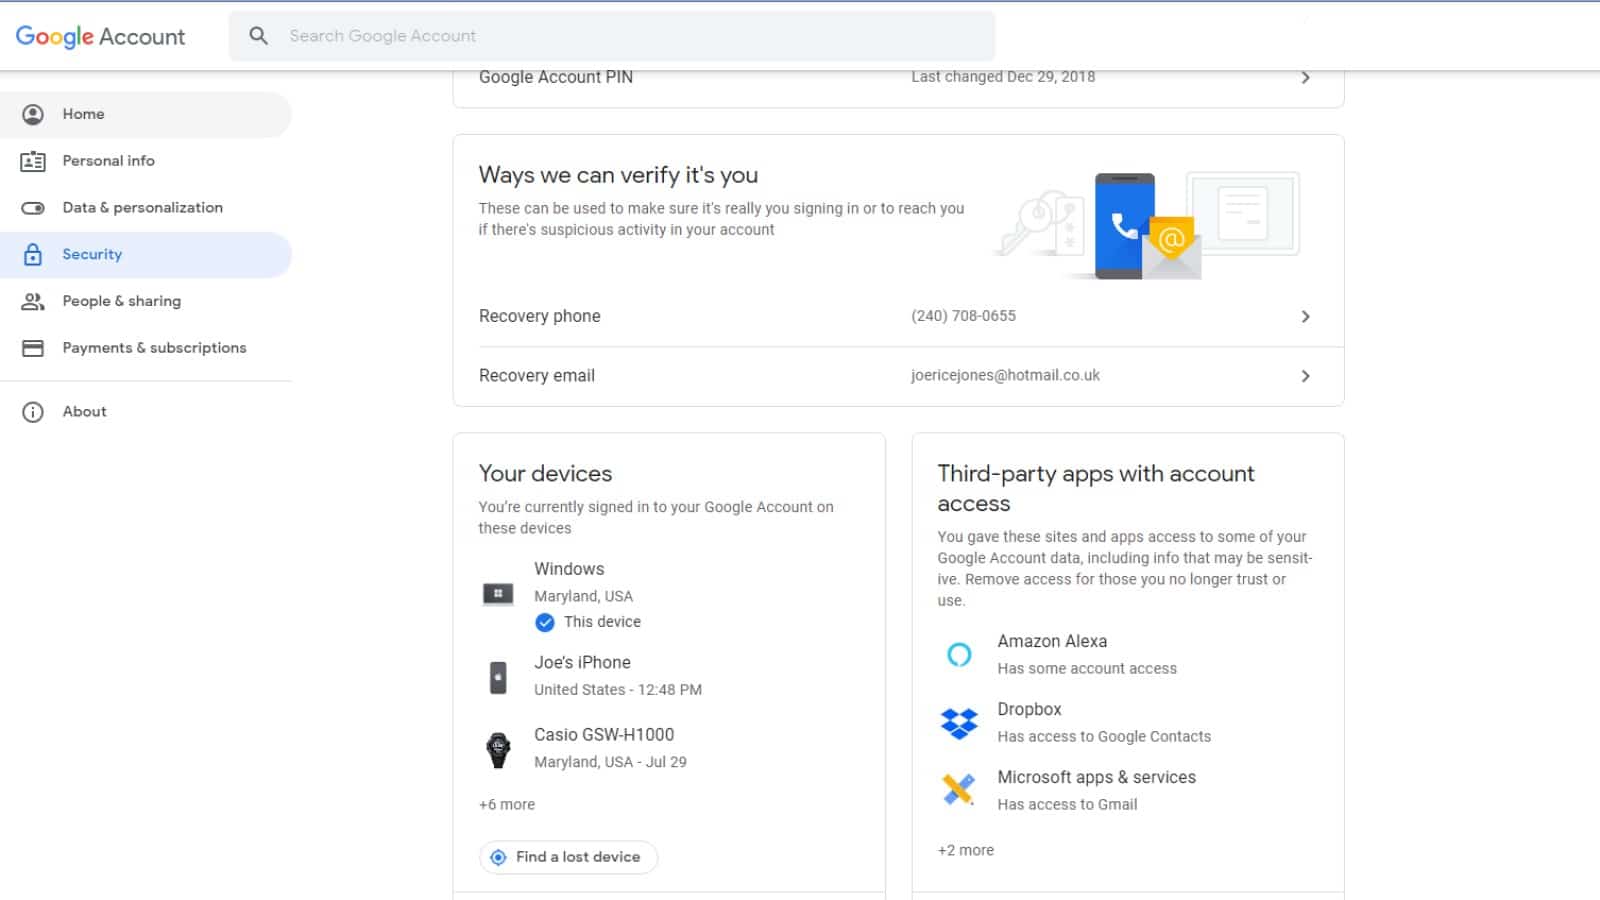
- Sign into your Google Account and click on Security on the left
- Scroll until you see Ways we can verify it’s you
- If you’ve already added recovery emails or phone numbers, they’ll show here
- If either of these options isn’t filled in, it’s a good idea to make sure you add secondary contact details here
Set up a recovery email account
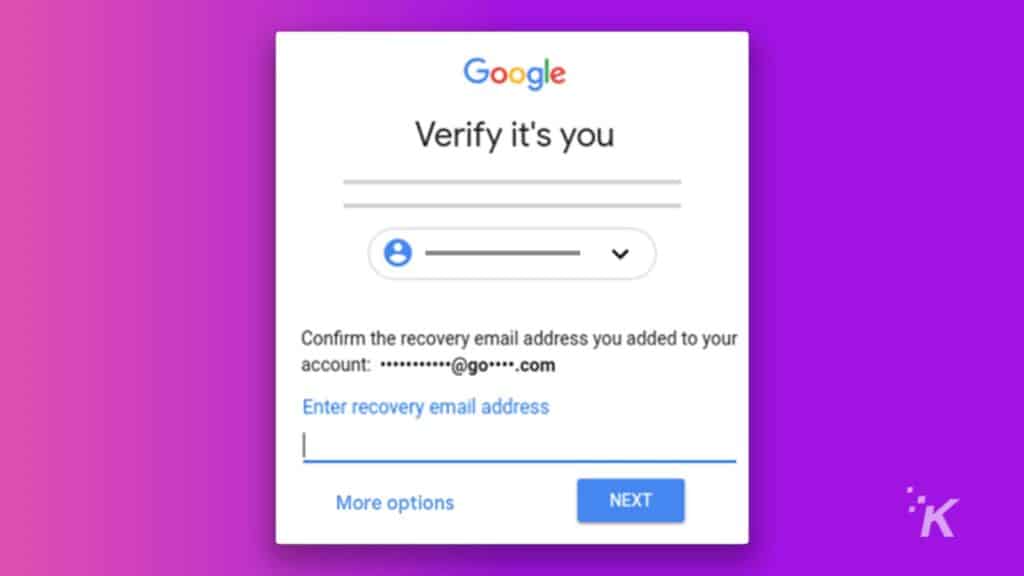
From the Ways we can verify it’s you page, click on Recovery Email. Type in your secondary email address, and hit enter. You’ll get an email with a six-digit verification code, so go to your other email account to grab it. Come back to this page and you’ll have a prompt to enter the verification code. Oh, and you have 24 hours before you need to ask for another verification code.
Set up a recovery phone number
While you’re in the Ways we can verify it’s you page, click on Recovery phone. Click on Add Recovery Phone then enter your number into the pop-up. You’ll get a verification code sent to your SMS, enter this into the verification pop-up and you’re done.
Try to remember when you opened your account
One of the ways Google tries to verify your identity is by asking approximately when you opened your account. I had absolutely no idea when that was when I started writing this piece, other than knowing Gmail was invite-only at the time.
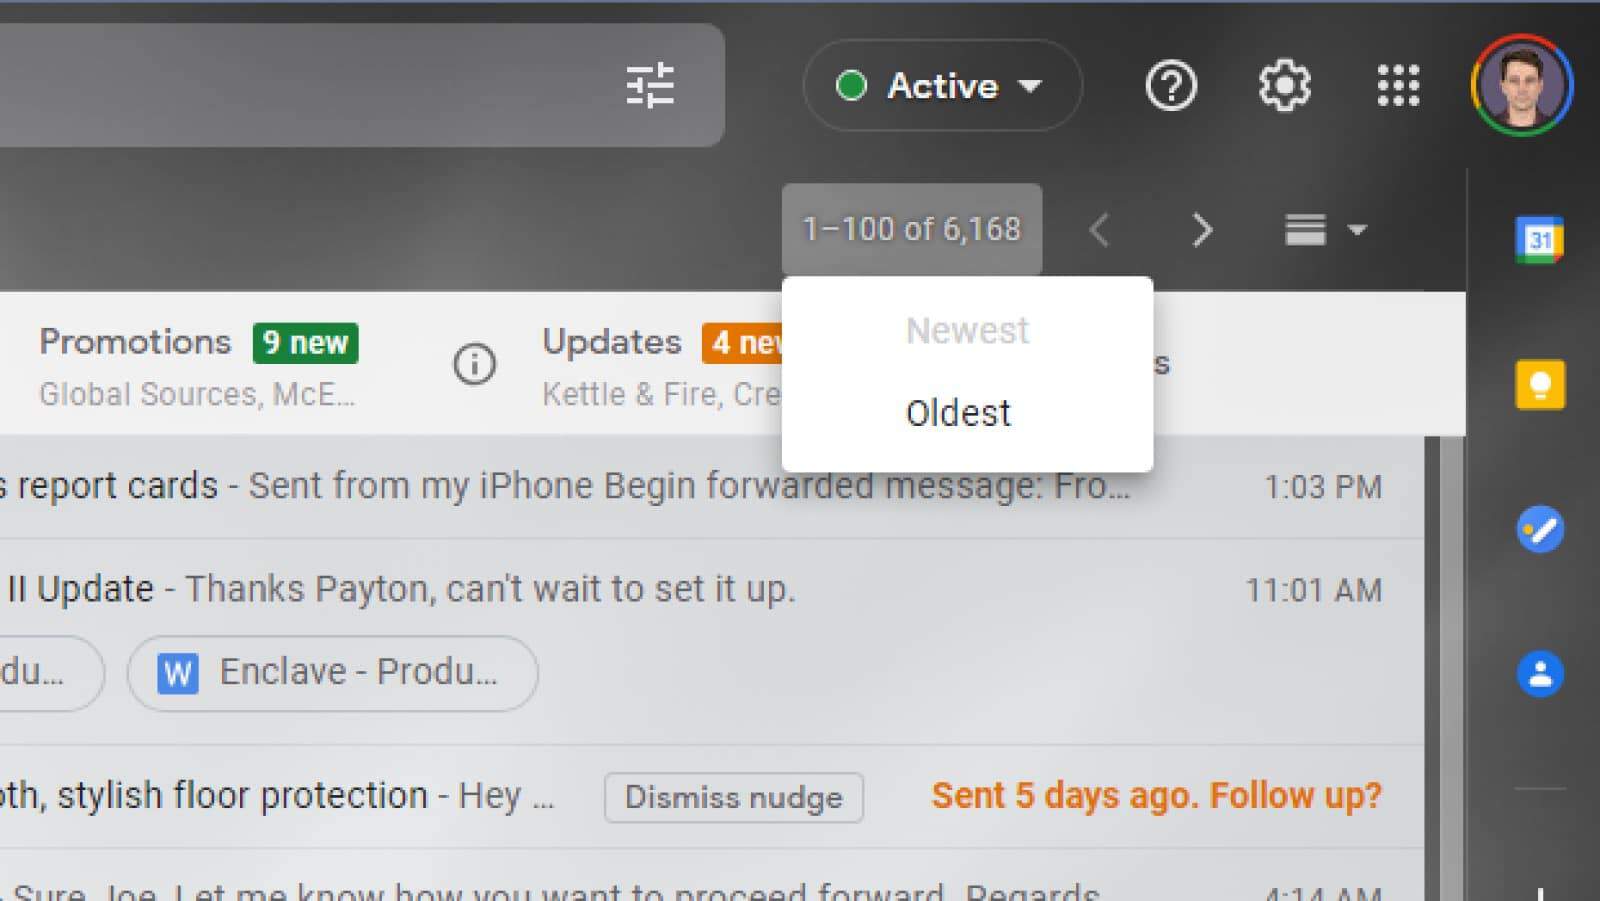
If you still have emails from when you first started using your account, you can try sorting by Oldest to find out your rough account creation date. It didn’t work for me, as I’ve deleted almost everything prior to 2016 instead of paying for more cloud storage, but it might work for you.
How to recover your password
Can’t remember your password? Accidentally deleted it from your password manager? Can’t get in for any other reason? Well, Google has a Recovery page that will ask you a bunch of questions to verify your identity, then let you change your password.
The only thing? You might not have all the information that Google is going to ask. That could be anything from the prior password, to verification codes sent to your recovery email or phone number, to the answer to your security question (you know, the one Google phased out last year). If you don’t have any of these, the recovery loop will just ask you to try again, without really resolving anything.
READ MORE: The easiest way to delete your Gmail account
There are a few other options if you go to the Can’t sign into your Google Account help page, so try the options that make the most sense for the information you have on hand.
If all else fails…
Google does have a few more things to do while trying to recover your account, like using your usual browser, a familiar device or location, or adding helpful details such as “you’re traveling” as a reason you were locked out.
If all of that fails, you’ll have to do the unthinkable – start again with a brand-new Gmail account. You did backup your emails when we mentioned earlier, right?
Have any thoughts on this? Let us know down below in the comments or carry the discussion over to our Twitter or Facebook.
Editors’ Recommendations:
- How to schedule emails in Gmail and Outlook
- You can now use Google Workspace and Google Chat without an enterprise account
- Gmail for Android now lets you switch email accounts with a simple swipe – here’s how
- How to factory reset your iPhone
Follow us on Flipboard, Google News, or Apple News