How-To
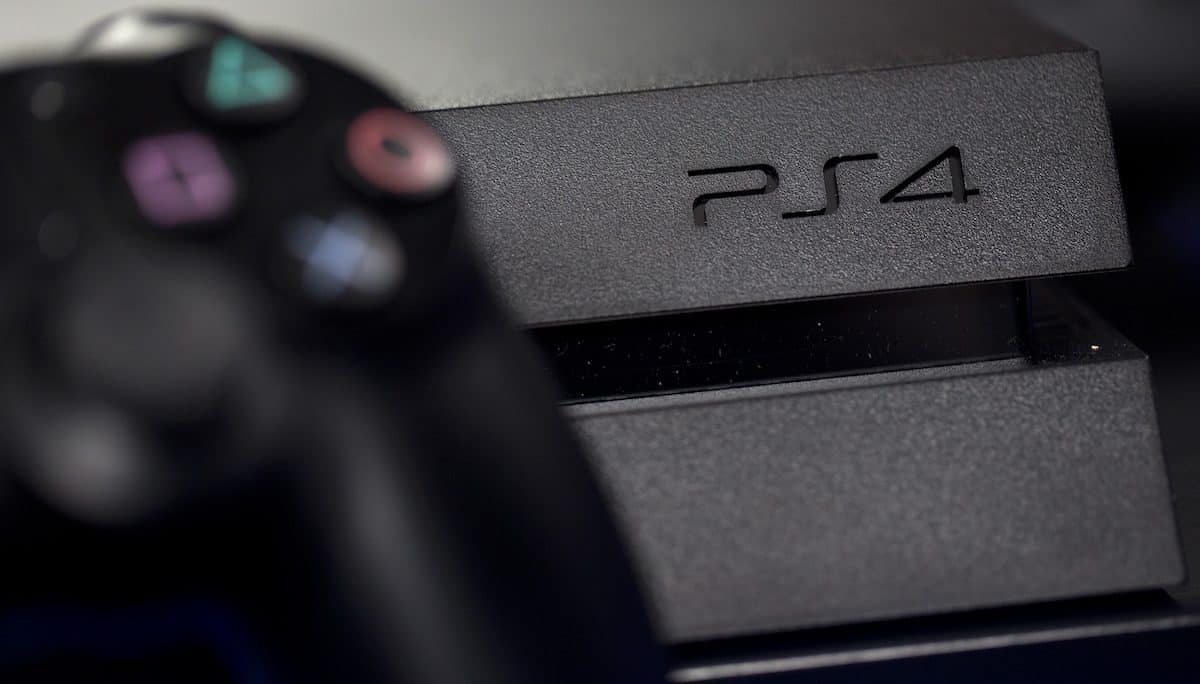
How to fix your PlayStation 4 if it isn’t accepting discs
You actually have some options that are pretty easy to try.
Just a heads up, if you buy something through our links, we may get a small share of the sale. It’s one of the ways we keep the lights on here. Click here for more.
If your PlayStation 4 won’t accept a disc, it could be any number of things on either the hardware or software fronts. Don’t despair, there are a few self-help tips you can try before resorting to sending it into Sony.
I’m not recommending you gut your Playstation 4 here, but there are a few minor adjustments that you can make with taking it apart slightly that might fix the issues you’re experiencing.
Give the disc a clean
This might be common sense, but give your disc a wipe down with a clean microfiber cloth. While at first look the disc may seem fine, it could always do with a quick polish to get rid of superficial scratches, dust or grease.
Give it a light rubbing from the inside to the edge, and also check for any small cracks on the disc that might be hard to see at first.
Restart into Safe Mode and update the console
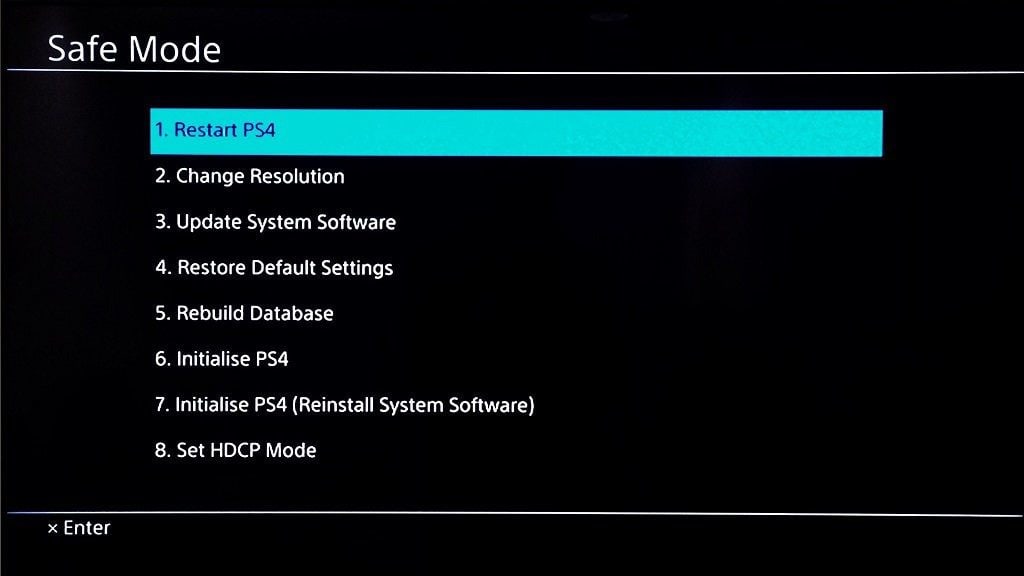
Image: Android Central
This step is a little more involved, but it’s the last troubleshooting step before grabbing a screwdriver.
To start, ensure your PlayStation 4 is completely powered down – not just in Rest Mode.
Once off, press and hold the power button for several seconds. You’ll hear an initial beep and then another one after seven seconds. Release the power button after the second beep.
Connect your DualShock 4 controller to the console using your USB charging cable as instructed (or any USB PS4-compatible controller).
Now you’ll see the screen shown in the screenshot above, with a list of options to choose from. Choose the third option: Update System Software to begin with, and then after it’s finished, the first option: Restart PS4.
Your console should boot up as normal after these steps.
Tighten the manual eject screw
Grab that screwdriver, we’re going in. Regardless of which model you’re using, the original PS4, the PS4 Slim or the PS4 Pro, each has a manual eject screw associated with the disc drive should issues arise and the disc gets stuck.
Sony has well-documented diagrams on how to tighten this screw, which also tends to solve issues around your PS4 not accepting a disc also.
These all require you to unplug every cable from your PS4 before proceeding.
Original PS4
If you purchased your PS4 between 2013 and the middle of 2015, you likely have either a CUH-1000 Series model or CUH-1110 Series model.
1. Gently slide off the left HDD bay cover panel as seen below.
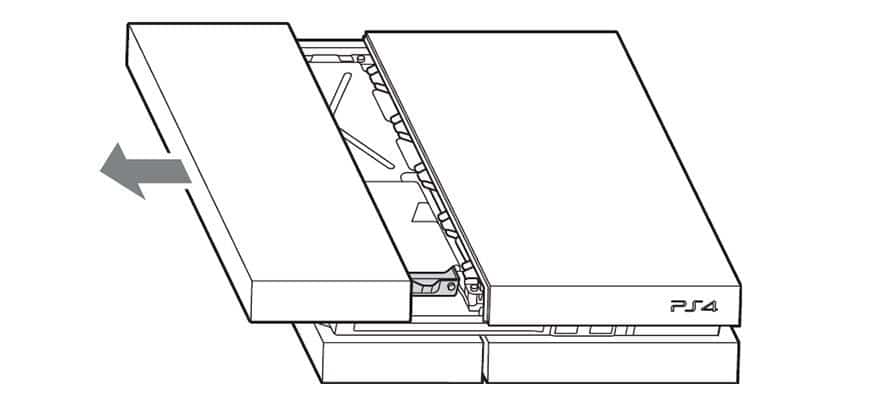
Image: PlayStation
2. You will see two sets of vents on the outside edge of the console. From the front, follow those vents until you see a slot that isn’t grouped with any other slots. This is where the screw is to be found (use a flashlight if needed).
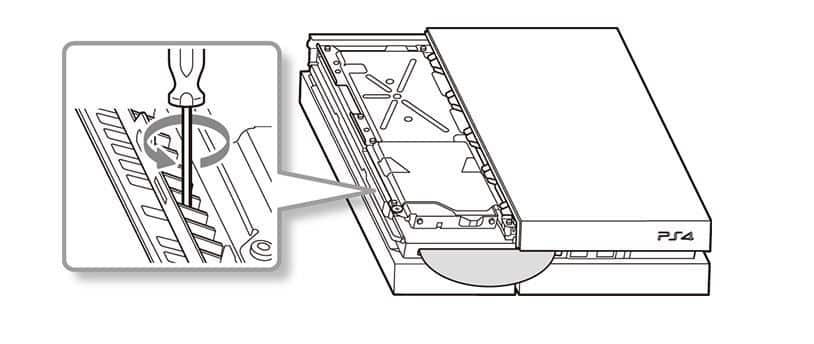
Image: PlayStation
3. Once you’ve found it, tighten the screw as needed.
4. Replace the HDD cover and you should be good to go.
PS4 CUH-1200 Model
If you bought your PS4 between mid-2015 to around September 2016, you likely have the PS4 CUH-1200 Series.
Just like for the launch PS4, start by removing the HDD cover. Using your fingers as leverage, apply even pressure near the seam to slide the top panel away. (It should move about 7mm and you’ll hear a click).
Then you need to partially remove the HDD itself. Look for a screw with the PlayStation symbols on it and unscrew it counter-clockwise to be able to move the HDD out of the way.
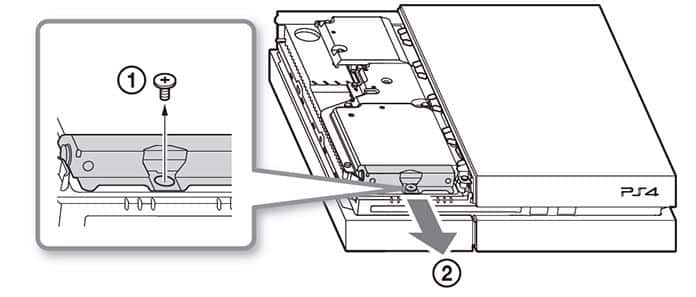
Image: PlayStation
You should be able to see the manual eject screw now, as shown in the below diagram.
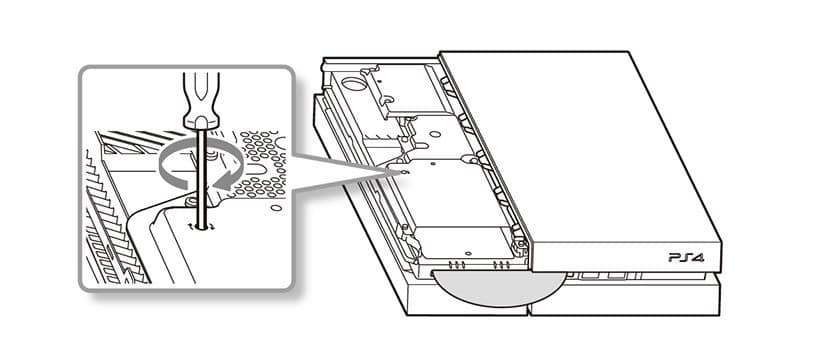
Image: PlayStation
PS4 Slim and PS4 Pro
If you bought a PS4 from late 2016 until today you probably have the PS4 Slim, or the PS4 Pro if you shelled out the extra.
This is the easiest out of the batch to tighten, Sony did a good job of the layout here.
First, flip over your console and look for the circular hole directly above the PlayStation logo.
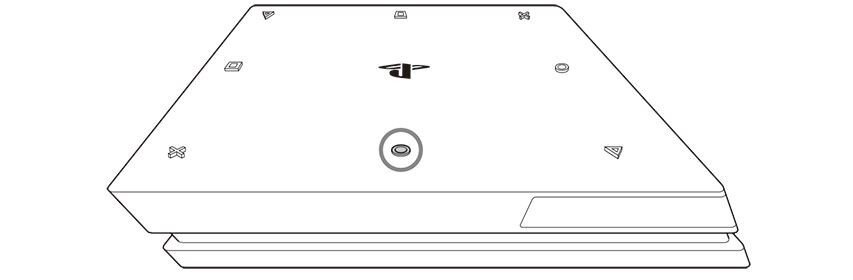
Image: PlayStation
Grab that screwdriver, insert it into the hole and turn. Finished!
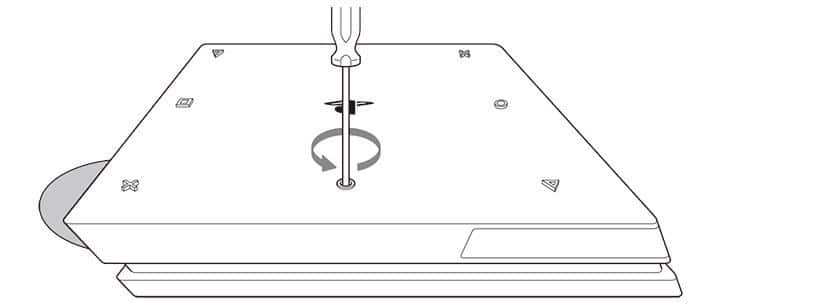
Image: PlayStation
Last resorts for your PlayStation 4
If your PS4 is still having issues, the last recourse is to send it to Sony for repairs. Luckily, that’s easy to arrange although you’ll be without your console for the interim.
Ever had disc issues with your PS4? What did you do to fix it?
For more gaming news and how-to guides, check out:
- Looks like Fallout fans will have a chance at the Fallout 76 beta in October
- Here’s how to download and install Amazon Alexa for Windows 10
- You can now play Doom in ASCII mode because life is pain