Just a heads up, if you buy something through our links, we may get a small share of the sale. It’s one of the ways we keep the lights on here. Click here for more.
[letsreviewunique pros_title=”The Good” pros=”Good value for money, Quiet fan, Nice aesthetics” cons_title=”The Bad” cons=”Slightly fiddly to install” accent=”#911d9c” final_score=”85″ format=”2″ skin=”1″ animation=”1″ design=”1″][/letsreviewunique]
On the test bench today, is a new air cooler from Raijintek, the LETO. Raijintek is aiming at the budget end of the market with this cooler, with a price tag of $36.99 currently on Newegg. This is an interesting choice to me as most companies appear to be targeting the high-end of the market. Let’s see how well it fares.
Specifications
- Dimensions: 122(W) x 76(D) x 157(H) mm
Heatsink
- Base Material: CPU Direct Contact [C.D.C.]
- Fin Material: Aluminium Alloy; Solder-free fins assembly
Heat-pipe
- Spec: 8mm
- Quantity: 3pcs
Fan
- Dimension: 120(W) x 120(H) x 25(D) mm
- Voltage Rating: 12V (Range: 10.8 – 13.2V)
- Starting Voltage: 7V (Max.)
- Rate Current: 0.28Amp (Max. 0.32 Amp)
- Speed: 800 ~ 1800 R.P.M. (PWM)
- Bearing Type: Sleeve bearing
- Air Flow: 65.5 CFM (Max.)
- Air Pressure: 1.14 mmH2O (Max.)
- LEDs: 8
- Life Expectancy: 40,000 hrs
- Noise Level: 28.5 dBA (Max.)
- Weight: 570g (Heat Sink & fan Only)
- Thermal Resistance: 0.13?/W
Socket Compatibility:
- All Intel® Socket: LGA 775 , 115x , 1366 , 201x , 2066
- All AMD Socket: AM4, AM3+, AM3, AM2+, AM2, FM2+, FM2, FM1
This is all fairly standard for air coolers, and it’s nice to see AM4 compatibility out of the box.

Image: Joe Rice-Jones/KnowTechie

Image: Joe Rice-Jones/KnowTechie

Image: Joe Rice-Jones/KnowTechie
The LETO comes in a compact box, with mounting hardware that supports both Intel and AMD chipsets. Note the CPU Direct Contact heat pipes on the contact area, with the rest of the contact area being aluminum. This gives enough contact to cool the CPU effectively while keeping manufacturing costs down. The mounting hardware comes in bags that aren’t separated for use on Intel/AMD, something that isn’t ideal but it’s easy to separate them out according to the instructions.
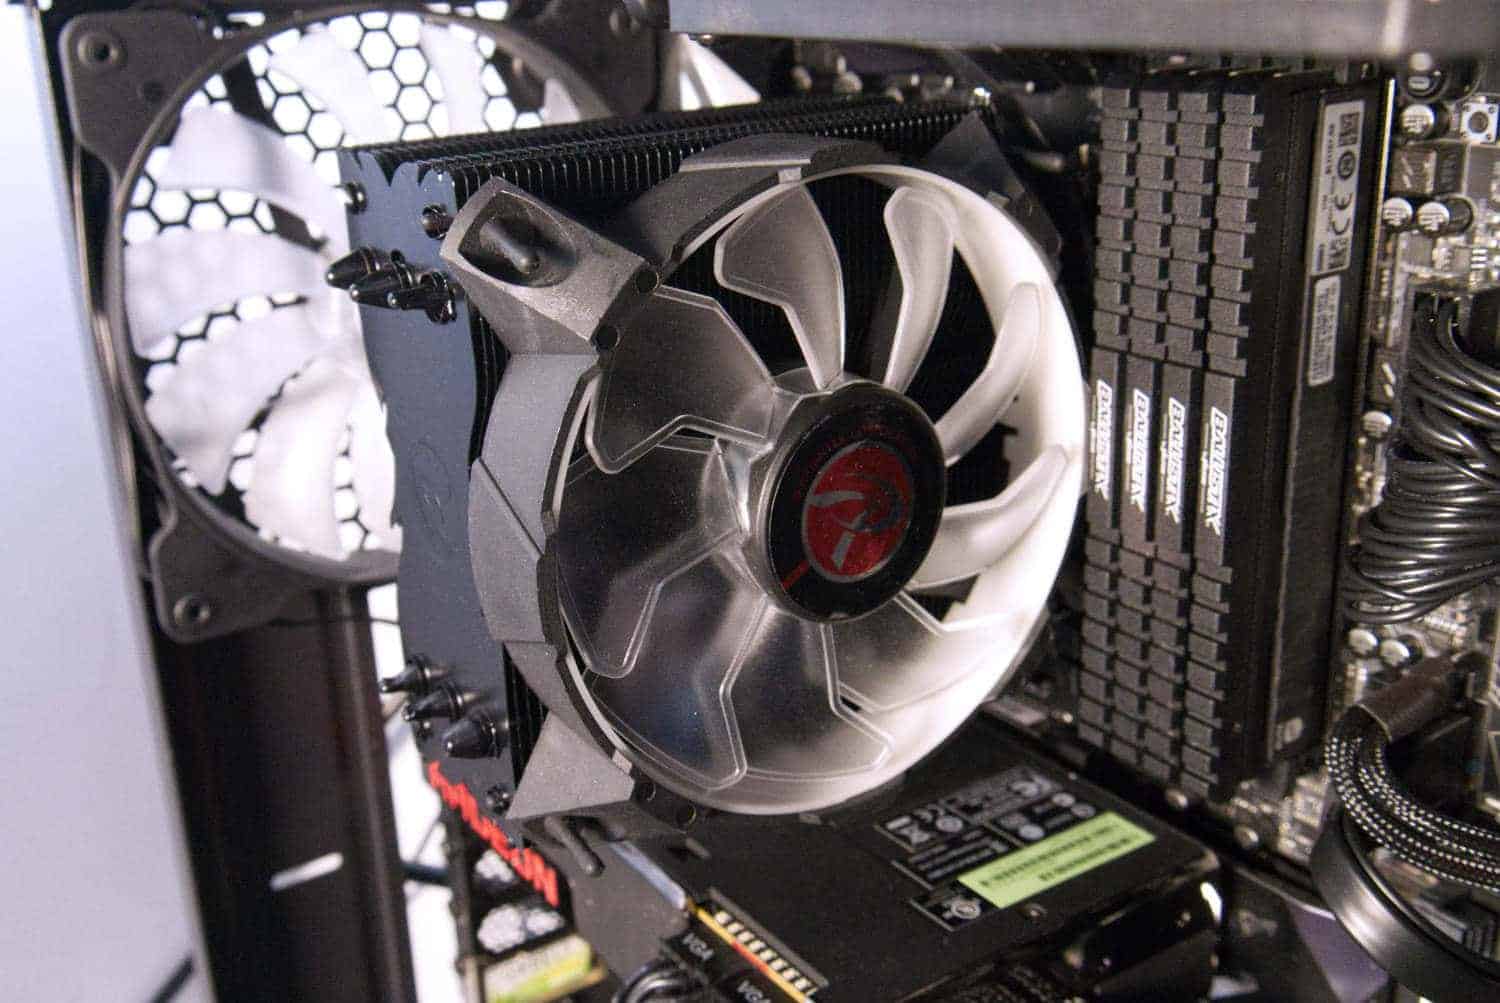
I like that Raijintek has powder-coated the fins black, this is something often earmarked for high-end coolers so to see it on a budget-orientated cooler is welcome. They also aim to distinguish themselves with a LED-equipped PWM fan, with a sleek design I’ve not seen from the competition. This fan has 8 LEDs in the central hub, which is a nice difference from the usual four LEDs in the outside frame from budget fans. With the cooler being 157mm tall, it should fit most cases but it’s always worth double-checking for your individual case.
Installation Process
I’ll walk you through the installation process now. Note that we tested using an AM4 platform, so the process will reflect that.
The first thing to do is get the backplate ready – four long screws go through the mounting arms, and then through the socket holes on the motherboard. This is version 2 of the backplate, with a foam padding between the backplate and the motherboard. This helps to protect your motherboard and has the added bonus of keeping the screws in place while you complete the next stage.

Image: Joe Rice-Jones/KnowTechie
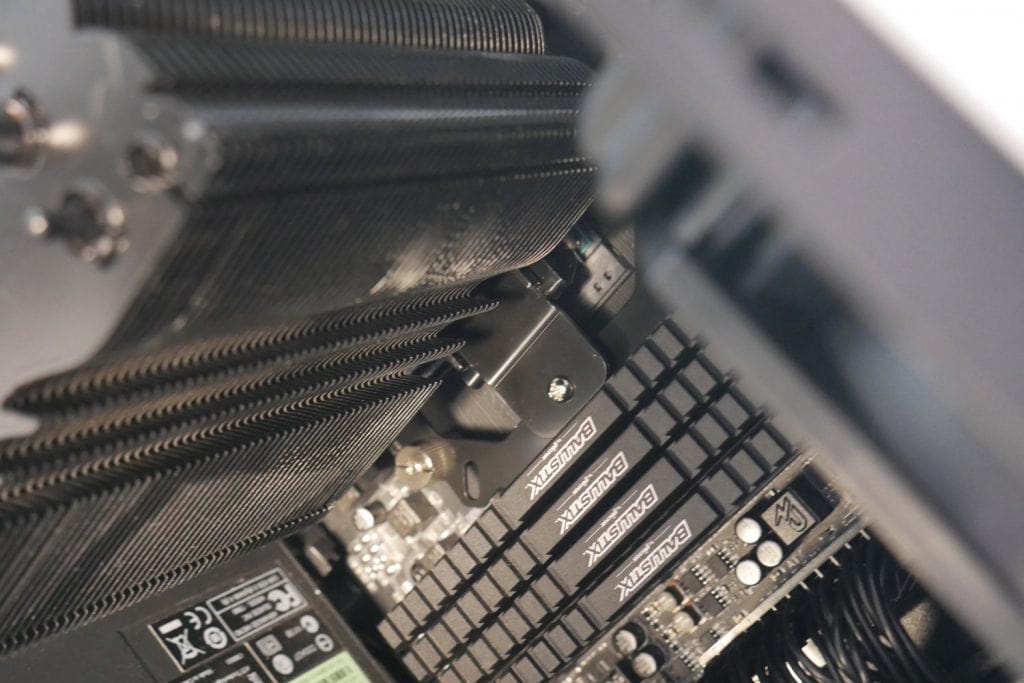
Then there are four black nylon threaded spacers that go onto the screws on the other side. These hold the backplate in place and also space the cooler mounting hardware to its desired height. Then you put the black square from over the screws, and secure them with the thumbscrews. There are also two brass pegs, which need to be screwed onto the frame according to your desired orientation of cooler. In our case, it’s closest to the RAM slots and the hole opposite.

Image: Joe Rice-Jones/KnowTechie

Image: Joe Rice-Jones/KnowTechie
After you put thermal paste on the CPU, line the cooler over it ready for the securing bar. This goes through the hole in the cooler, and lines up with two small bumps on the top of the heatsink area. The last stage for the heatsink is to screw the two small mounting screws through the securing bar and into the brass standoffs. One thing I will say, it was all easy until this last step, where I had to put more pressure than I’d like to get the second screw to mate with the standoff. Not a big issue, but worth keeping in mind as you install.
Raijintek used an interesting fan mounting system with rubber pegs that go through the fan and into grooves in the fins of the heatsink. This helps to reduce vibrational noise. There’s also a couple of wire clips for extra security, similar to other coolers on the marketplace.

Image: Joe Rice-Jones/KnowTechie
Test Rig:
We used a Ryzen 7 1800X plugged into a Gigabyte AX-370 motherboard, paired with 32GB of 3200mhz Ballistix Elite DDR4, as well as a Samsung EVO 960 NVME drive and an 850W G2 EVGA PSU to power it all. This is all done on an open-air bench.
Test Procedure:
Testing coolers involve taking a total of four temperature readings per cooler. First, we measure the idle temperature of the Ryzen 1800X at stock speeds, before measuring its temperature under load at stock speeds. Next, we overclock the CPU to 4.0GHz using a 1.3 Vcore, ensuring greater heat output. In its overclocked state we then measure the idle and load temperatures of the CPU again. The figures we present are temperature deltas – meaning we take each temperature reading and subtract the ambient temperature from it. This allows us to test in an environment that is not temperature-controlled.
Where possible, each cooler’s fans are plugged directly into the motherboard using the CPU_Fan or CPU_Opt headers. Some AIOs, however, ship with their own fan controllers or PWM hubs. If we are unable to plug the fans directly into the motherboard, it will be specified in the performance section of the review.
An idle reading comes from leaving Windows on the desktop for 15 minutes after a cold boot. A load reading comes from running Prime95’s (version 29.4) Small FFTs test for 15 minutes – enough time for temperatures to plateau.
Noise Reading:
Unfortunately, I am unable to properly measure the sound output of CPU coolers using a digital sound meter. This is because my apartment has high ambient noise levels and I’m also not testing at the same time every day. Using a sound meter is, as such, not possible. I will endeavor to subjectively describe the sound output in a manner you may find useful.
Performance
Thermals:
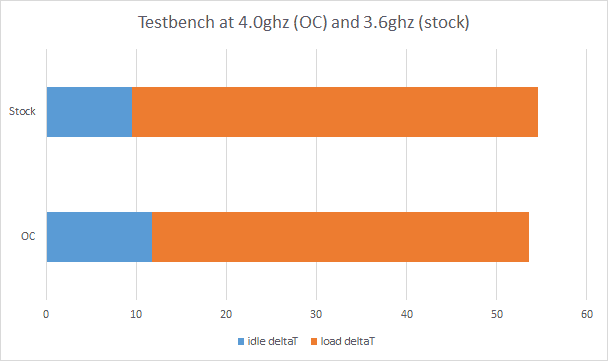
The Raijintek LETO performed admirably in our testing, with idle temps of delta T of 9.5c at idle and 11.8c at the overclocked settings. Under load, it came in with delta T of 45.1c at stock and 41.8c at the overclocked level. Note that this is perhaps different to what you’d expect, with a slightly higher temperature at load on the stock configuration. On the Ryzen 1800X, XFR can boost one core at a time to 4.1ghz, and that’s what explains the discrepancy to me. This is a good result on both and is well below the Tjmax of the Ryzen processors of 95c.
Acoustics:
The fan that Raijintek has included with the LETO is one of the quietest I’ve personally used. Even at 100% speed, I could barely tell it was running from a distance of 2ft. As most people have their PC case at this distance or further, I can safely say that most users won’t be disturbed by the noise.

Image: Joe Rice-Jones/KnowTechie

Image: Joe Rice-Jones/KnowTechie
Final Verdict
With a couple of minor caveats, Raijintek has a winner on their hands here. Gone are the days when ‘budget’ was a bad word, and the LETO aptly demonstrates this. Good performance overall, and a price point that few coolers on the market can match. If you bought a CPU without a cooler included, or if you want to trade up from the ‘just-enough’ stock coolers that some CPUs come with – the Raijintek LETO is definitely a viable option.
A sample unit was provided to KnowTechie for the purpose of this review.
Follow us on Flipboard, Google News, or Apple News