How email forwarding works in Gmail
Want to set up automatic email forwarding in Gmail? We’ve got you covered.

Just a heads up, if you buy something through our links, we may get a small share of the sale. It’s one of the ways we keep the lights on here. Click here for more.
Email forwarding is a feature that is possible with almost all email service providers, including Gmail.
Gmail offers two ways to forward emails so that you can send them to another account – manual and automatic. Depending on where you plan on forwarding the email can determine which method is best for you.
If you need a little help understanding email forwarding in Gmail, then no worries, we’ve got you covered.
Manually forwarding an email in Gmail

Forwarding an email from a Gmail account to another email address is possible with only a few clicks. It doesn’t make any difference if you are using the browser version or the apps for tablets and phones.
Here’s how you do that:
- First, log on to your Gmail account
- Open the email in question that you want to forward
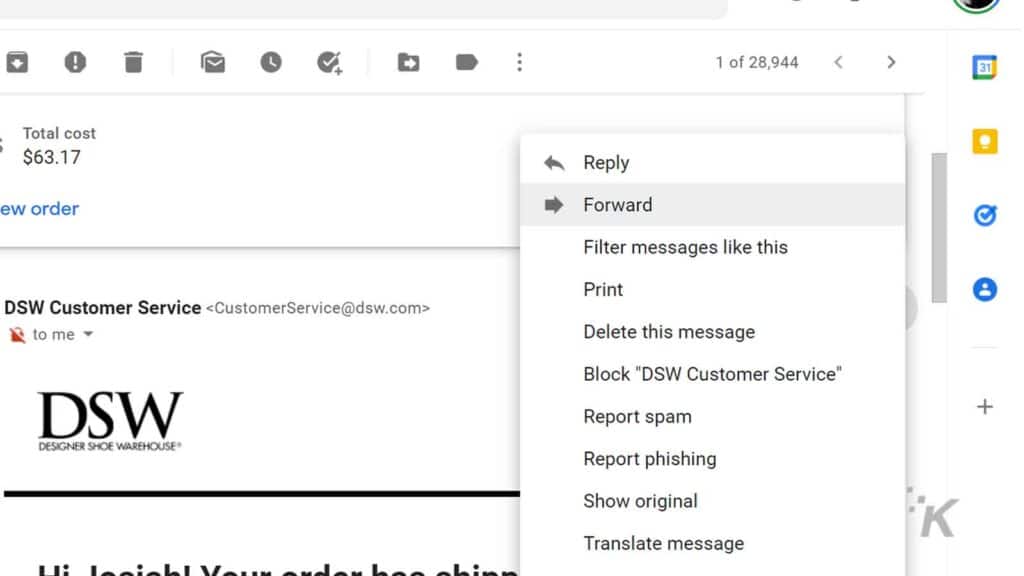
- You can find the three-dot icon (either next to the Reply button or in the top-right corner of the email)
- Press Forward
- Type or Insert the email address to which you want to forward that particular email
- Press send
Forwarding multiple emails simultaneously
Gmail only allows forwarding one email at a time. However, there is a workaround with the help of a Chrome browser extension called Multi Email Forward. With its help, users can forward up to fifty emails simultaneously.
So, before you start using this extension, you need to add it to your Chrome browser. To install the Multi Email forward extension, you need to follow these simple steps:
- Go to Chrome’s web store
- Type Multi Email forward in the search bar to find this extension (or click here)
- Add it to your Chrome browser, as you would do with any other extension
- Follow the instructions on how to connect this extension to your Gmail account
Once you are done with the setup, you can begin to forward emails in Gmail:

- Open your Gmail account in your Google Chrome browser
- Select as many as fifty emails from your inbox
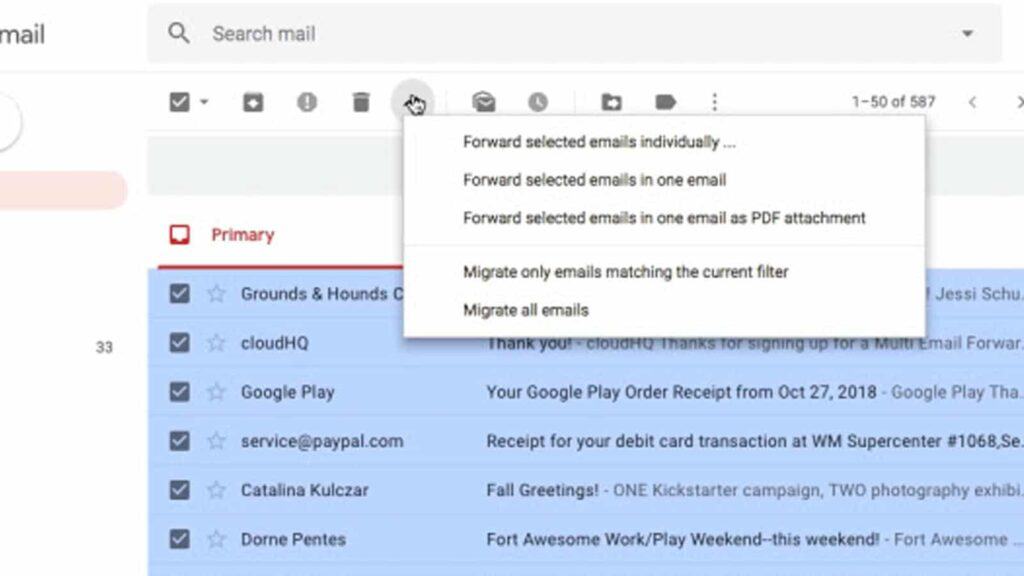
- Press the Multi Forward Button that is located at the top of the screen
- Now, choose how you want to send the emails from the drop-down menu
- Type or insert the email address of the recipient to finish the process
Note: You can choose to send each email as a separate one, combine all of the emails into one, or all emails in one email but with each email added as an attachment.
Automatically forwarding an email in Gmail

Automatic forwarding is a convenient way to have emails from different addresses forwarded to one address. Here is how to make it happen:
- Log in to your browser-based Gmail account
- Press the Gear button in the right top, then select See All Settings
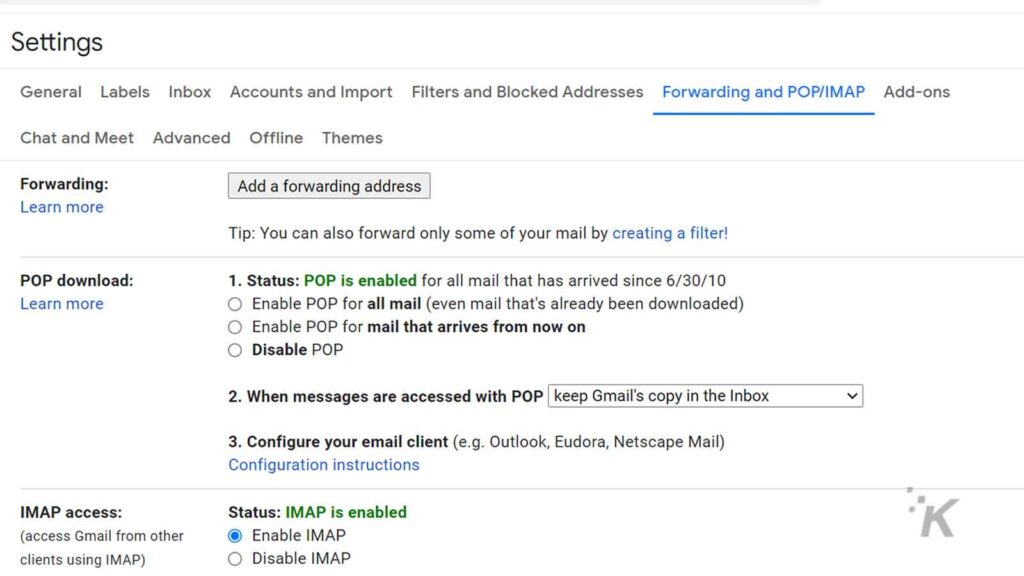
- Select the Forwarding and POP/IMAP tab at the top of the page
- Select Add a forwarding address
- Type the address you wish to forward to and select Next
- Open the email account that you are forwarding to
- Click the verification link in the message that you get from Gmail
- Back in your Gmail account, navigate to the Forwarding and POP/IMAP tab once again
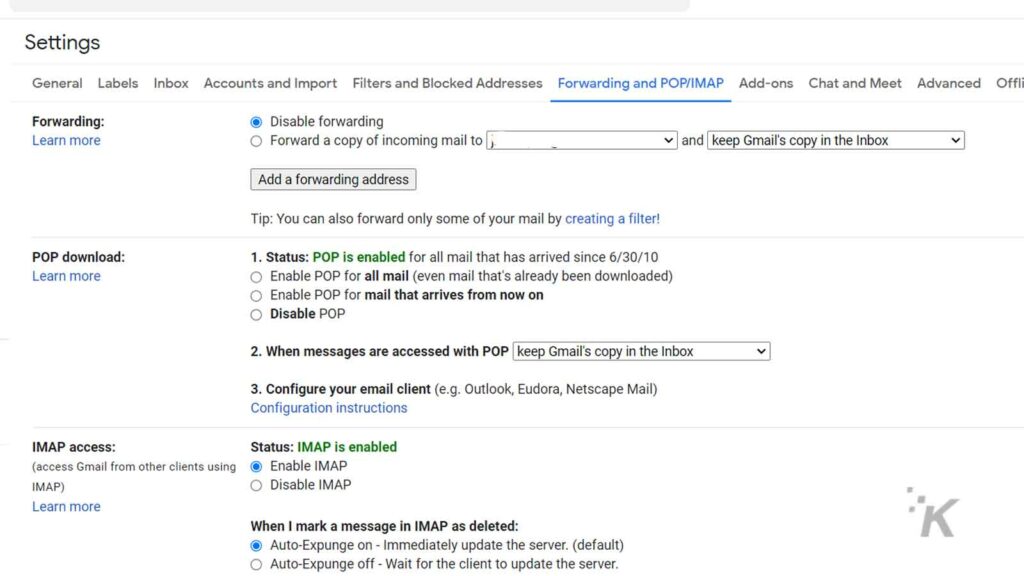
- Press Forward a copy of incoming mail to the intended address
- Decide what to do with Gmail’s copy of your emails
- Press Save Changes
How to forward only selected emails
In case you want to forward only a particular set of emails, you can do that with the help of a filter.
- Log in to your Gmail account in your Google Chrome browser
- Select the dropdown arrow in the Search bar to enter filter criteria
- Enter the criteria you want then select Create Filter
- On the next page, select the Forward option and enter the intended email address
- Select Create filter
Note: You can filter email by the recipient, subject line, or messages that contain certain words.
How to stop email forwarding in Gmail

When you want to stop forwarding emails to another email address, you just need to follow a few simple steps:
- Open your browser-based Gmail account
- Press the Gear button in the right top, then select See All Settings
- Select the Forwarding and POP/IMAP tab at the top of the page
- Access the Forwarding section and choose Disable forwarding
- Press Save Changes
There you have it! That’s everything you need to know about forwarding emails in Gmail. While some of the features take a little while to set up, they can be a great help if you have recently switched email addresses or need to keep a record from certain senders.
Have any thoughts on this? Let us know down below in the comments or carry the discussion over to our Twitter or Facebook.
Editors’ Recommendations:
- You can now make phone calls inside Gmail, because why the hell not
- How much time do you spend in meetings? Google Calendar’s new ’Time Insights’ tool now shows you
- How to get back into Gmail if you lose access to your account
- How to remove those annoying Chat and Rooms tabs from the Gmail app


