Apple
How to change or remove the ‘Sent from my iPhone’ signature
If you want to remove the email signature or just change it to something more unique, you can. Here’s how.
Just a heads up, if you buy something through our links, we may get a small share of the sale. It’s one of the ways we keep the lights on here. Click here for more.
While many Apple users want everyone to know which tech company holds their loyalty, not everyone is seeking that sort of attention. That’s why you should know how to change or remove the ‘Sent from my iPhone’ signature.
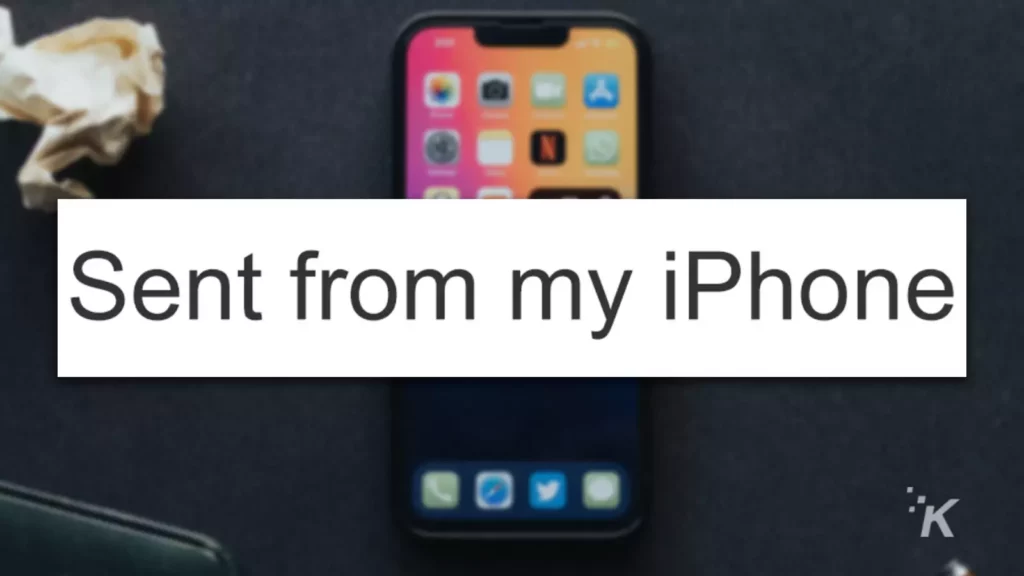
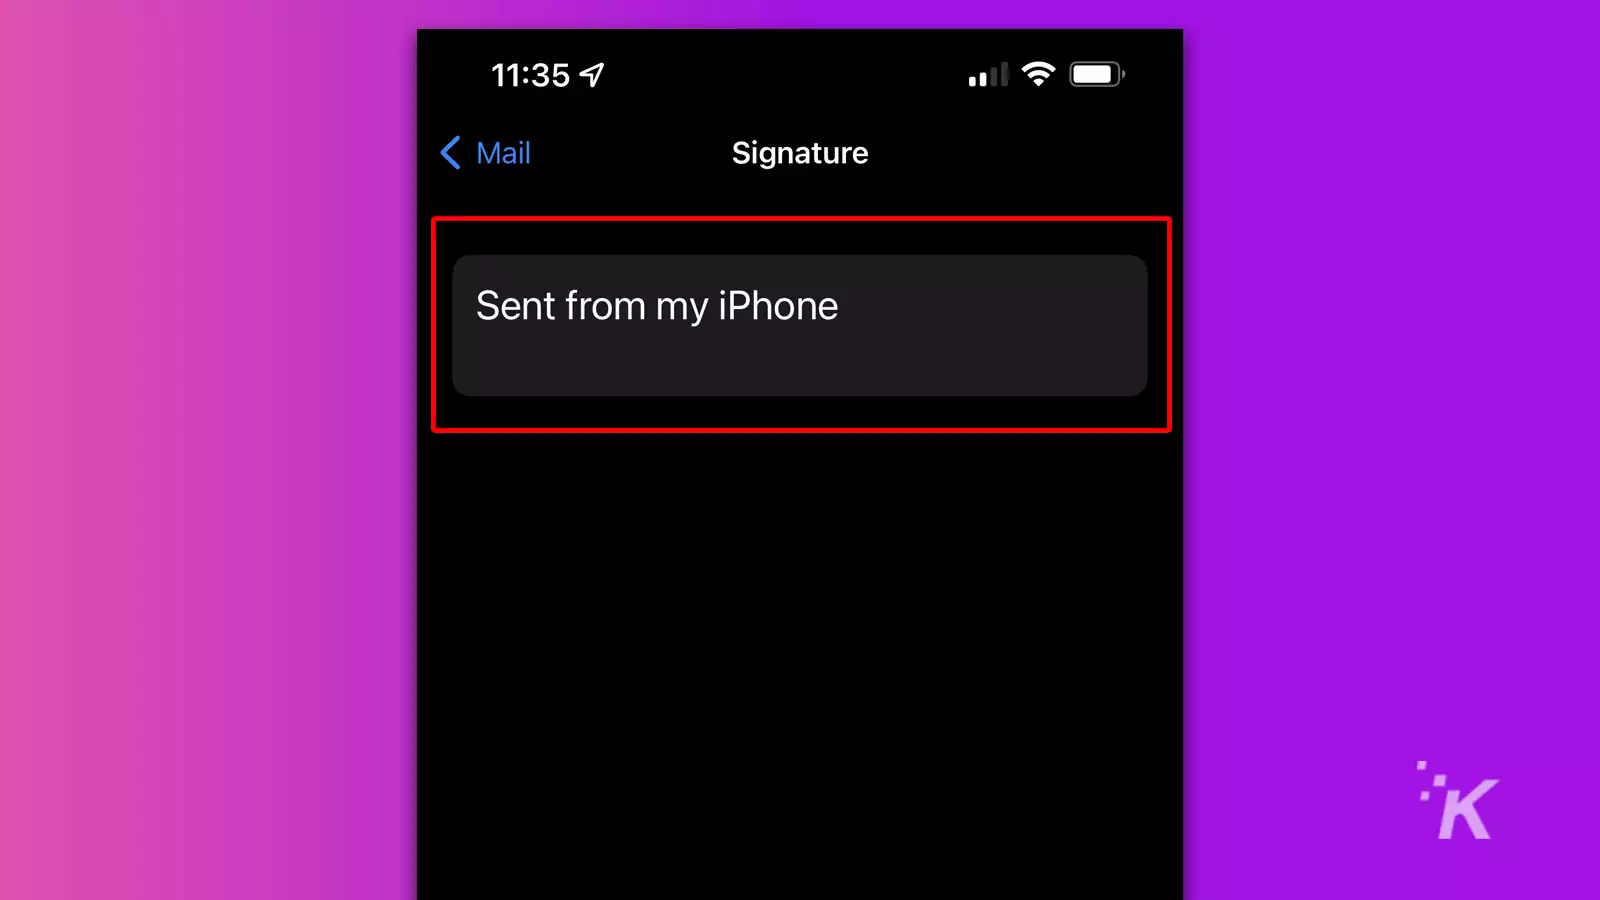
The “Sent from my iPhone” signature that accompanies messages sent through the Mail app is more of a subtle brag than a useful piece of information.
Fortunately, Apple does allow you to alter the text. Just in case you don’t want to provide unsolicited details about your chosen mobile device.
Let’s discuss how you can change or remove the “Sent from my iPhone”—or “Sent from my iPad”—email signature in iOS.
Why does my email say Sent from my iPhone?
If you ever wondered why your email signature on the Mail app says “Sent from my iPhone,” the answer is pretty simple. It’s Apple’s way of saying, “hey, look at this person. They’re using an iPhone.”
Essentially, it’s another marketing strategy from Apple to put the word “iPhone” in front of people’s faces as often as possible. Other devices and email apps add similar signatures by default.
The “Sent from my iPhone” signature is added to every email that you send from the Mail app on your iPhone, no matter which email address you’re using. That is, of course, unless you tell it not to.
Does Gmail say Sent from my iPhone?
But what happens if you send an email from a different email app on the iPhone? For example, Google has a standalone app for Gmail that you might prefer to use over Mail. Does it also add the “Sent from my iPhone” signature?
The answer is no, it does not. The default Apple signature only pops up when you send emails from the Apple Mail app.
So, if you use any other email app, such as Gmail, Outlook, or any other options, you won’t have that signature.
That’s not to say that each individual app won’t add its own signature to your emails by default. But in order to change that, you’ll have to navigate to the settings of that individual app, instead of Mail settings on iPhone.
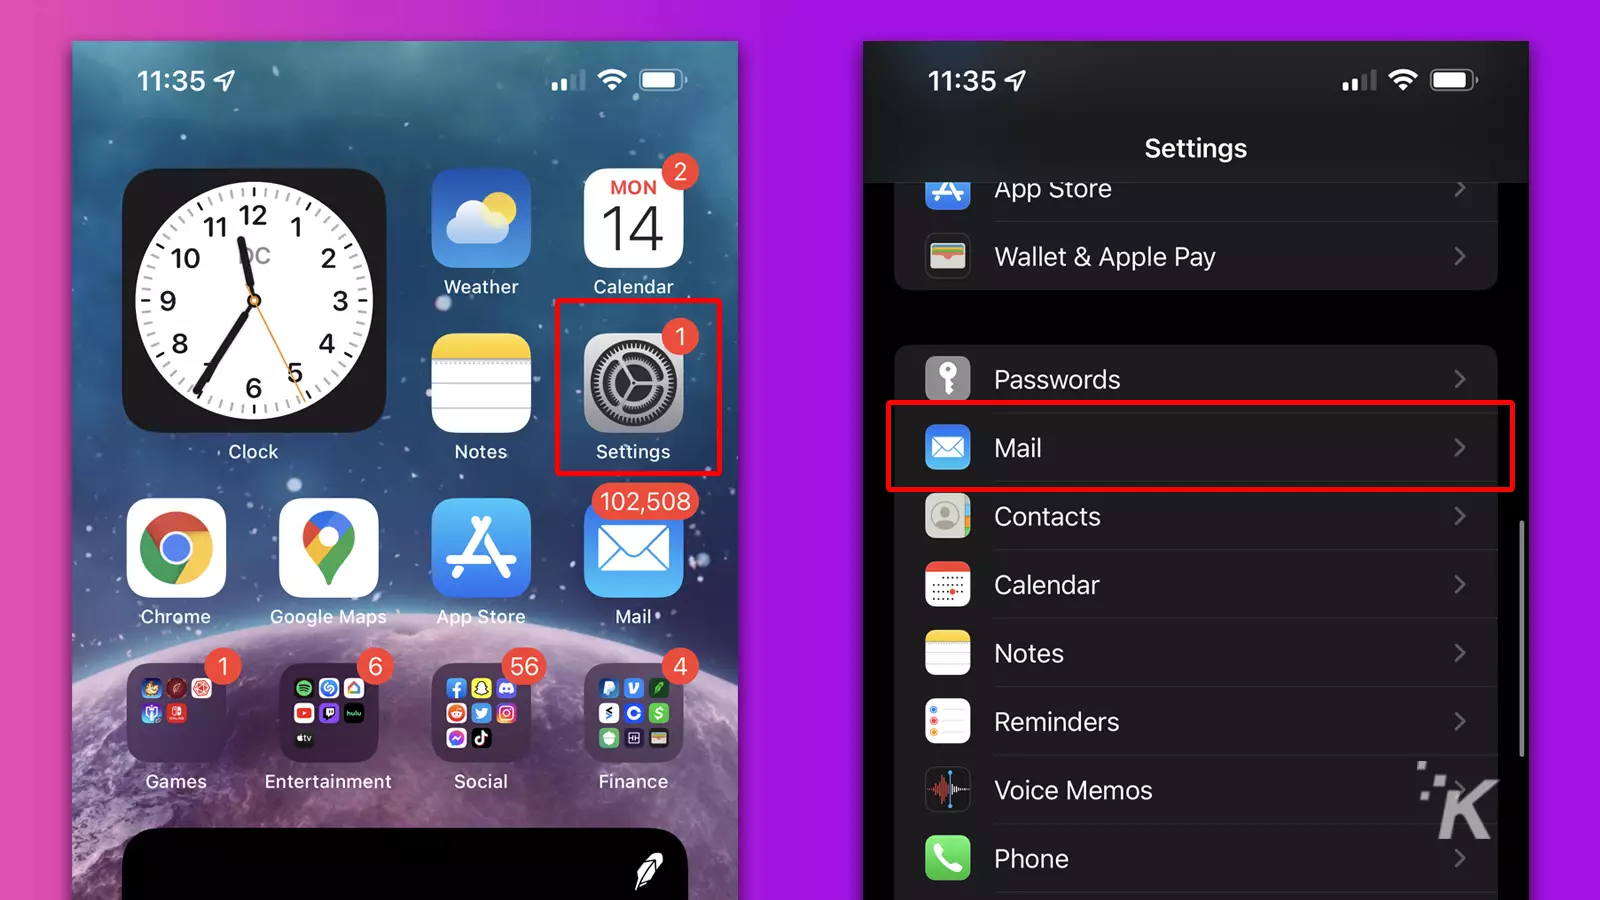
How to turn off or change the ‘Sent from my iPhone’ signature
If you don’t want people to know you are responding to their email from your iPhone or iPad, you have options. Here’s how to change or remove the iOS “Sent from my iPhone” signature:
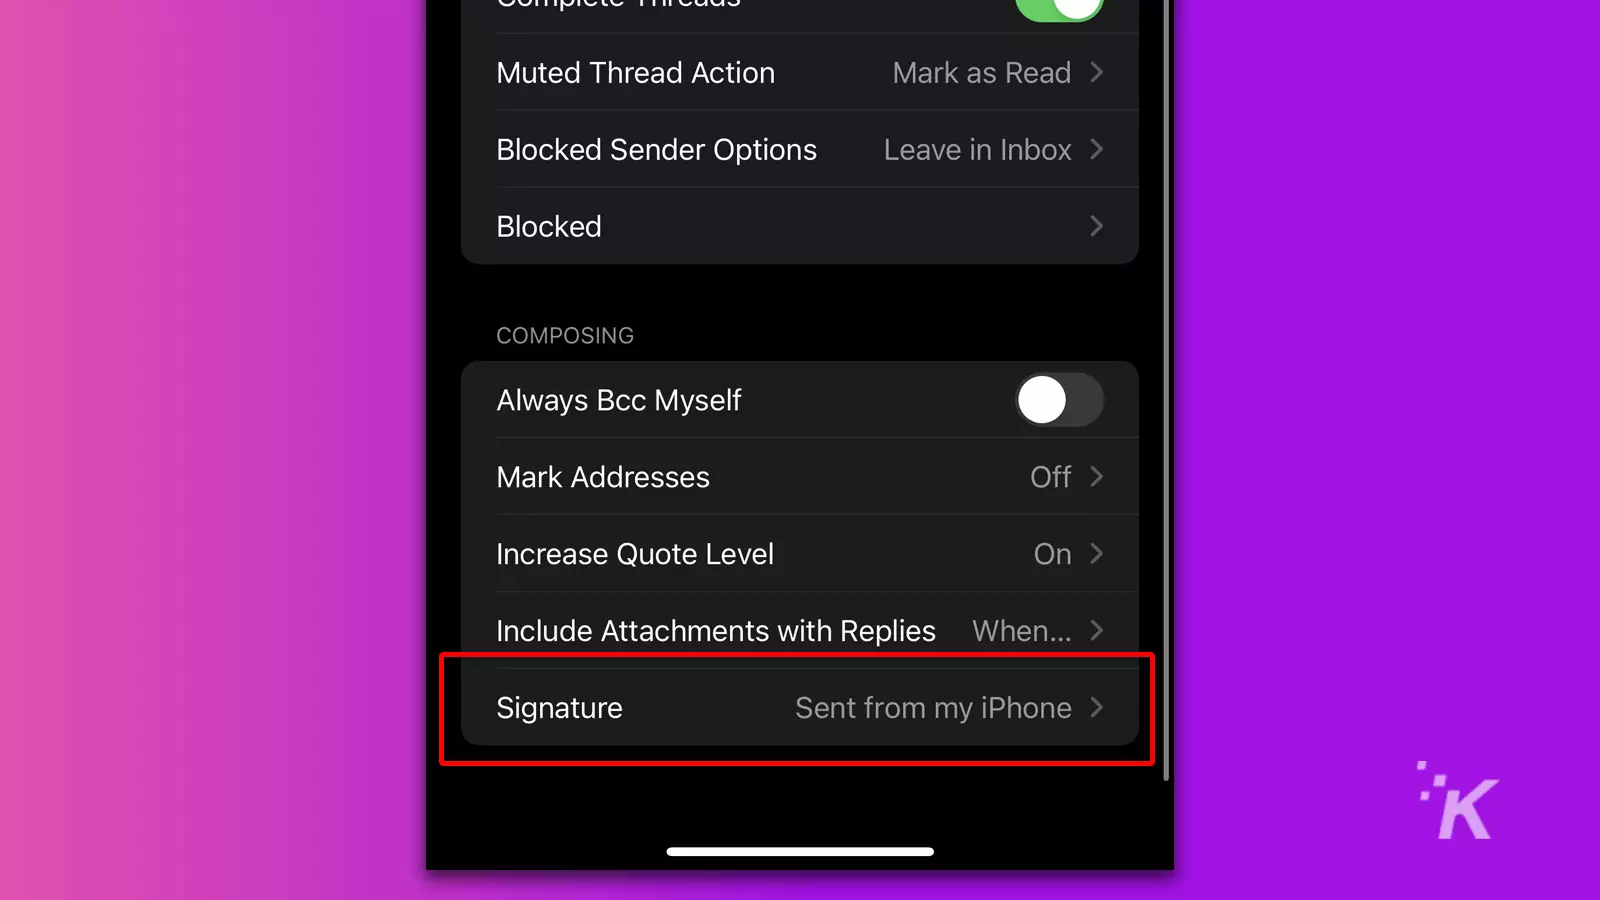
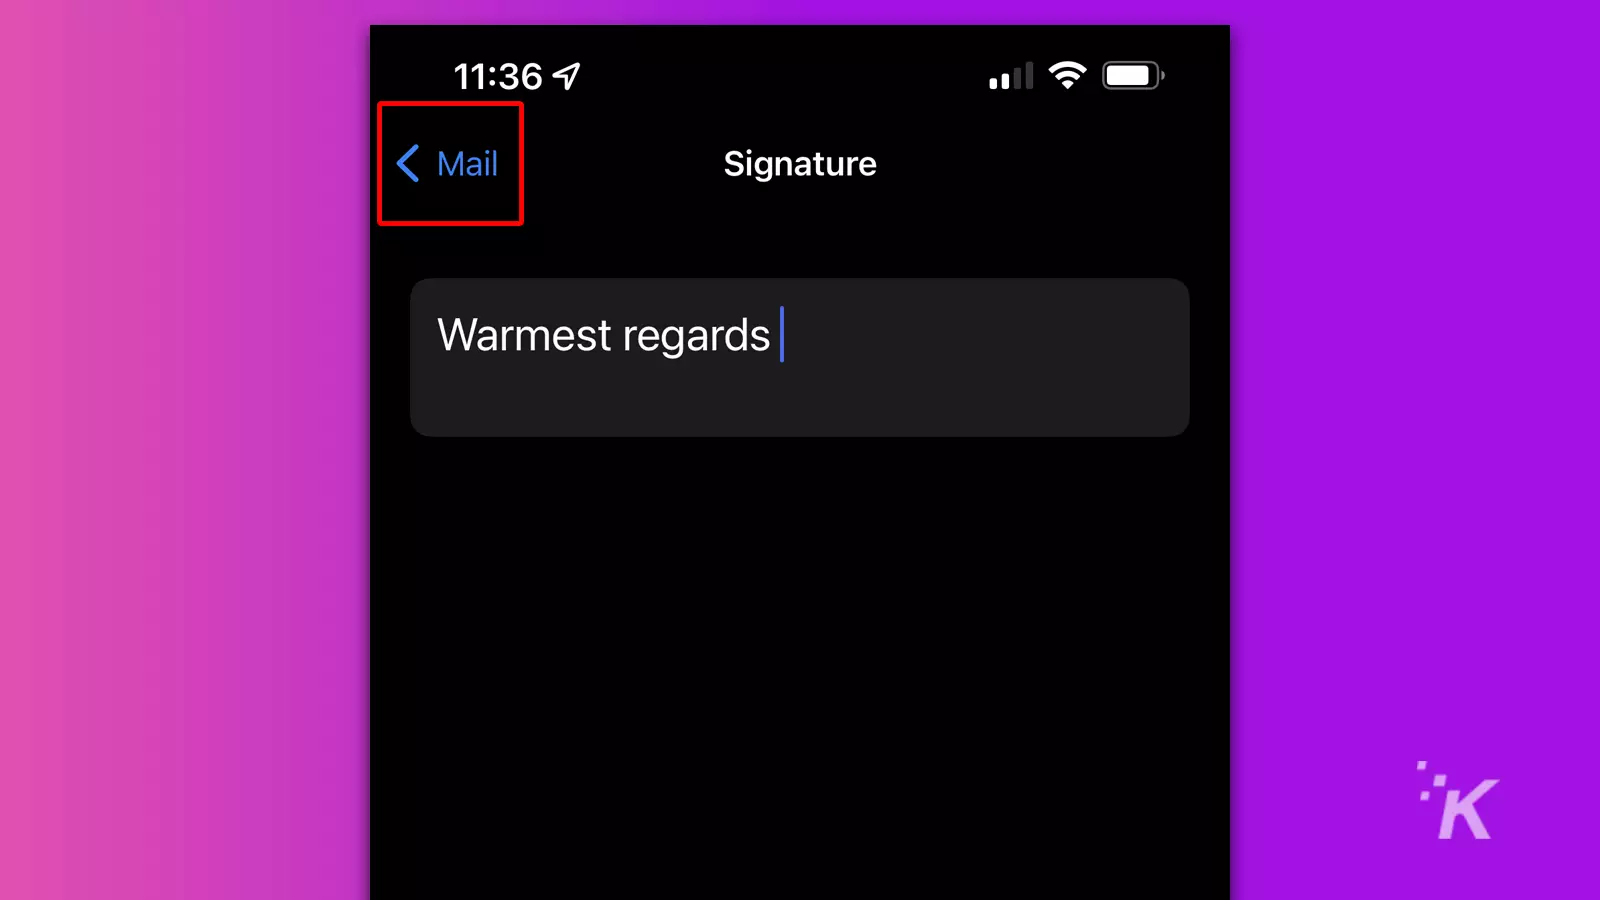
If you’re using an iPad, you can follow the same process. This will remove the “Sent from my iPad” signature from your emails.
Set yourself apart in emails
When you send emails from your iOS device, you don’t need to be just another Apple user in the crowd. That’s why you should change your ‘Sent from my iPhone’ signature.
Sure, you could leave your signature blank. But, if you really want to catch the attention of your mail recipients, you should use something with flavor, flair, and fewer hints of superiority.
Have any thoughts on this? Let us know down below in the comments or carry the discussion over to our Twitter or Facebook.
Editors’ Recommendations:
- How to update your iPhone
- Here’s how to eject water from a wet iPhone with a simple shortcut
- How to change your iPhone passcode
- Here’s how to set a sleep timer for Apple Music on iPhone
Follow us on Flipboard, Google News, or Apple News