Just a heads up, if you buy something through our links, we may get a small share of the sale. It’s one of the ways we keep the lights on here. Click here for more.
Although the ability to take screenshots is a common device feature, few manufacturers make the method for performing the action obvious. If you need to take a screenshot on an iPad, we’ve got you covered.
In many cases, you’ll need to press a certain button combination to make the magic happen. But figuring out what to press can take trial, error, and an unreasonable amount of time.
Fortunately, we’ve discovered several ways to take iPad screenshots, and some methods don’t even involve physical buttons. Let’s discuss the secrets of screenshotting on an iPad.
How to take screenshots on an iPad with a Home button
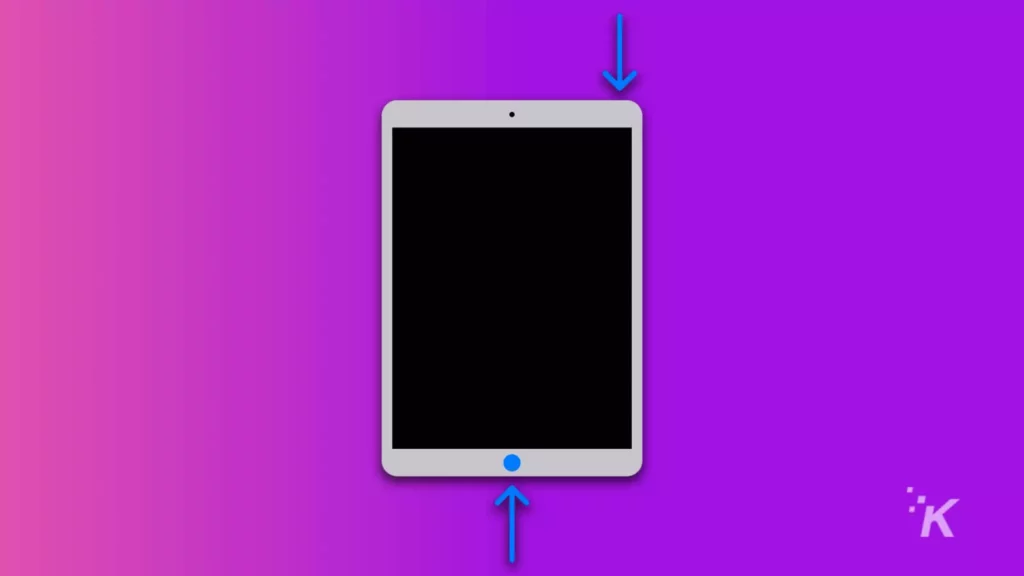
Here’s how to take a screenshot on an iPad that has a Home button:
- Press the Top and Home buttons simultaneously and release
- Either tap the subsequent thumbnail to open the image or swipe left to dismiss
Your iPad saves screenshots in Albums > Screenshots in the Photos app. From here, you can edit, share, and perform other standard image actions.
How to take screenshots on an iPad without a Home button
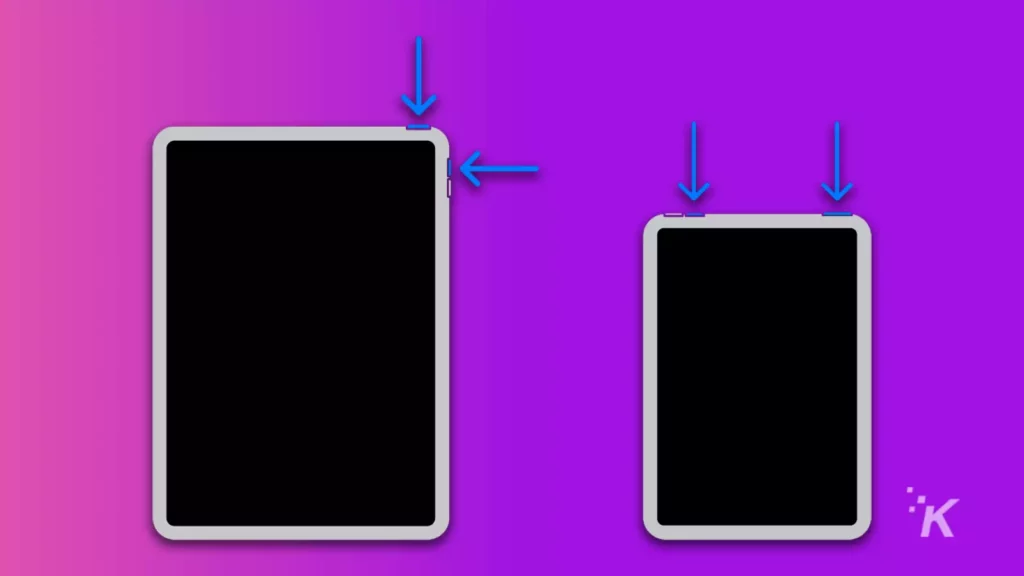
Here’s how to take a screenshot on an iPad that doesn’t have a Home button:
- Press the Top and Volume up or Volume down buttons simultaneously and release
- Either tap the subsequent thumbnail to open the image or swipe left to dismiss
Like the version with a Home button, your saved screenshots can be found in Albums > Screenshots in the Photos app.
How to take screenshots with an Apple Pencil
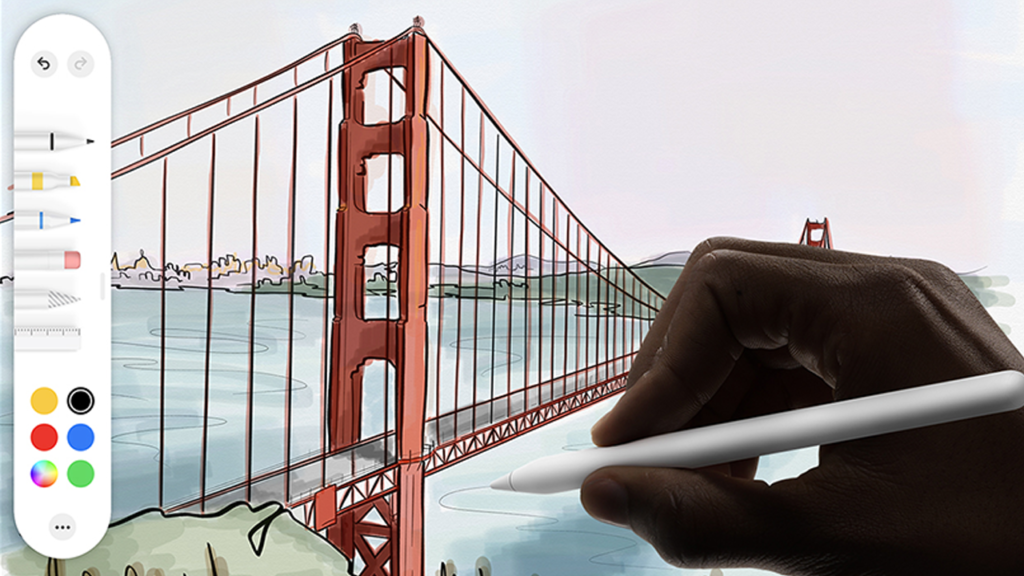
If your iPad supports Apple Pencil, you can use the accessory to quickly take a screenshot without getting buttons involved.
All you need to do is swipe your Pencil from either the bottom left or right corner, and the saved image will appear on-screen with markup tools ready to go.
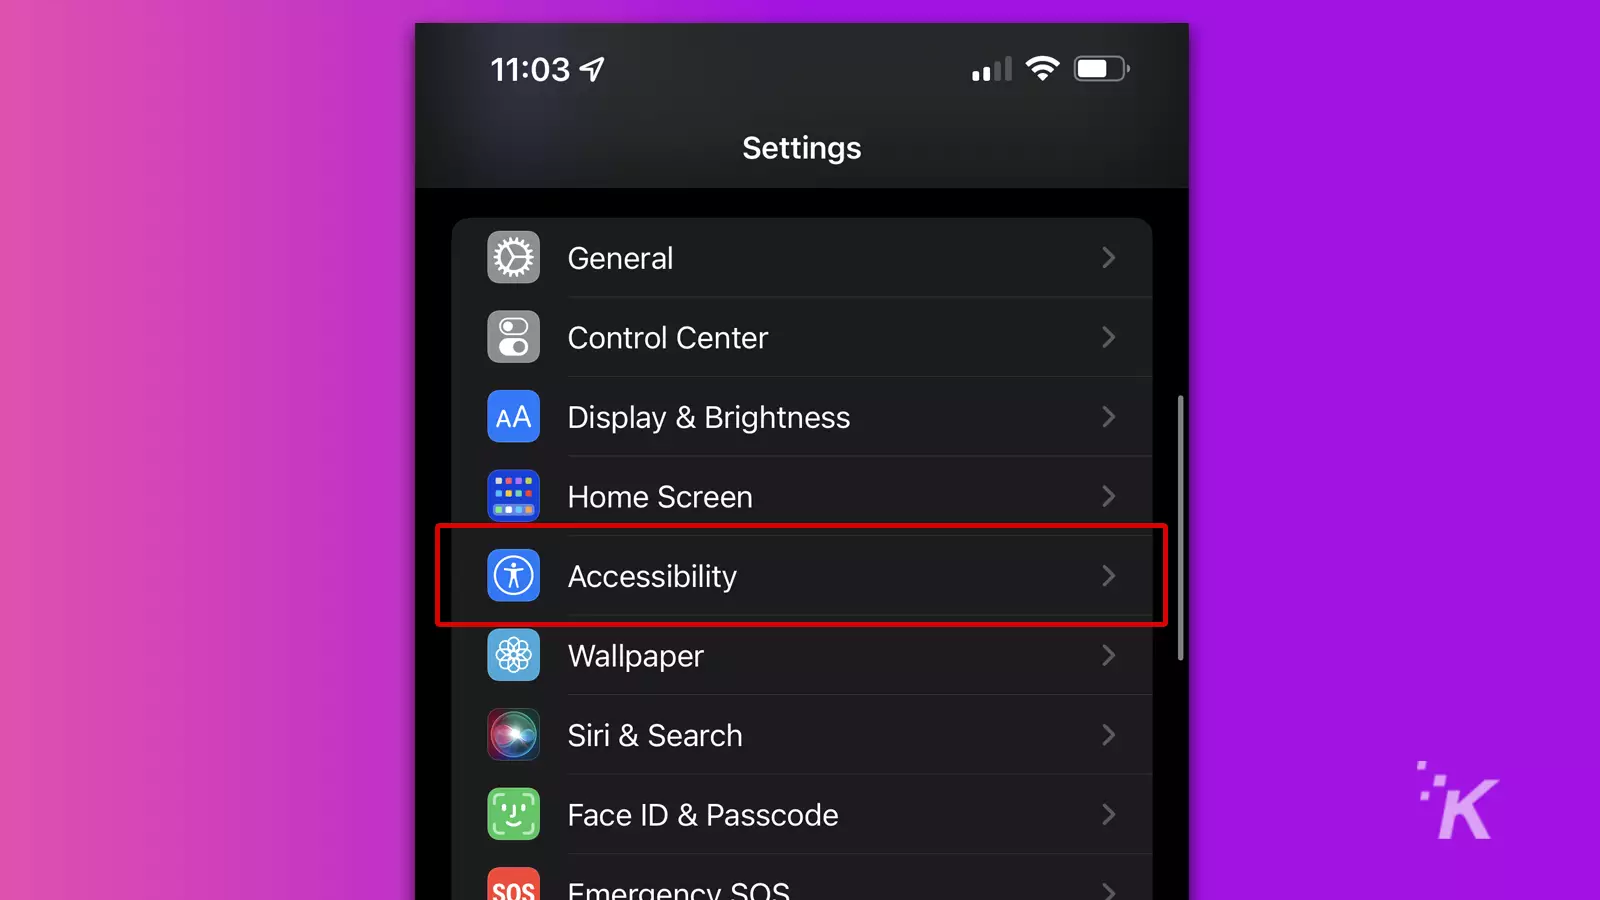
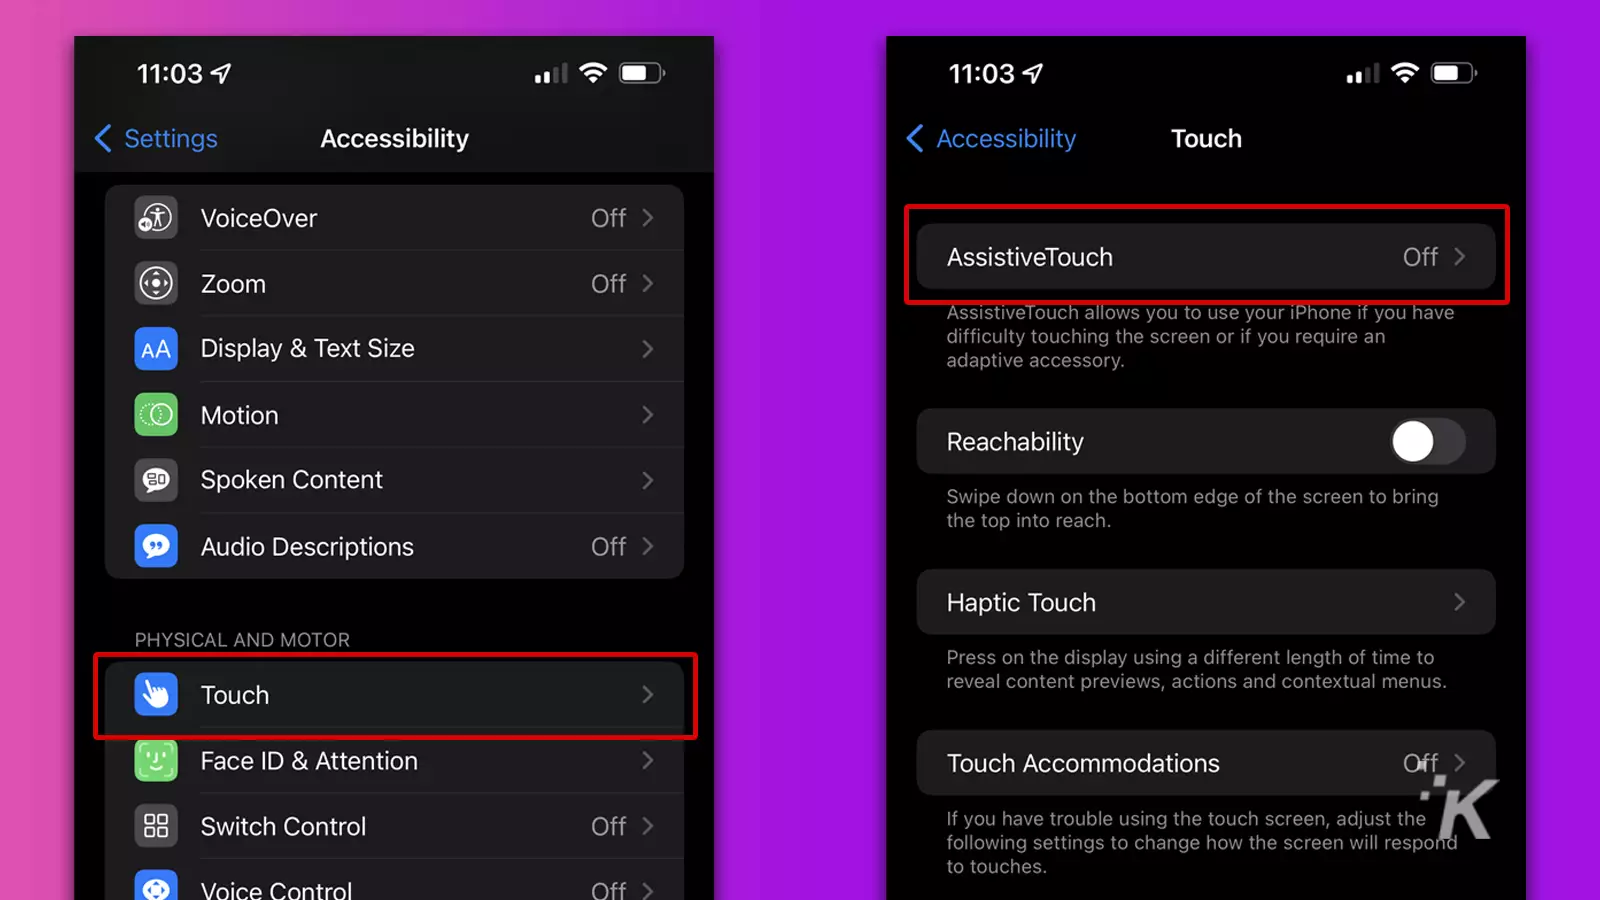
How to create an on-screen iPad screenshot button
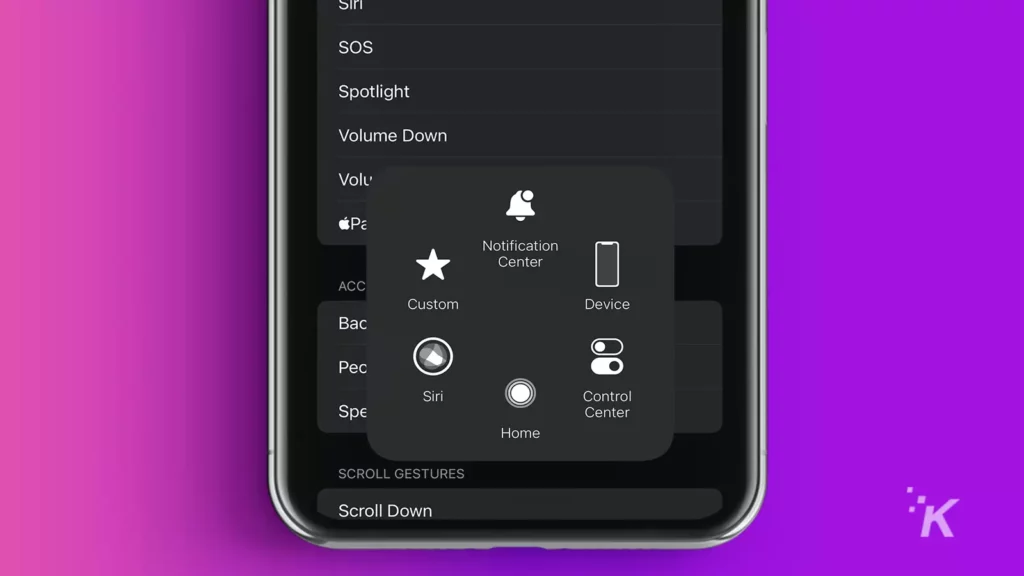
Here’s how to add a digital screenshot button to your iPad. We’ll be showing you the steps on the iPhone, but the process is the same:
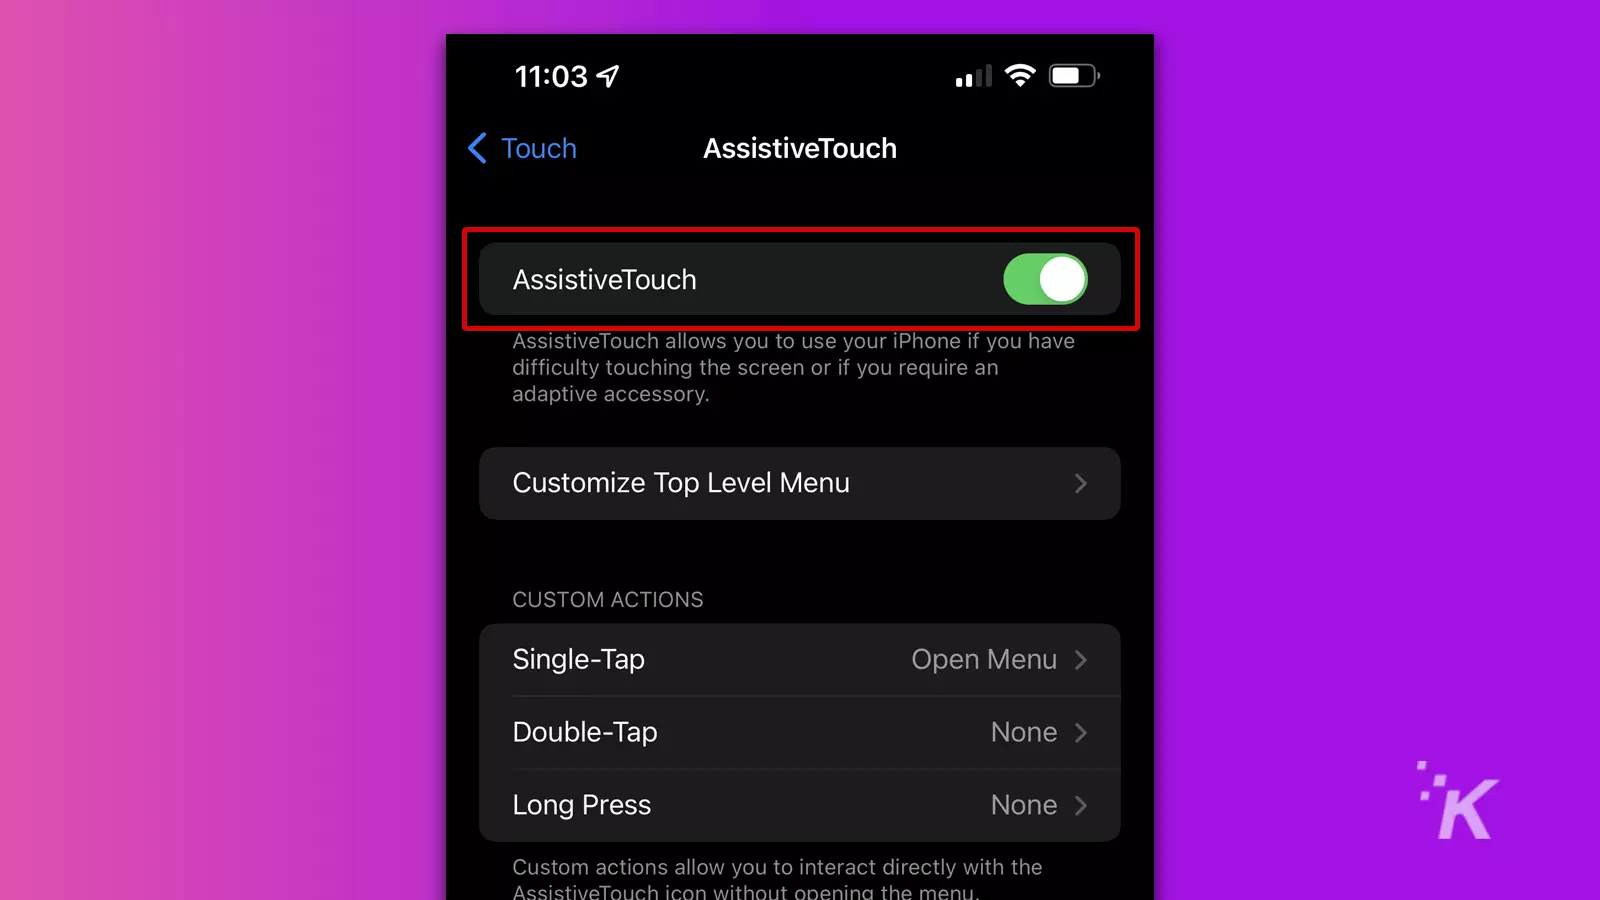
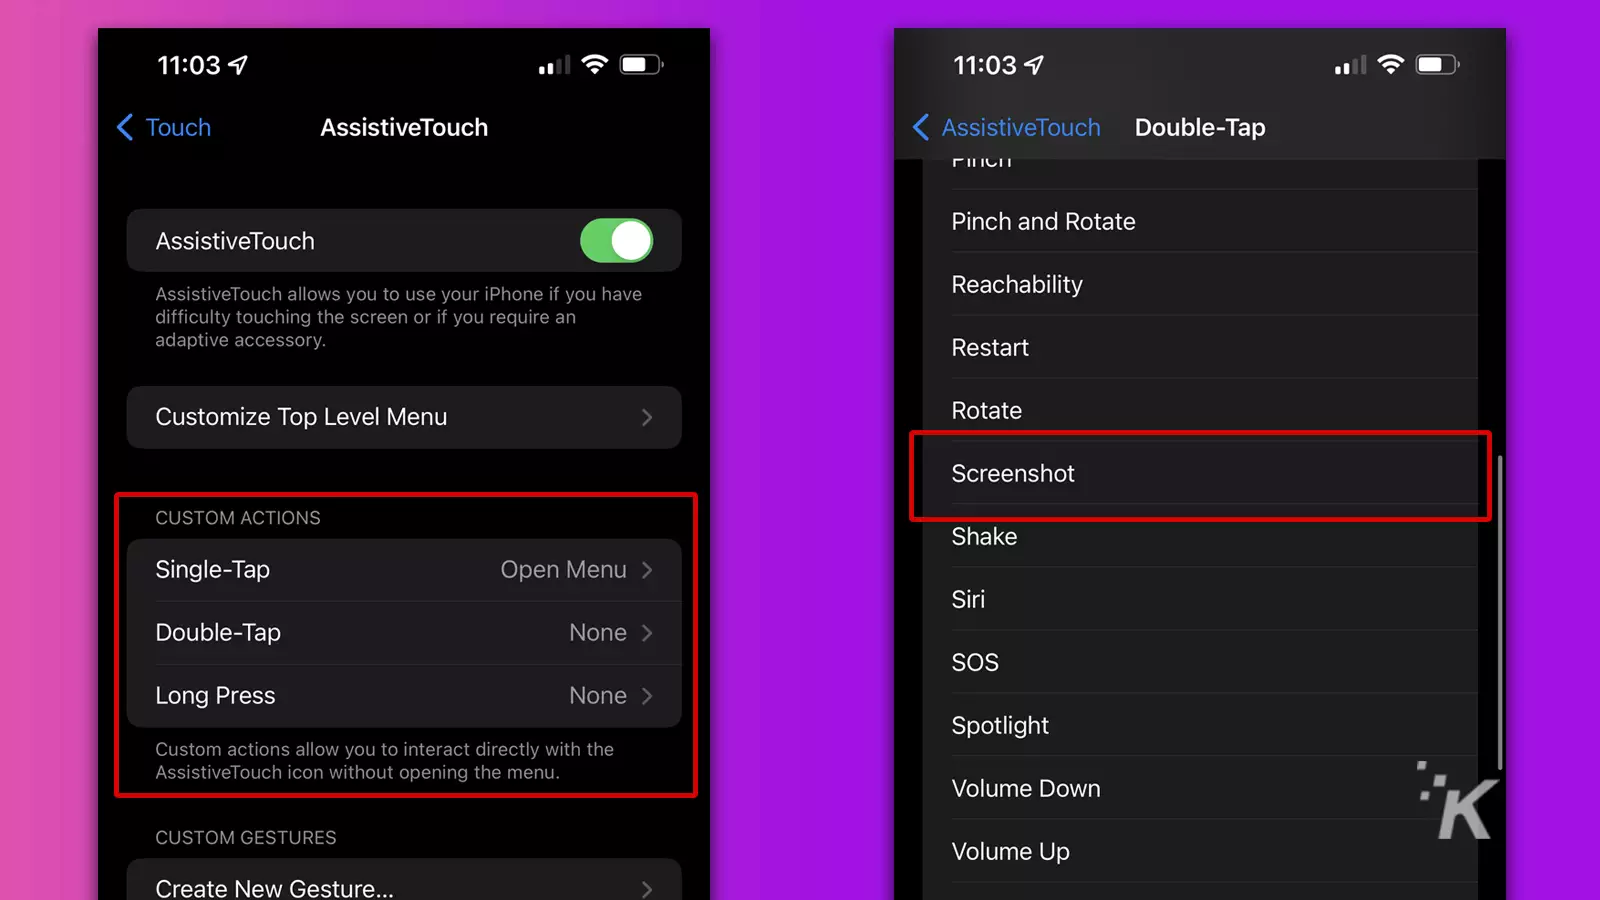
Once you’ve set up the feature, a moveable AssistiveTouch button will appear on-screen. Performing the action you selected—single-tap, double-tap, or long-press—will now reward you with an instant screenshot.
More iPad screenshot methods to discover
While we’ve discussed several methods for taking screenshots on an iPad, other solutions most certainly exist.
For example, you can configure AssistiveTouch in many ways, and an alternate configuration to the one suggested may better suit your style.
If you don’t want to touch your iPad at all, you can always call on Siri to do the hard work for you. That is, after all, why we keep her around.
Have any thoughts on this? Let us know down below in the comments or carry the discussion over to our Twitter or Facebook.
Editors’ Recommendations:
- How to update your iPad
- Here’s how to scan documents as PDFs on iPhone and iPad
- How to share an Apple TV+ subscription with your friends or family
- This trick lets you share photos between iPhone, iPad, and Mac faster than AirDrop
Follow us on Flipboard, Google News, or Apple News