How-To
How to roll back Windows updates
We’ll show you how to roll back Windows updates in several ways.
Just a heads up, if you buy something through our links, we may get a small share of the sale. It’s one of the ways we keep the lights on here. Click here for more.
Quick Answer: You can roll back Windows updates from the Control Panel, Startup Settings, System Restore, or by resetting your Windows to a freshly installed state.
Windows updates can sometimes create performance issues or prevent certain applications from running normally. If your computer is acting strange, the reason could be a Windows update.
For example, the notorious KB5030219 update, which caused crashing, slowdowns, and funky networking issues, among others. Thankfully, rolling back a Windows update is straightforward.
Some common issues caused by Windows updates are the taskbar not showing, hardware not being detected, and random blue screens. In rare cases, updates completely brick computers, leading to the loss of important data.
Most of the time, Windows updates provide a variety of improvements like security patches, drivers, and other features. However, some updates can still create issues on certain systems.
Before you take your computer to a repair center, try rolling back the Windows update.
How to roll back Windows updates on Windows 10
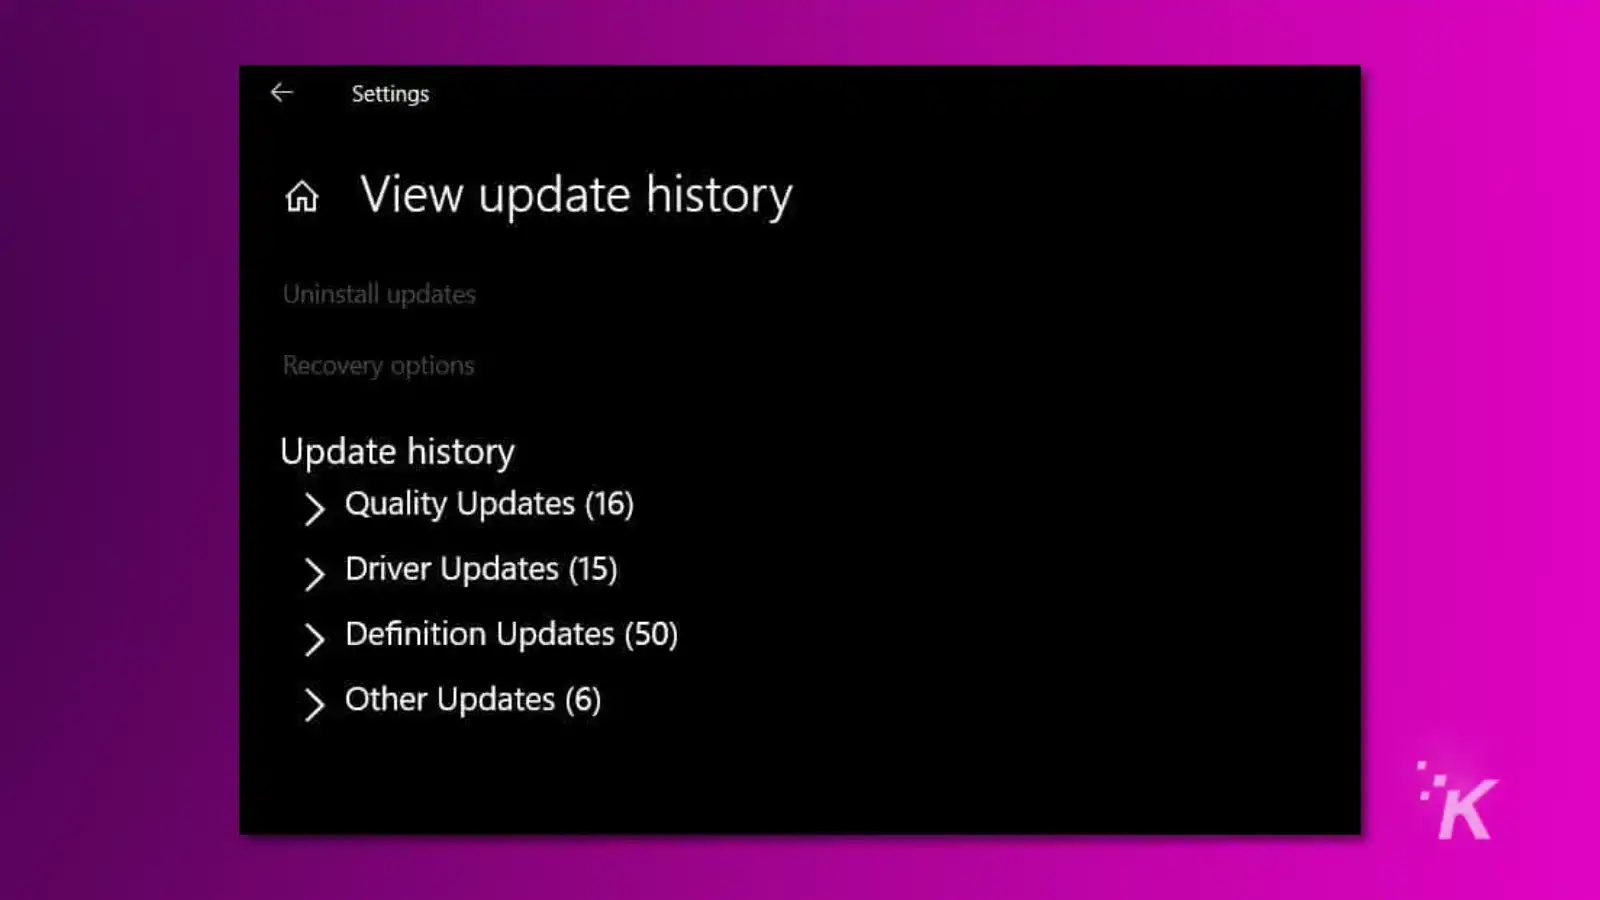
To roll back a Windows update on Windows 10, head into the Settings app.
- Click on Update & Security.
- Select View Update History.
- Highlight the most recent update and click on uninstall.
- Restart your computer to save the changes.
How to roll back Windows updates on Windows 11
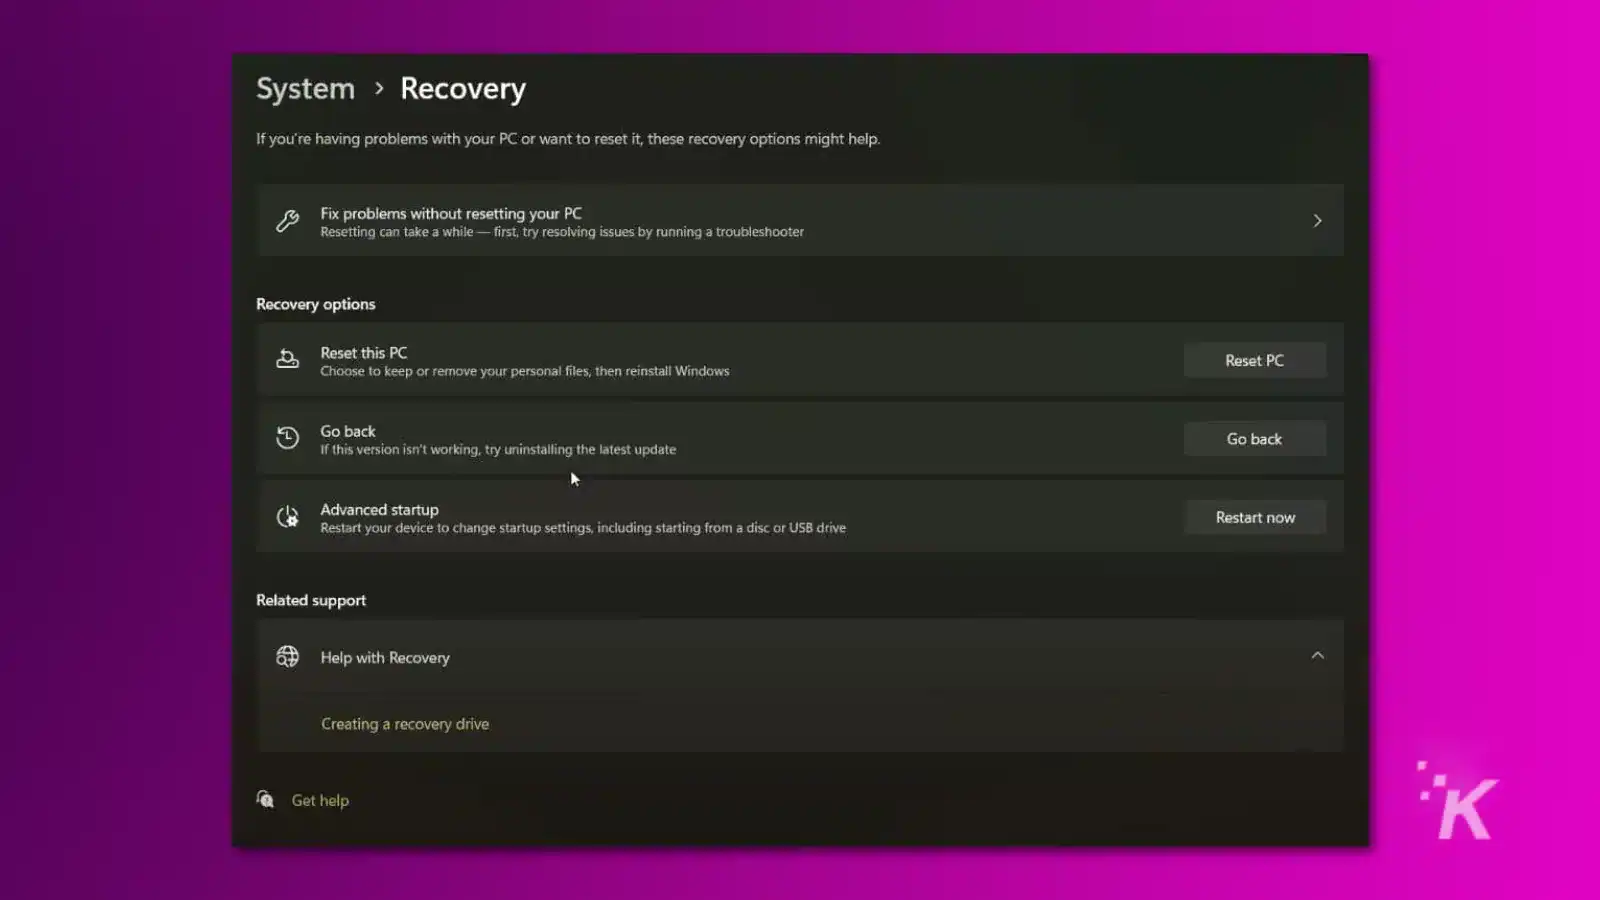
The steps to roll back Windows updates are more streamlined on Windows 11 than Windows 10.
- Open Settings.
- Click on Updates.
- Then on Recovery.
In the Recovery section, there will be an option labeled Go Back which will launch a troubleshooter.
Roll back Windows updates without the taskbar
When a problematic Windows update installs, it may break the Start Menu and/or Taskbar, making it hard to access Windows Settings.
To roll back a Windows update without the taskbar, press Windows Key + I, the shortcut to open Settings. Then follow the steps we mentioned earlier.
To restart your computer without the taskbar, press CTRL + ALT + DELETE. Click the power icon at the bottom right on the lock screen and select Restart. When you restart your computer, the taskbar should be fixed.
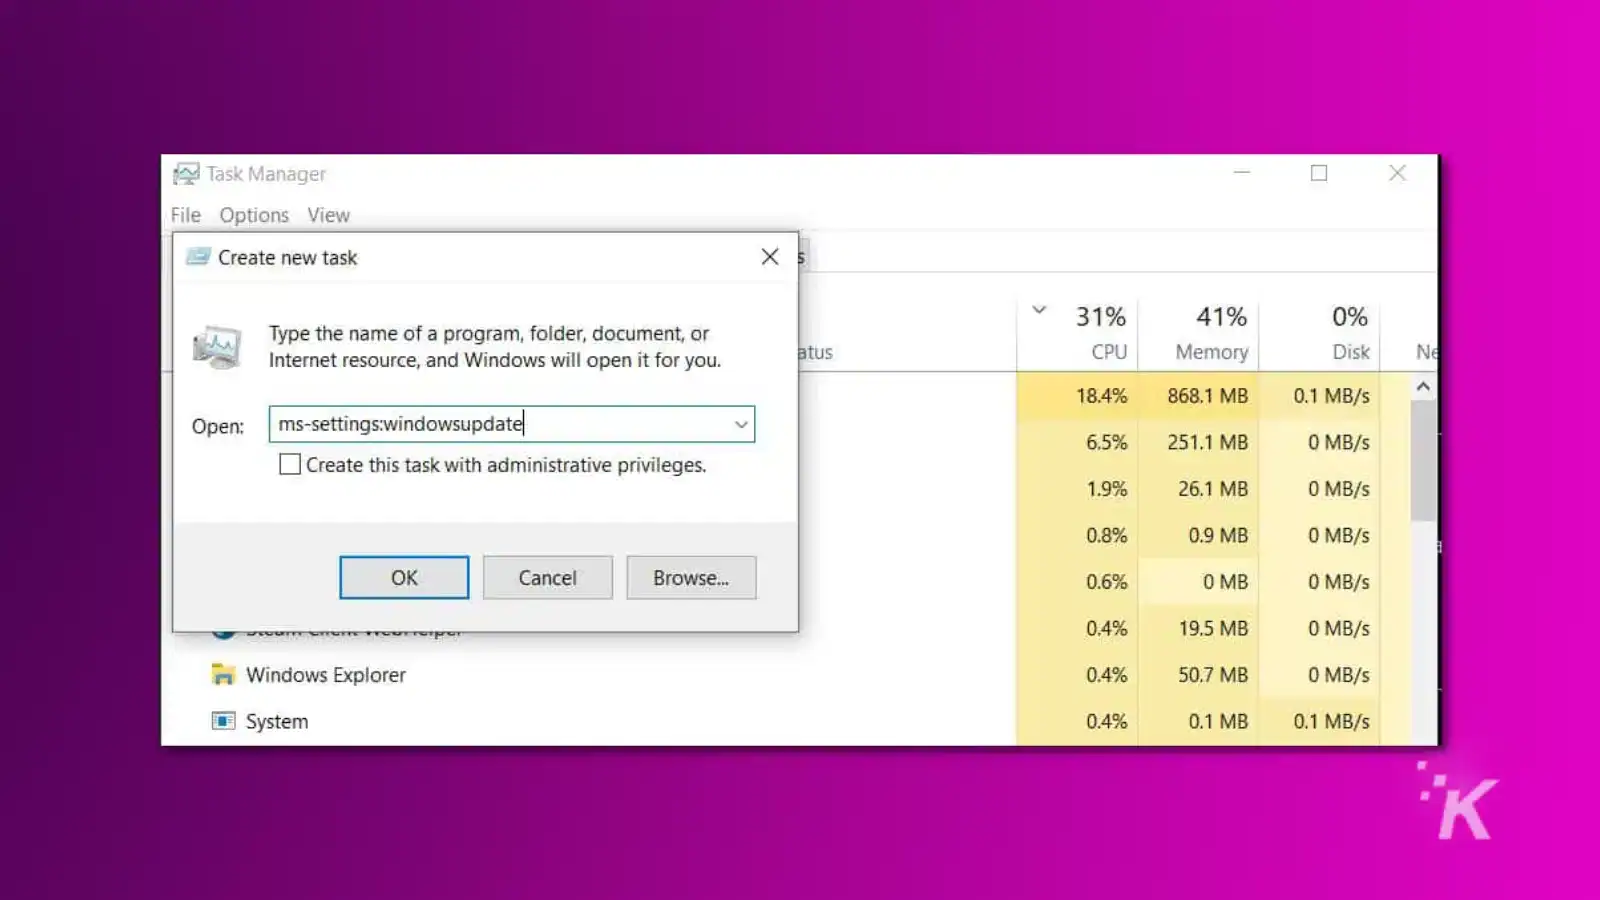
You can also try forcing explorer.exe to open. To do that, press CTRL + ALT + DELETE to open Task Manager. Under File, select Run a New Task and type Explorer.exe.
When you press enter, the Windows user interface should appear, and you can open Update & Security to roll back the update. If that doesn’t work, try typing ms-settings:windowsupdate.
Roll back Windows updates when your PC doesn’t boot
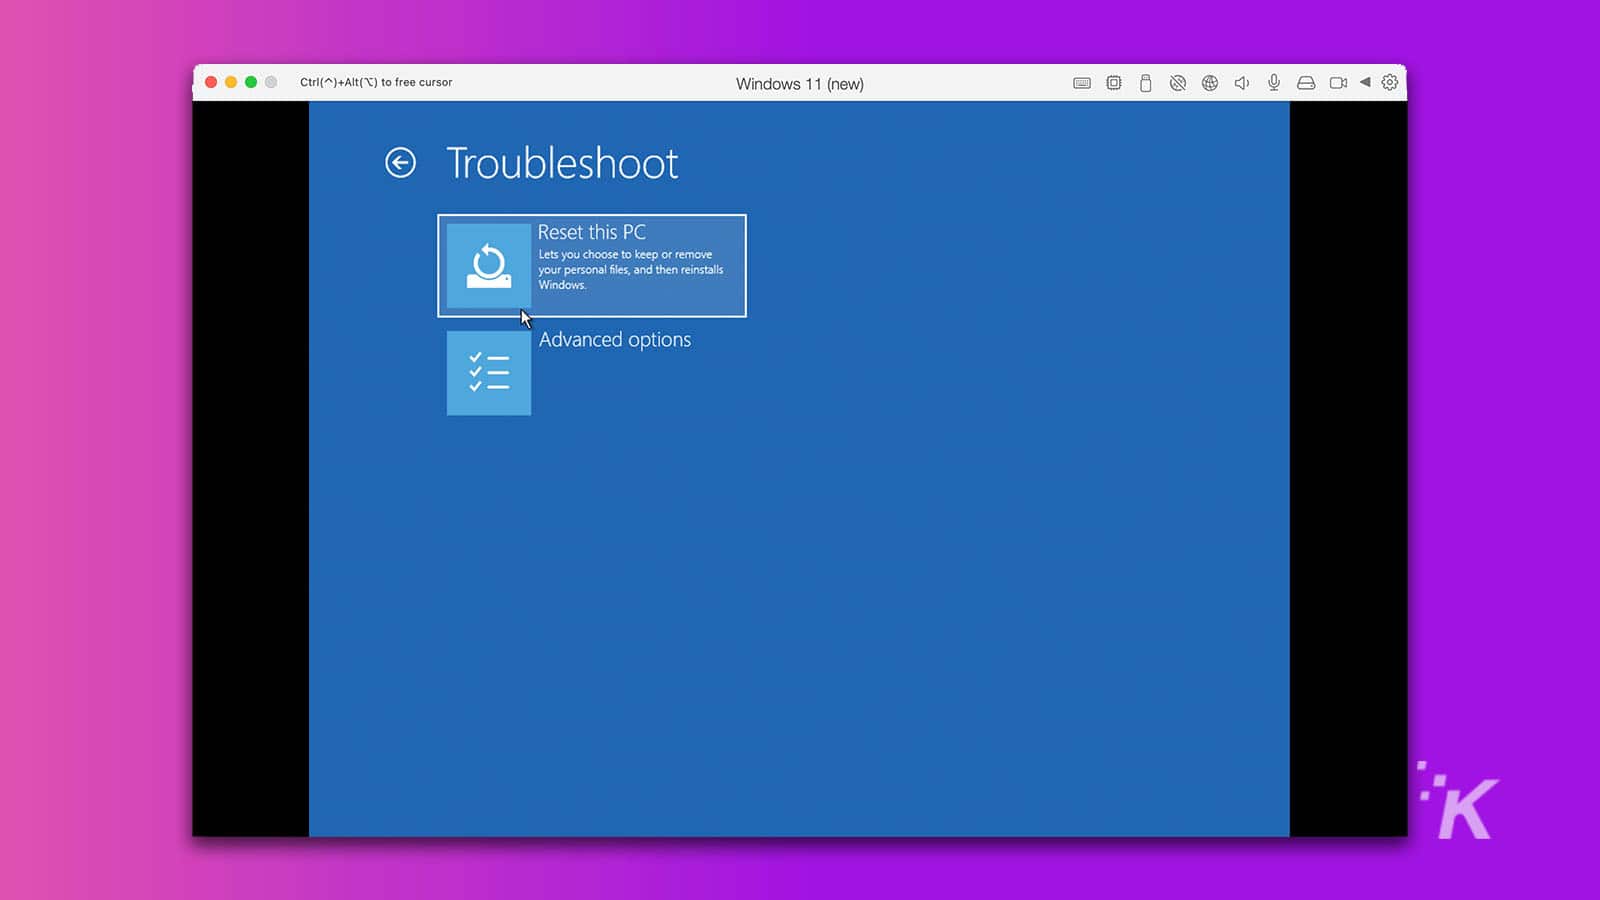
If your computer won’t boot into Windows (or it’s stuck on the login screen), boot in safe mode to uninstall the most recent Windows update. There are a few ways to boot in safe mode, depending on where your computer freezes in the boot process.
From the lock screen, hold SHIFT and click on Power and Restart. When your computer restarts, the recovery options will appear. Select Troubleshoot, Advanced Options, and then Startup Settings.
The computer will restart and you’ll be shown a list of startup options, select Enable Safe Mode with Networking. If your computer boots into Windows via safe mode, follow the previous steps to roll back the problematic Windows update.
What happens when your computer won’t even get to the lock screen?
In some cases, a Windows update can prevent your computer from booting to the lock screen. When that happens, you can force the recovery options to appear by manually shutting down the computer.
Turn your computer on, wait for the Windows logo to appear, and immediately press and hold the power button. When you turn your computer back on, the Troubleshooting options should appear.
How to use system restore
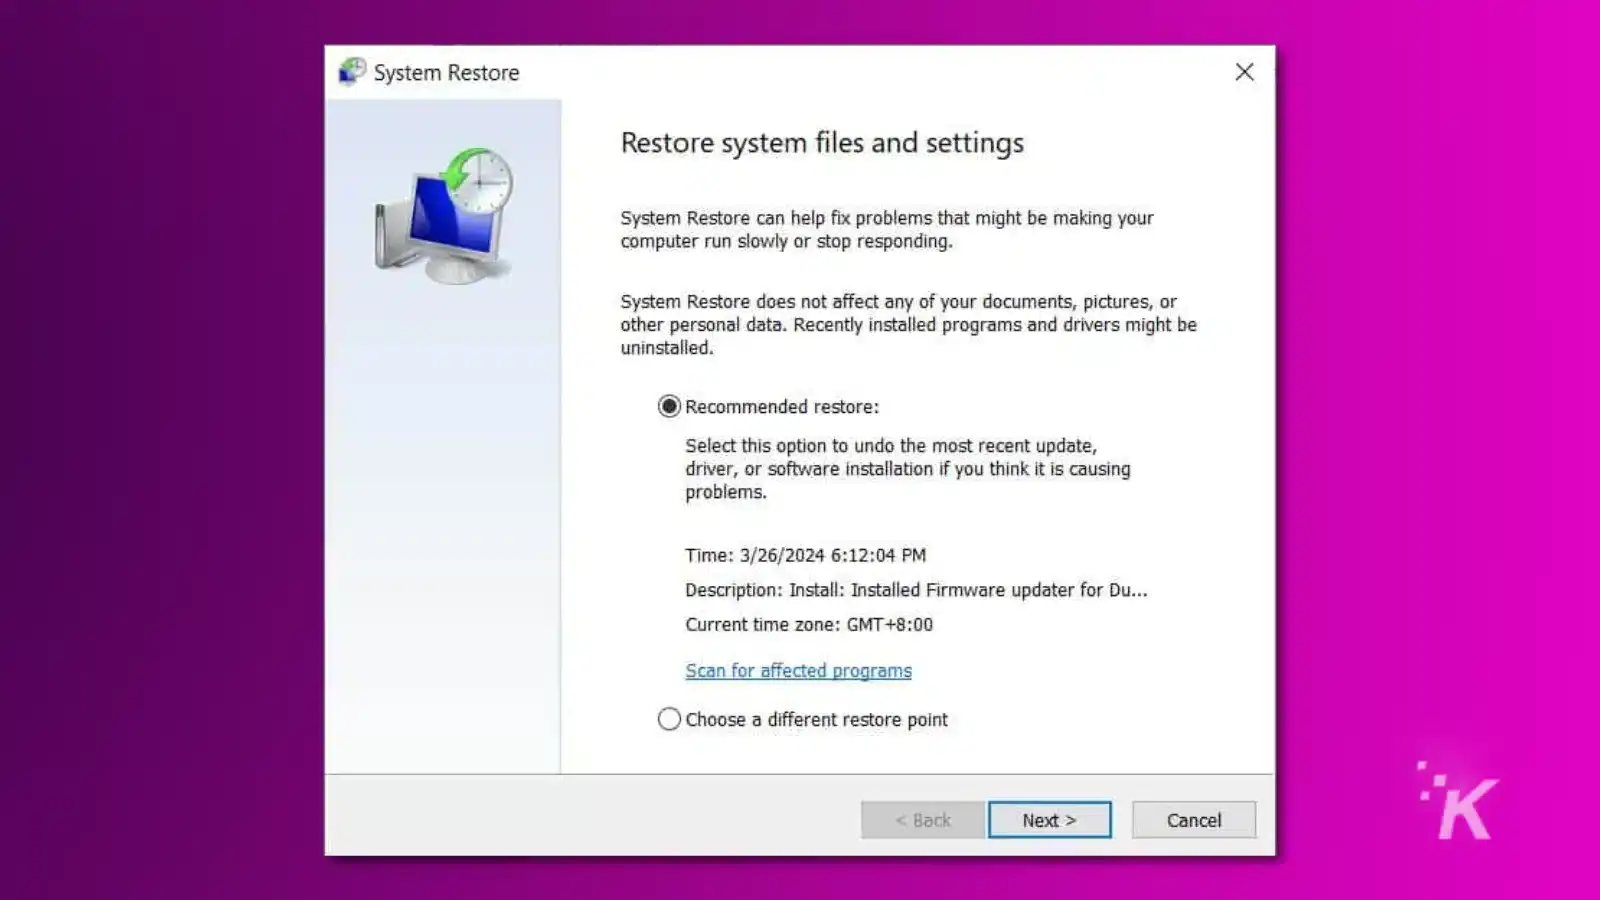
Windows will usually automatically create a restore point when a major update is installed on your device.
If you can’t figure out which Windows update is creating issues, using system restore could be the solution. A restore point will save your Windows system settings and files but it won’t remove your documents or settings.
If your computer is running booting into Windows, you can easily roll back an update by typing “Recovery” into the Start Menu and clicking on Open System Restore.
The wizard will show the most recent restore point as well as information about when the restore point was created. Progress through the wizard to roll back the Windows update.
On the off chance that a Windows update won’t let you boot into the operating system, you can access System Restore from the boot troubleshooter mentioned earlier.
The easiest way to access the boot troubleshooter is to force a shutdown in the middle of the boot process.
Reset your computer
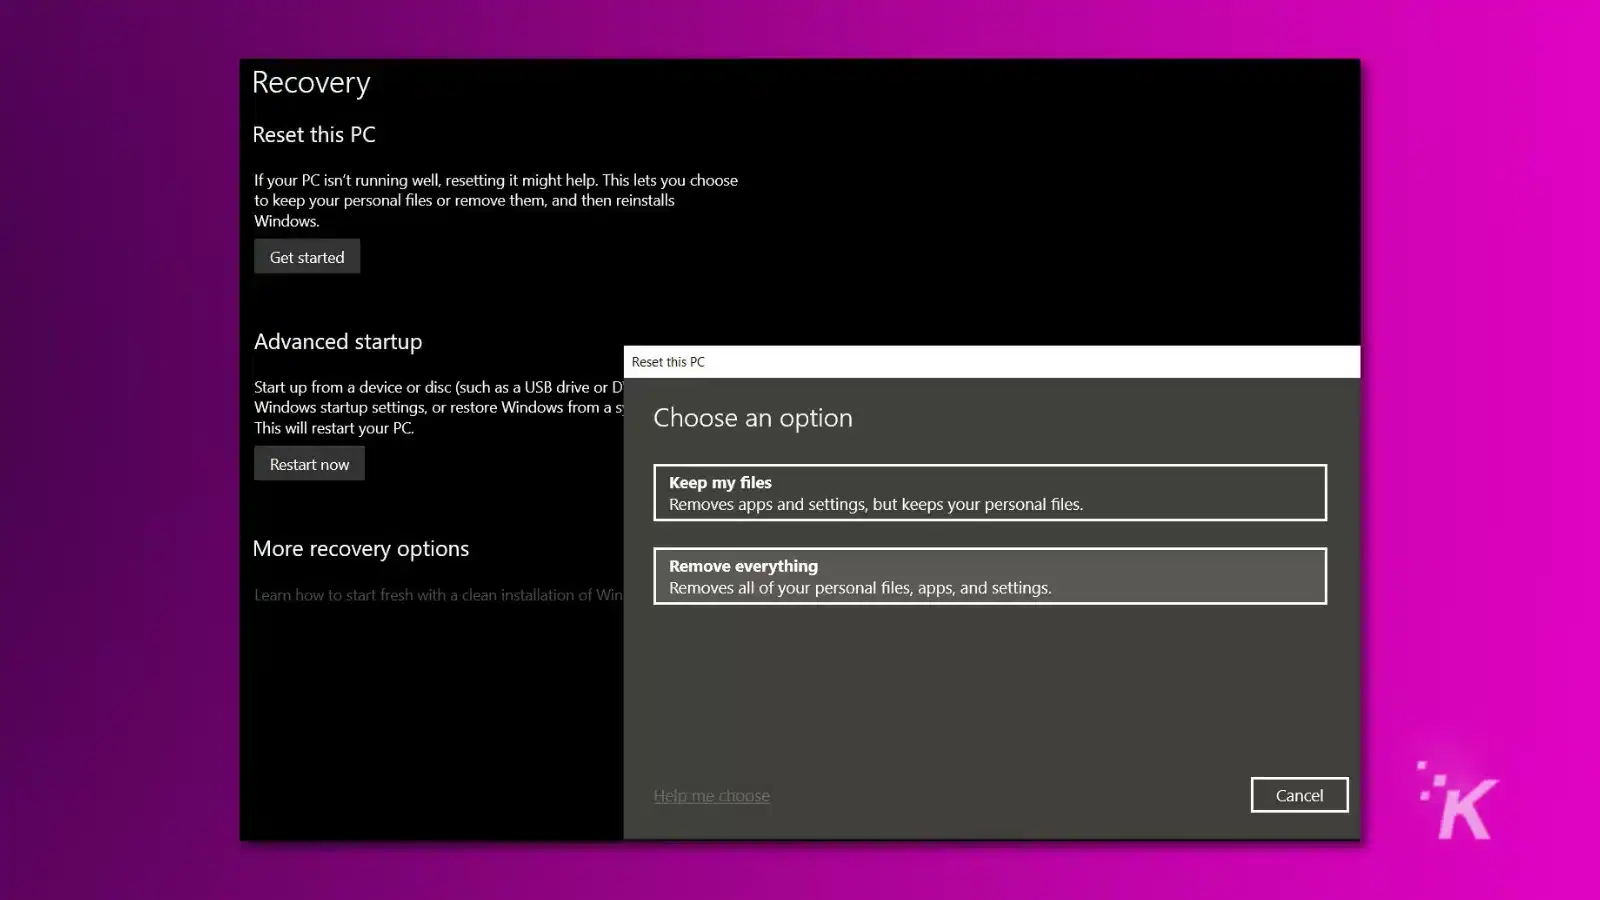
If none of the above options can restore functionality on your device, the last resort is to reset your computer and restore everything to factory defaults.
Windows makes it easy to reset computers and there’s even an option to only restore Windows system files without removing personal files.
Like the other options, you can find the option to reset Windows either in Updates & Recovery or in the boot troubleshooter.
You can also reset your computer with a Windows 10 or Windows 11 recovery disk or thumb drive. Resetting your computer often improves performance because it clears out bugs and other issues. It can also help with faulty drivers.
Before you proceed, it’s a good idea to backup your important documents to an external drive or online storage.
It’s generally better to do a completely clean install of Windows because it has a better chance of clearing out the program that’s causing issues. That means all your files and programs will be removed.
How to disable automatic Windows updates
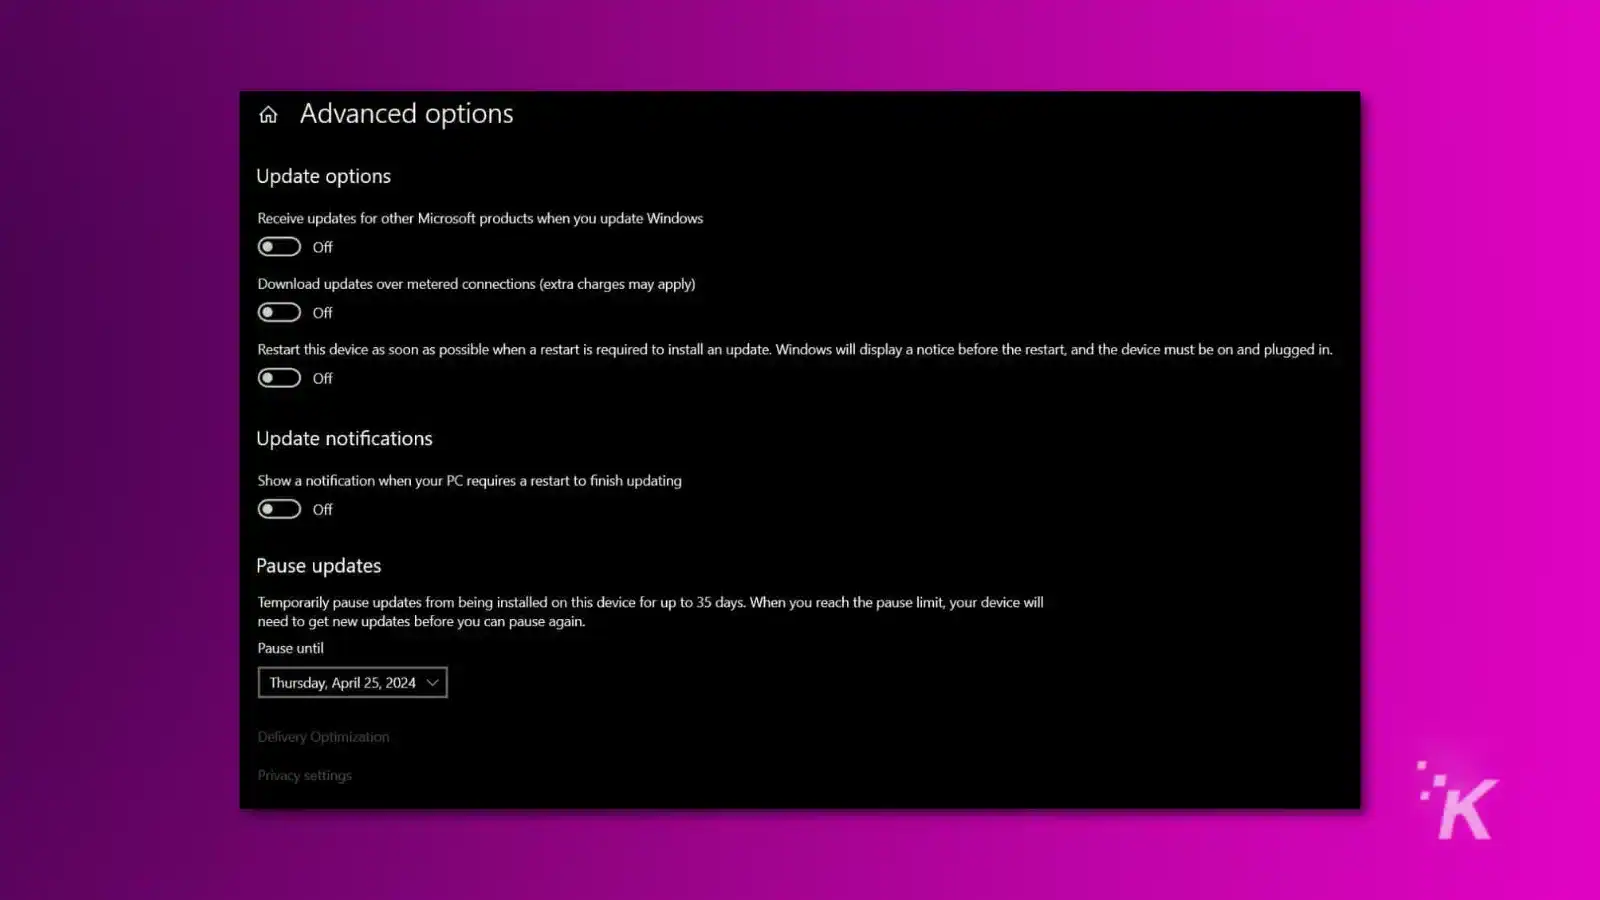
It’s not recommended to completely disable automatic Windows updates because they include security patches. Windows also doesn’t make it easy for people to disable Windows updates.
Most of the methods available online are only temporary and the updates will be enabled again once the system reboots. The best option at this moment is to pause Windows updates.
To pause Windows updates:
- Open Settings.
- Select Updates & Security.
- Click on Pause Updates for 7 Days.
- In the Advanced section, you can select a specific date to unpause updates. The maximum amount of time updates can be paused is 35 days.
So, now you know how to roll back Windows updates. It can be a bit of a hassle, but you’ll be up and running again in no time.
Have any thoughts on this? Drop us a line below in the comments, or carry the discussion to our Twitter or Facebook.
Editors’ Recommendations:
- How to calibrate HDR in Windows for a richer viewing experience
- How to get Xbox Game Pass on the
Steam Deck - Xbox Series X not reading discs? Here’s how to fix it
- How to use Xbox energy-saving mode


