How-To
How to add a printer to Mac
Thankfully, you have multiple options for adding a printer to Mac.
Just a heads up, if you buy something through our links, we may get a small share of the sale. It’s one of the ways we keep the lights on here. Click here for more.
Installing and setting printers may be a daunting task for anyone—even those who have done it before. It’s not just PCs either, Apple fans also need to know how to add a printer to Mac.
In most cases, printers are installed similarly regardless of brand or model. Even though each connection’s setup may appear to be very different, they are actually rather similar.
In this guide, we are going to walk you through how to add a printer to a Mac using Wi-Fi, USB, Bluetooth, and an IP address. So without further ado, let’s get started.
How to add a printer to Mac via Wi-Fi
If you have decided to add a printer to your Mac wirelessly, you can do it easily by pressing the Wi-Fi button on your printer and the WPS button on your router.
However, it may not work, and if this happens, you should try reading the instruction manual.


However, if the printer lacks the AirPrint feature, you must select the Printer > Add > Download printer drivers from Apple servers.
Bonus tip
Installing the NetSpot application, a Wi-Fi scanning tool that provides the best location for your printer is recommended if the printer is shared by coworkers but becomes unavailable due to a weak connection.
Adding a printer to Mac via USB
Adding a printer to a Mac through USB is more straightforward than Wi-Fi. This is because as soon as you connect the printer to Mac via a USB cable, Mac itself will automatically detect it and guide you through the on-screen instructions.
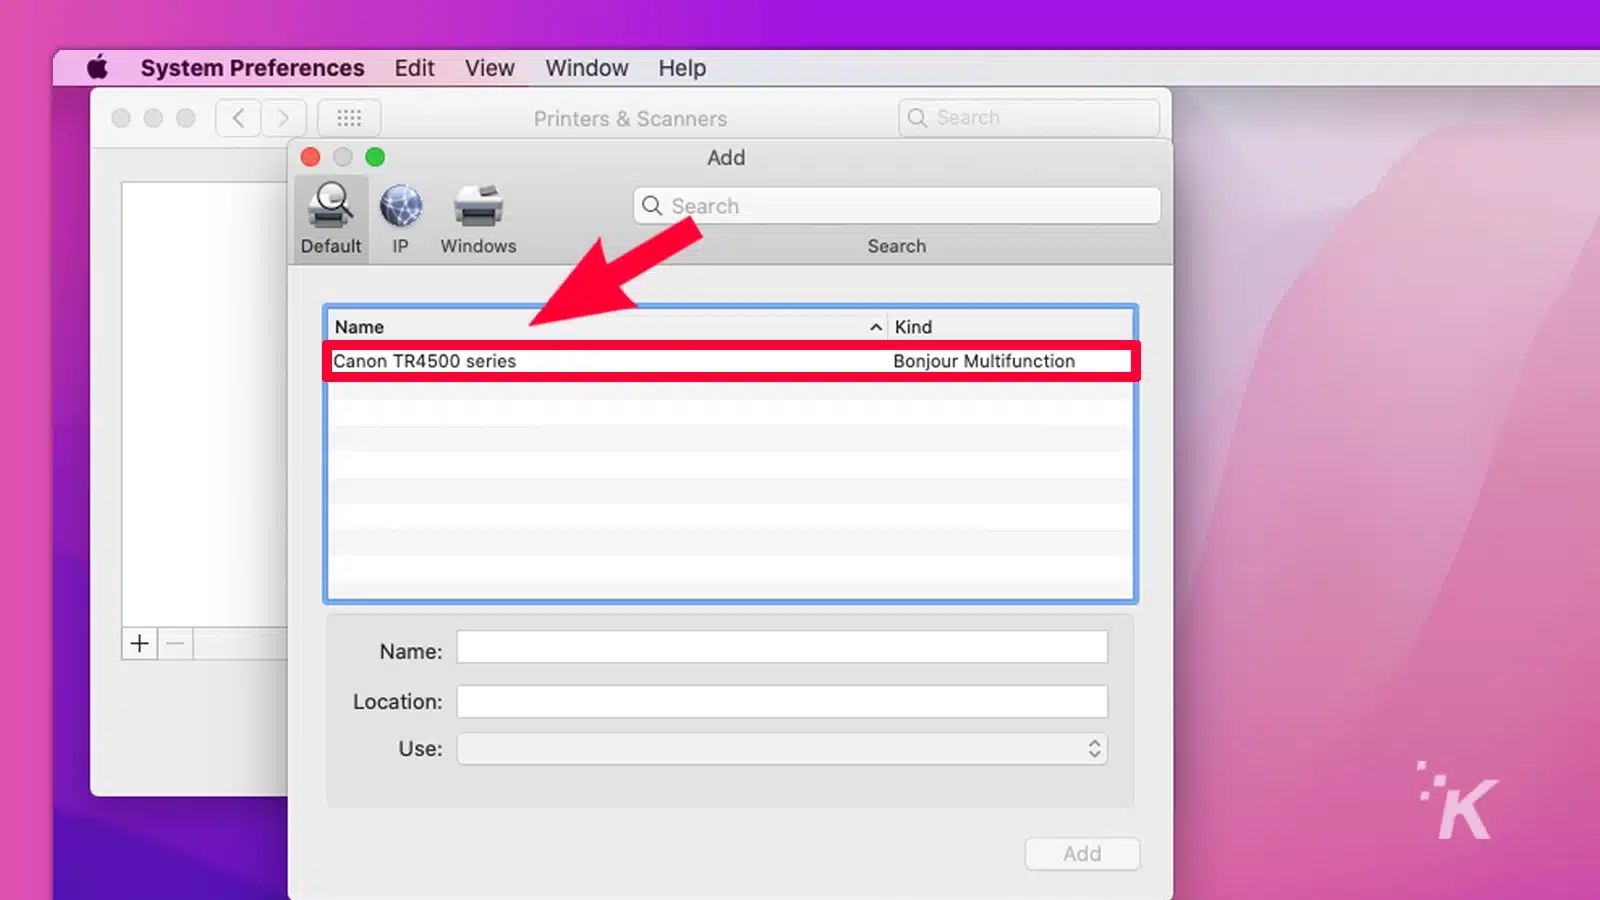
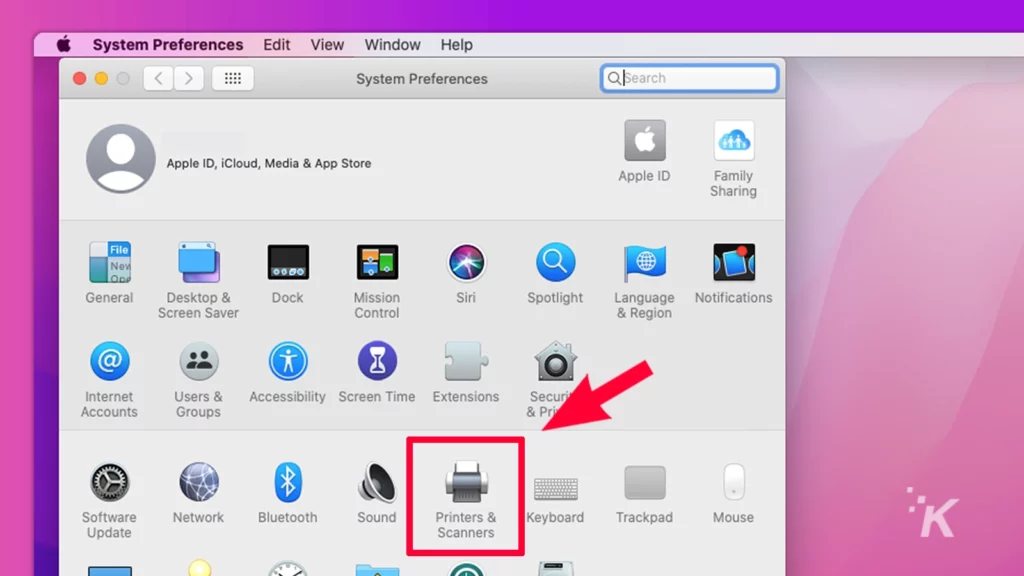
- After connecting your printer via USB, go to System Preferences > Printers & Scanners
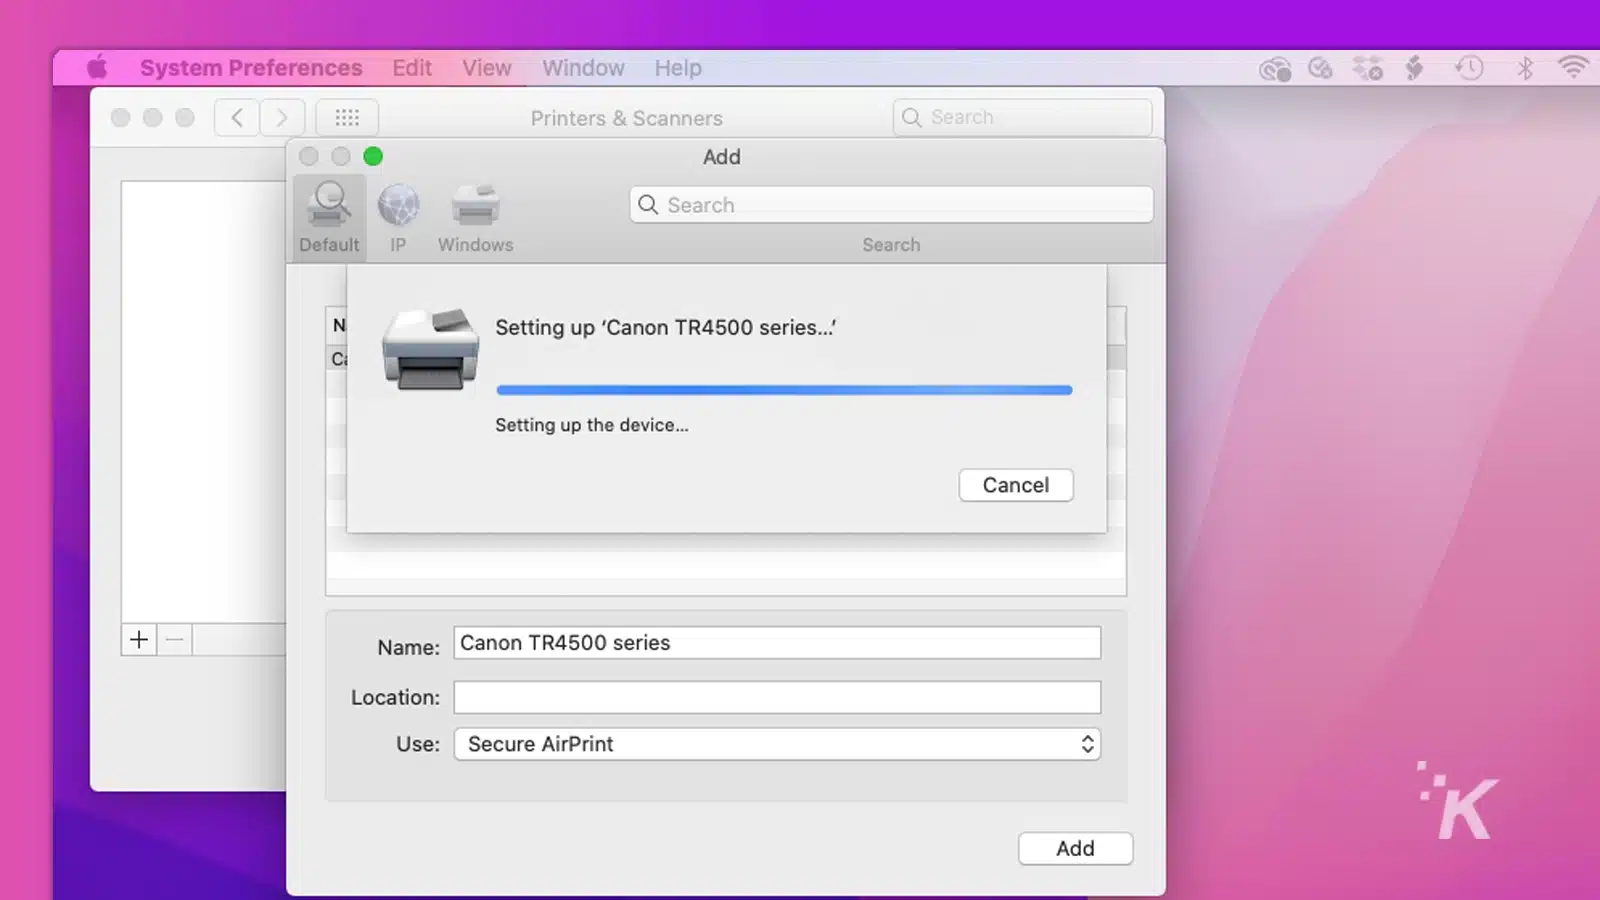
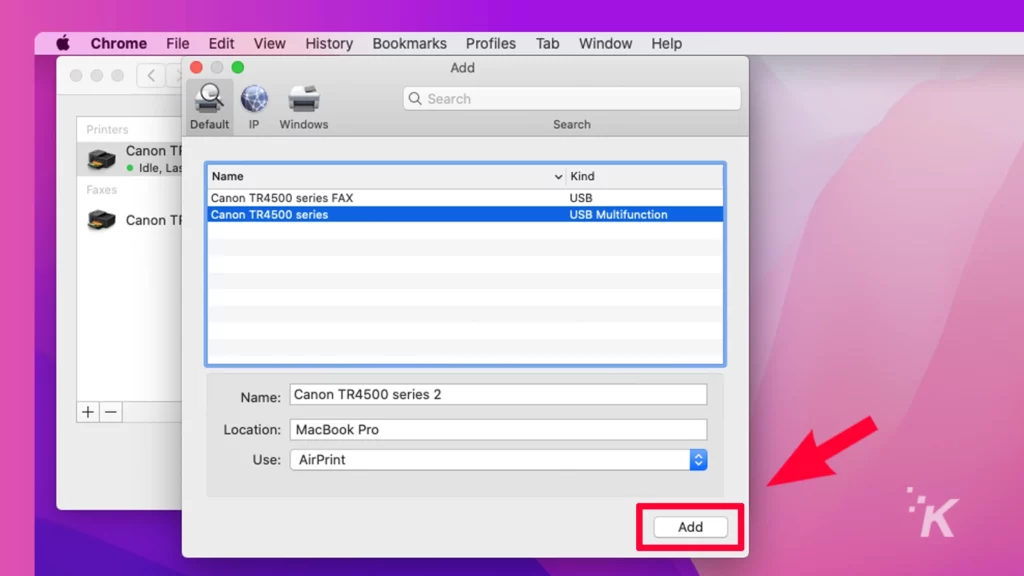
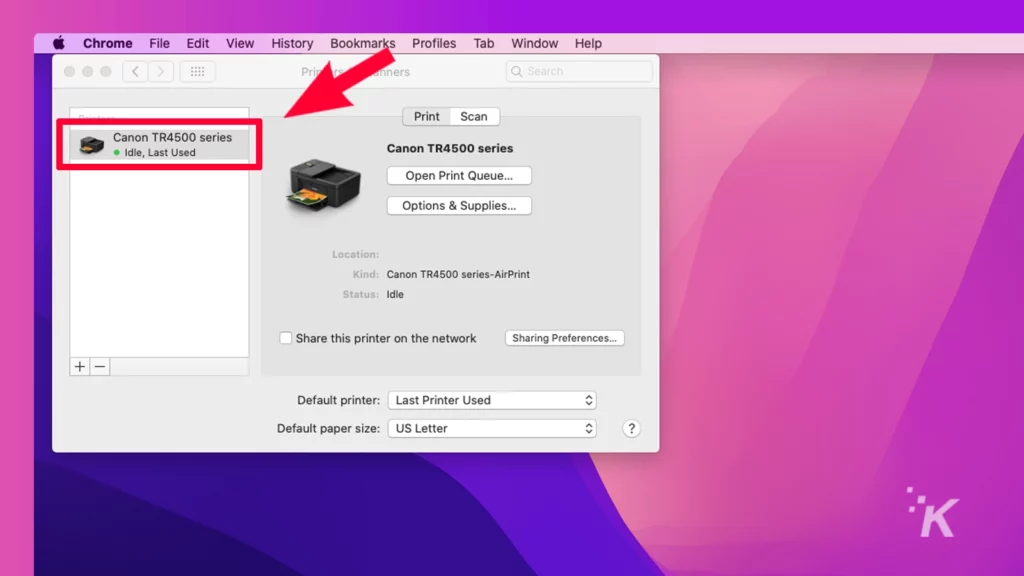
- Then press the plus button. If everything goes fine, you will see the name of your printer

- Next, click on Add
However, this doesn’t guarantee you won’t run into issues because your Mac may just fail to identify the printer.
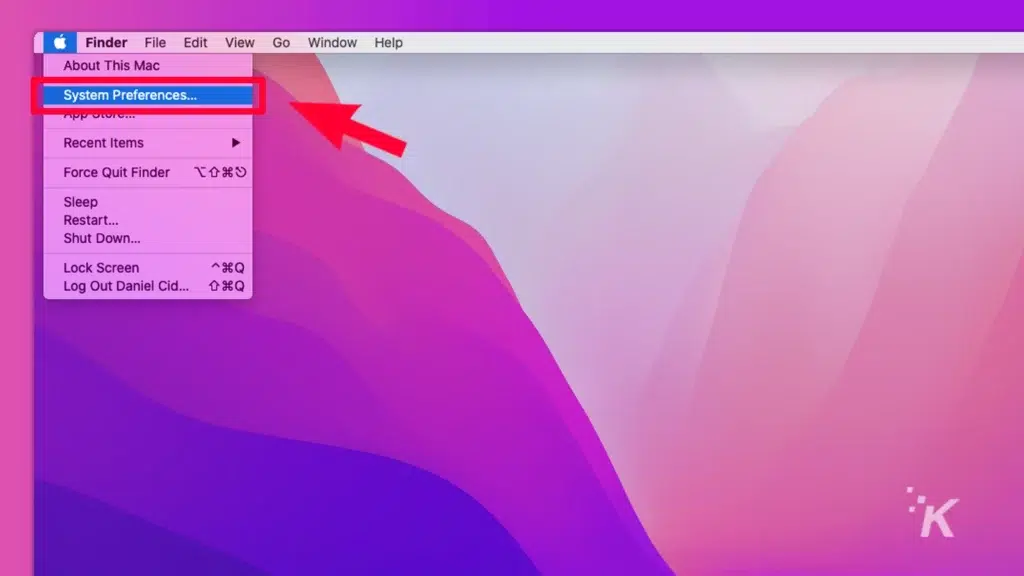
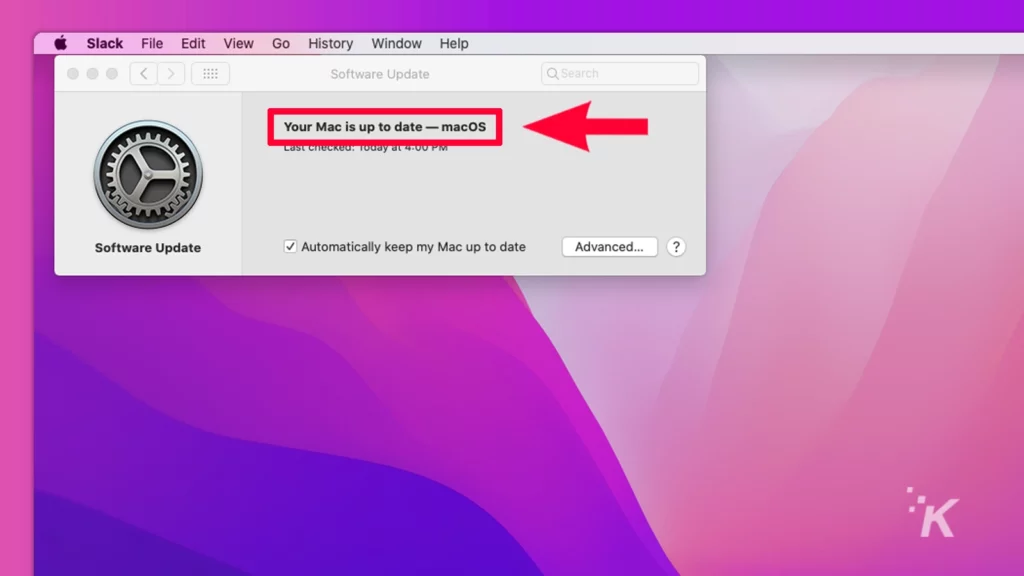
Many different reasons might cause the issue, but in most cases, it can be resolved by simply accessing System Preferences > Software Update > Install the latest updates.
How to add a printer to Mac via Bluetooth
Some printers use Bluetooth to connect to the devices and receive the print files. Like other connections, you must first add your printer to the list of printers.
- After turning on your printer, go to System Preferences
- Click on Printers & Scanners

- Next, press the plus button and select your printer from the list

When you want to print something, simply go to Mac > Bluetooth Preferences and tap the Bluetooth icon, and your printer will be paired.
READ MORE: What is the latest macOS version?
If you are having trouble adding the printer, the first step is ensuring that your Mac runs the most recent macOS version.
Adding a printer to Mac via IP address
If the previous methods did not work, we recommend connecting your printer to the Mac using an IP address. To use this method, you will need a few pieces of information, like the printer’s IP address or hostname, printing protocol, and model.
This information can be found in the user manual, by contacting support, or by following the manual instructions. Just like the other methods, you need to make sure that the latest macOS version has been installed on your Mac:
- Navigate to System Preferences > Software Update
- Then, ensure that your printer is switched on
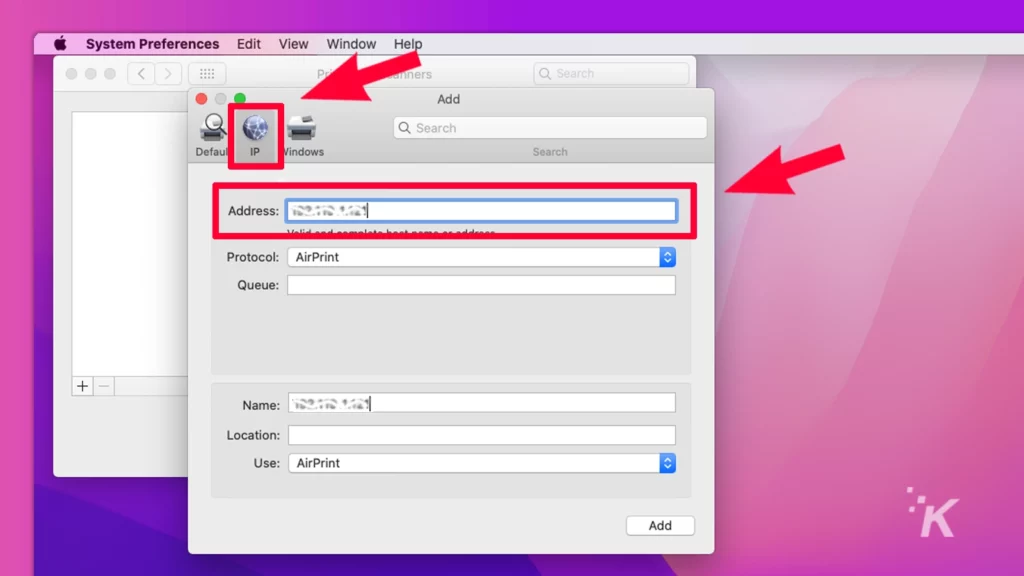
- Next, go to System Preferences > Printers & Scanners

- Click on the IP tab (web icon) and type your printer’s IP address
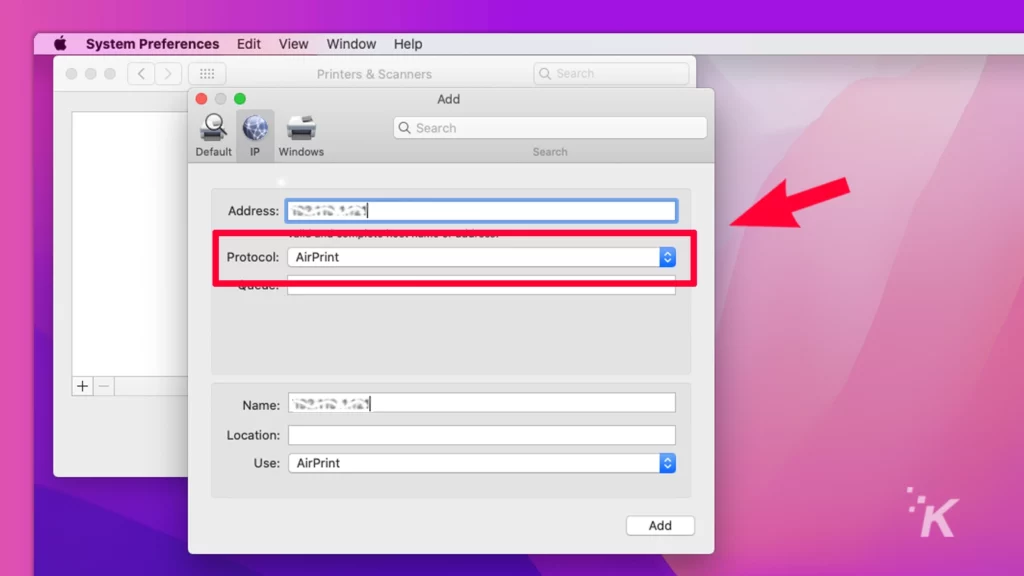
- The next step is selecting the Protocol (AirPrint, IPP, LPD, etc.)
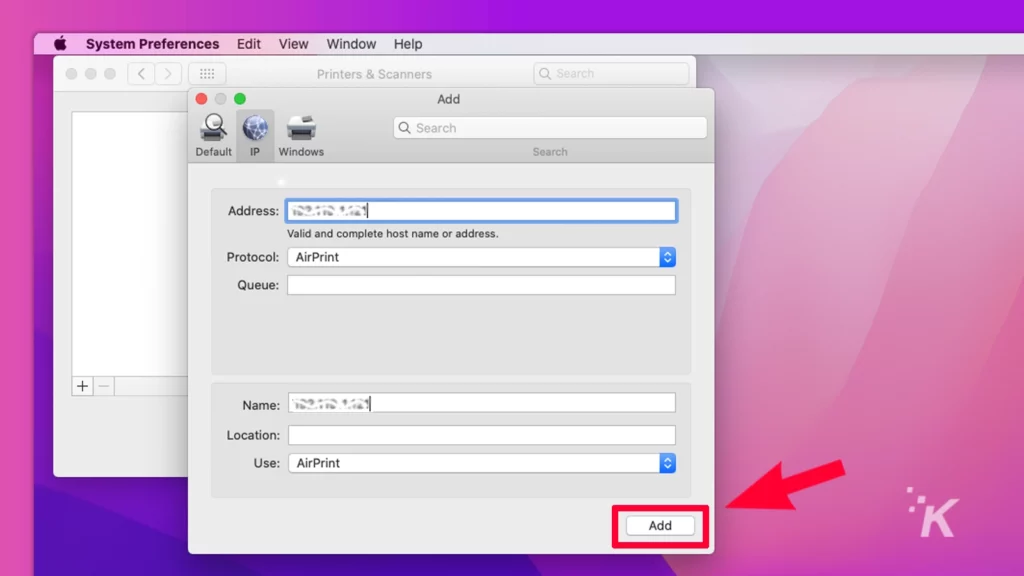
- Now you should enter the required information and click on Add.
This isn’t the easiest method, so we really only recommend using this if none of the other methods work.
How to remove a printer from Mac
Finally, it’s time to look at how to remove a printer from Mac. You’re now equipped with the knowledge to add a printer, but it’s good to know the reverse, as well. To delete the printer on your Mac device:
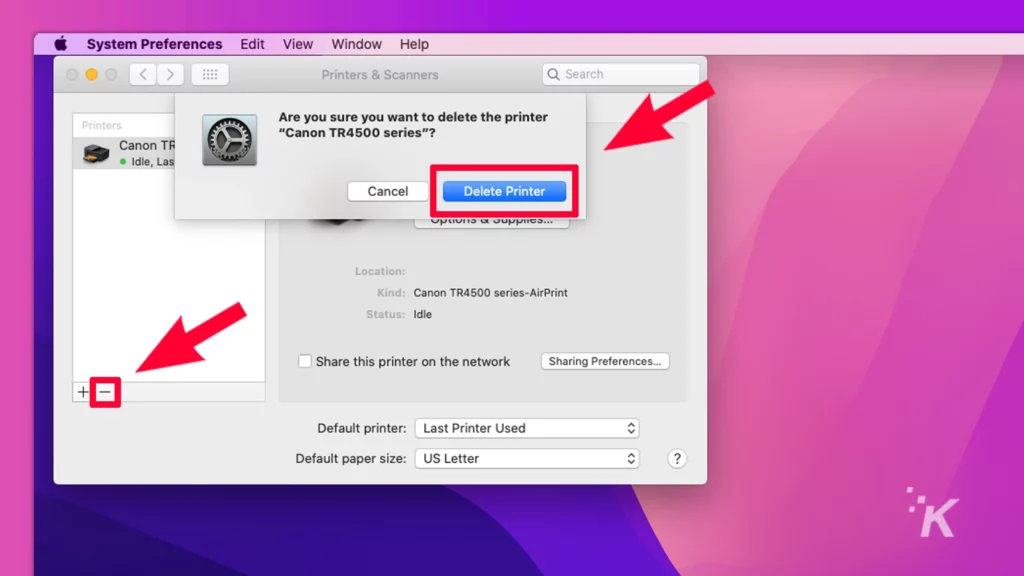
- Go to System Preferences

- Then click on Printers & Scanners

- Next, find the printer you want to delete
- Finally, click the minus button and confirm that you want to delete the printer
And there you go, you’ve now successfully removed a printer from Mac.
Conclusion
As you can see, there are many ways to connect a printer to Mac. You can use USB, Bluetooth, or Wi-Fi, and all produce similar results. But, as we’ve shown, you also have other options for adding a printer.
Thankfully, the process is practically the same across most methods. That means once you know how to do one, you know how to do them all.
Have any thoughts on this? Let us know down below in the comments or carry the discussion over to our Twitter or Facebook.
Editors’ Recommendations:
- Does your Mac need antivirus software?
- How to find saved WiFi passwords on Mac
- Here’s how to take a screenshot on any iPhone
- Here’s how to start a Mac in safe mode
Just a heads up, if you buy something through our links, we may get a small share of the sale. It’s one of the ways we keep the lights on here. Click here for more.