Just a heads up, if you buy something through our links, we may get a small share of the sale. It’s one of the ways we keep the lights on here. Click here for more.

Never miss a potential security event with the Blink Plus ($10/month, all devices) or Blink Basic ($3/month, one device) plans to record any events triggering your home security cameras.
Blink cameras are some of the best home security cameras to add video surveillance to your home. To store recorded video, you can subscribe to a cloud plan or use USB-attached storage.
You can manage, view, and share these videos using the Blink App. If you run out of storage, you’ll have to delete some videos so that you can record new ones.
We’ll walk you through the process, so you can clear out some storage for your Blink cameras.
A quick word before we continue–Blink doesn’t have a recycle bin so that you can restore deleted videos, once you delete them, they’re gone forever.
How to delete a Blink camera video
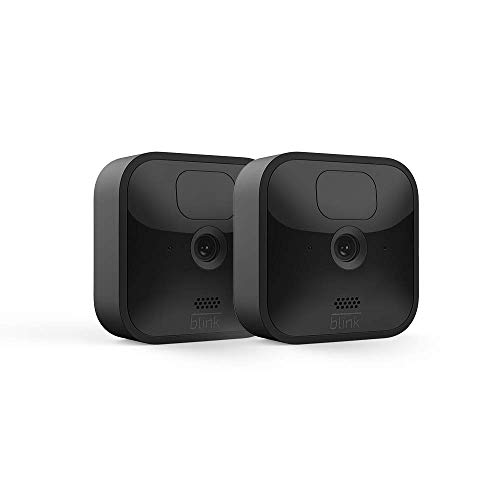
Blink Outdoor cameras are an affordable way to add security cameras to your property. They're weather-resistant, go two years without needing to charge, and have motion detection for recording potential security issues.
There are three different ways you can delete the clips recorded by your Blink Camera. Let’s explore them one by one.
Set your Blink camera recordings to auto-delete
Open the app
Open Settings
Open Device and System Settings
Set the cloud storage auto-delete time
Choose the time period
Now that you’ve got auto-deleted videos sewn up, we’ll show you how to do it manually.
Delete Blink videos manually
If you want to delete the recorded clips manually and don’t have a subscription, you’ll have to do it one-by-one. If you have a Blink subscription, you can delete multiple clips at once.
Here’s how to do both ways.
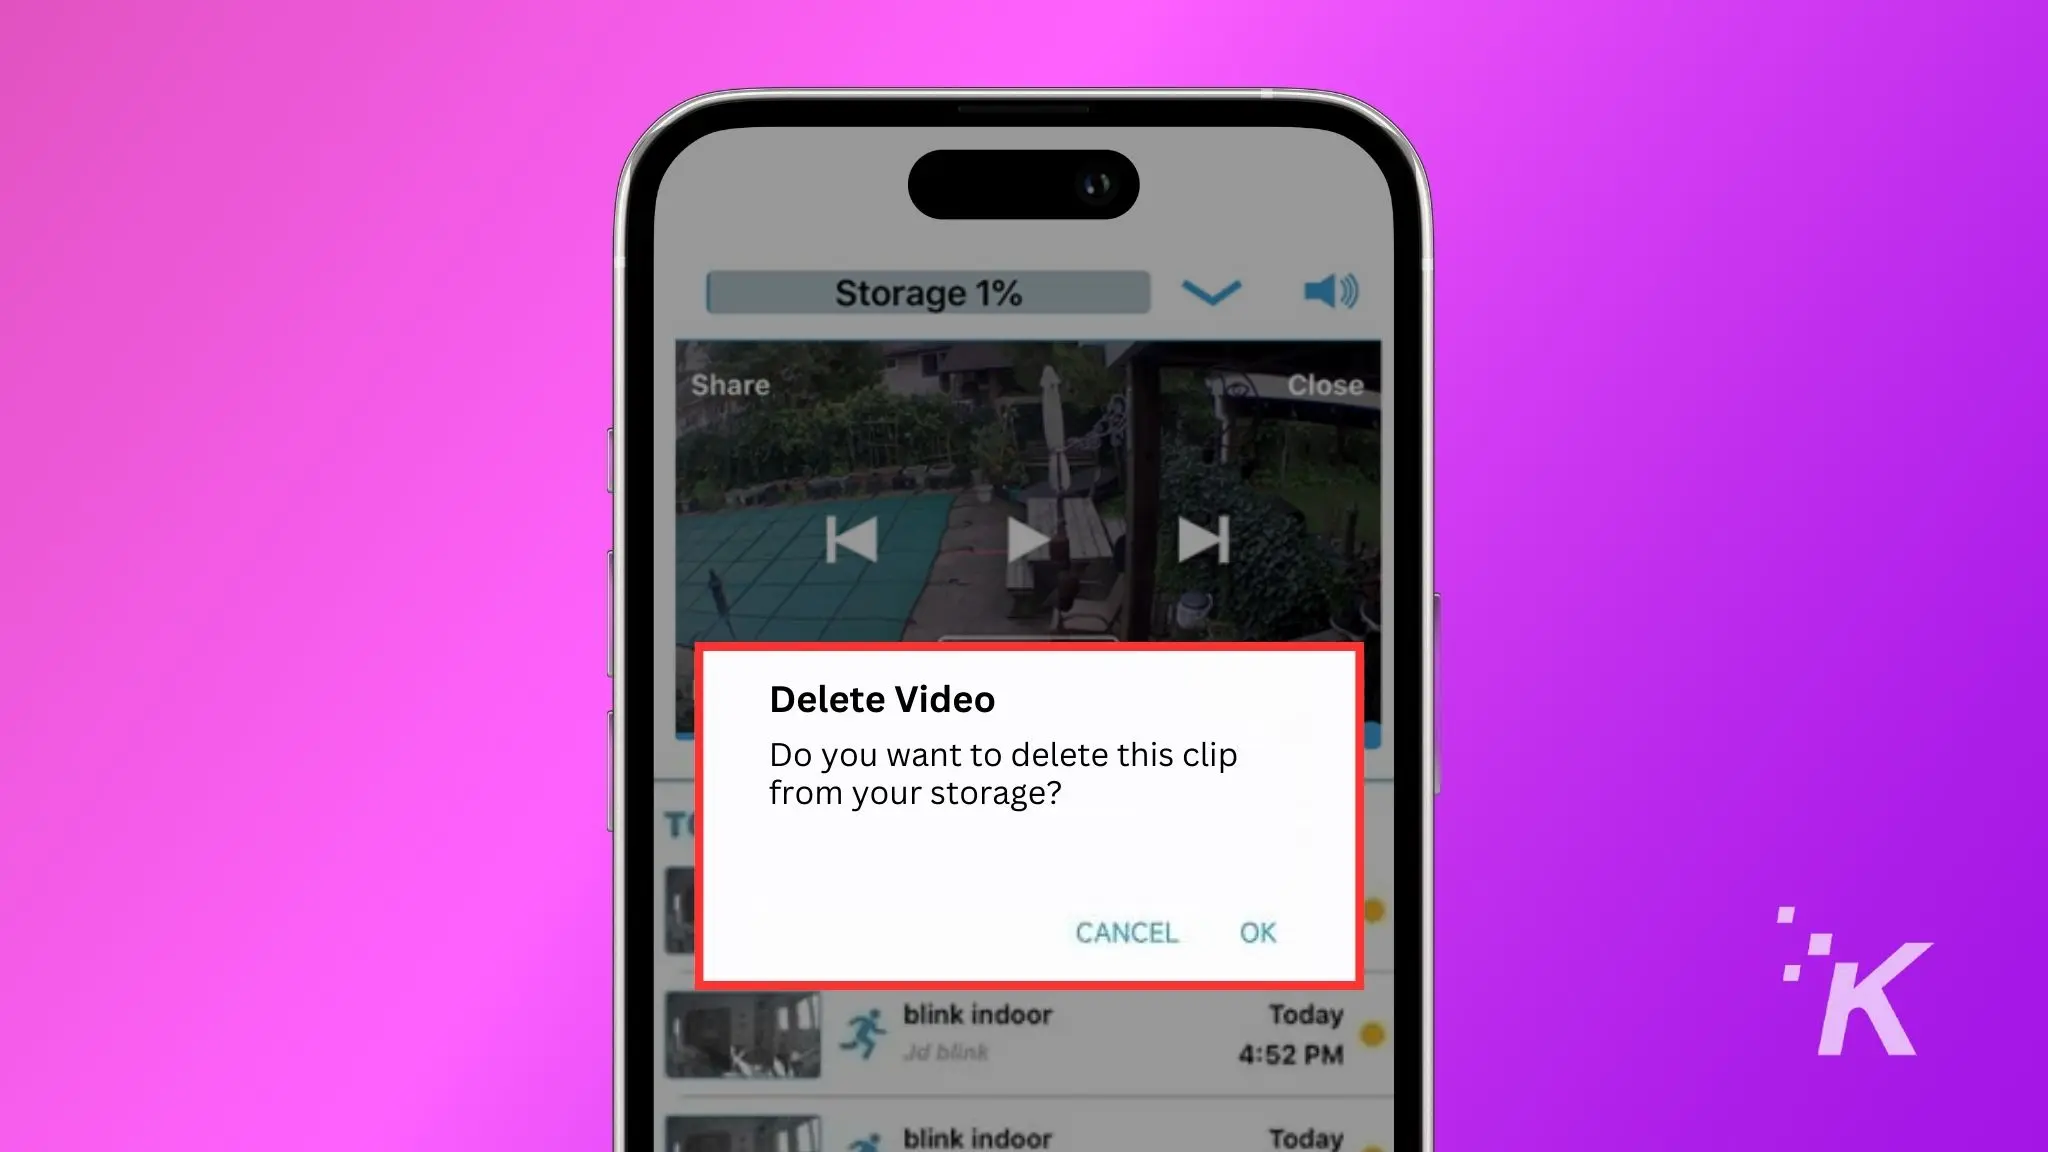
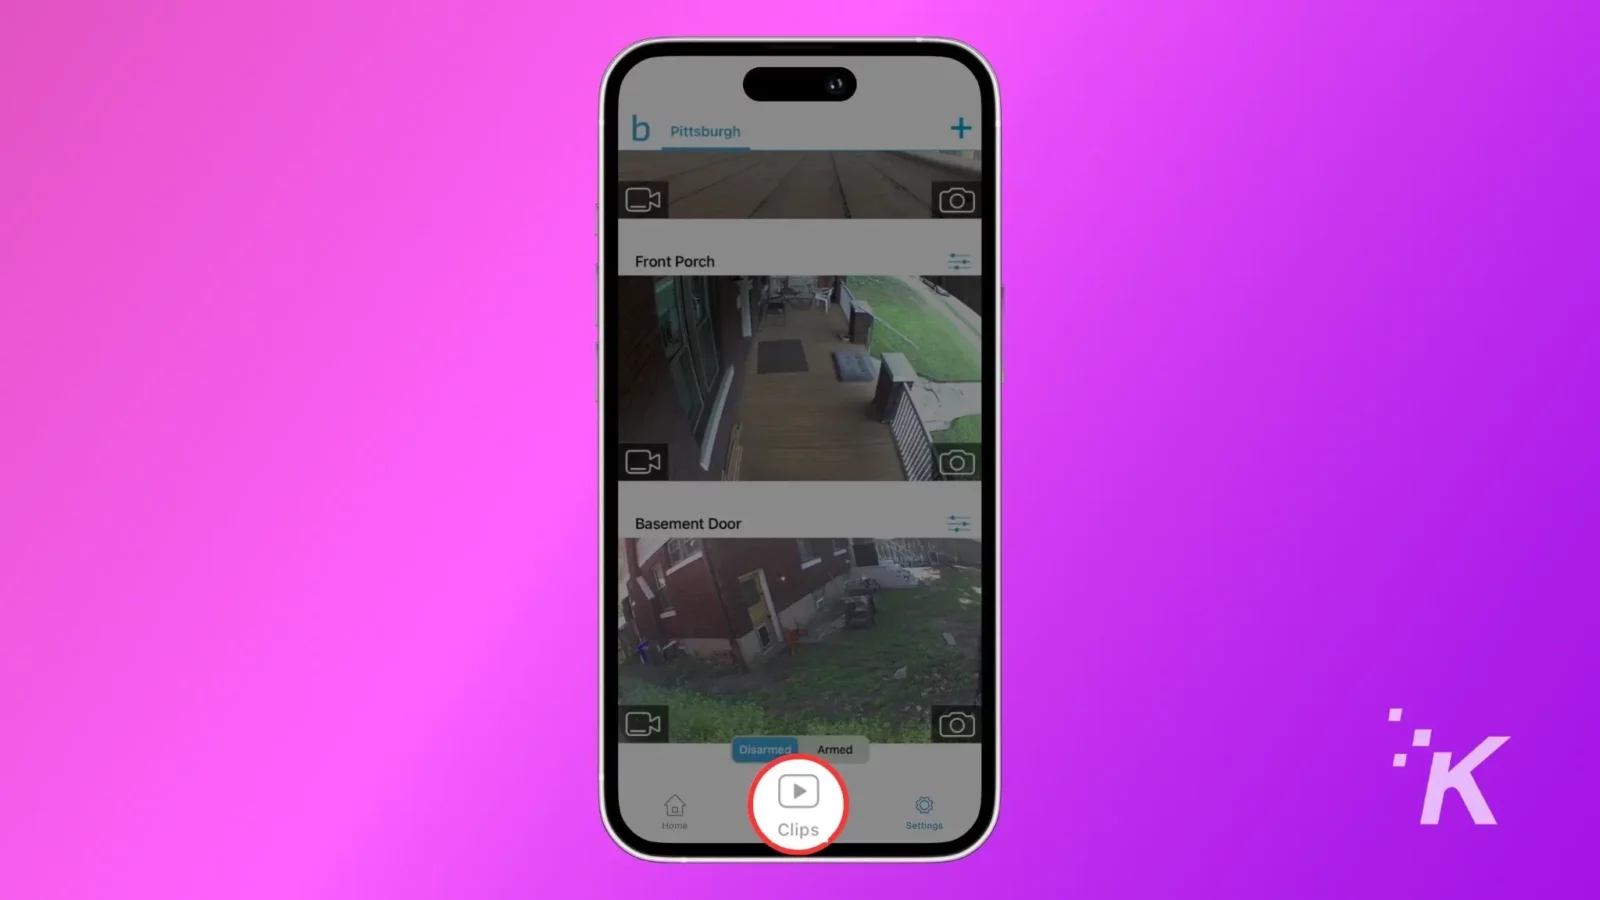
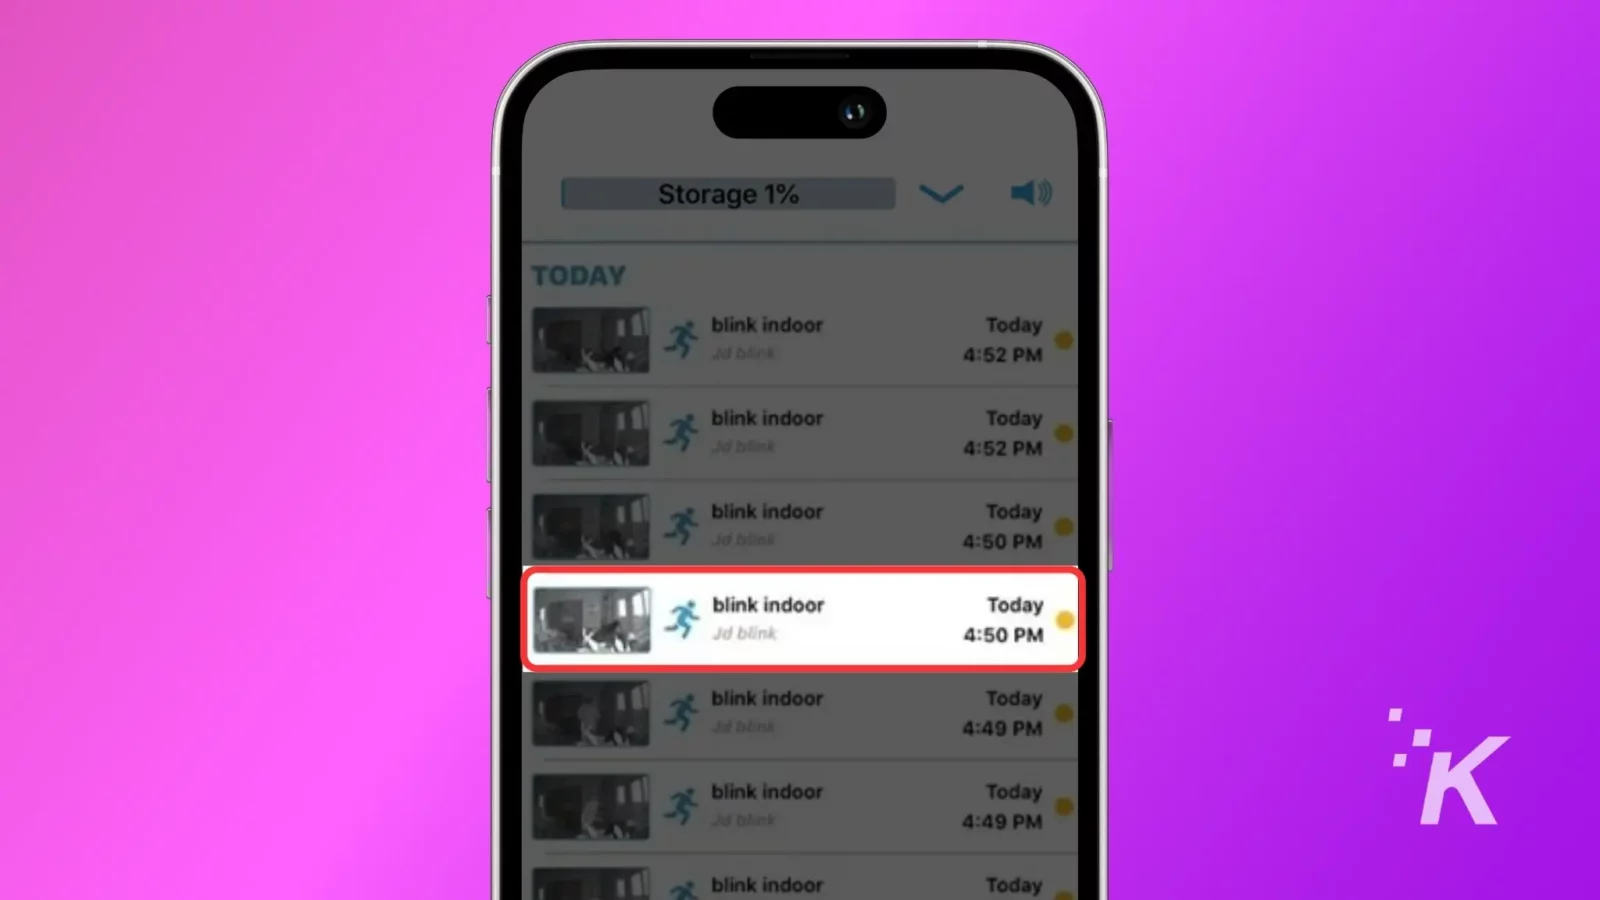
- Open the Blink App and tap on Clips at the bottom of the home screen.
- Tap on the clip you want to delete.
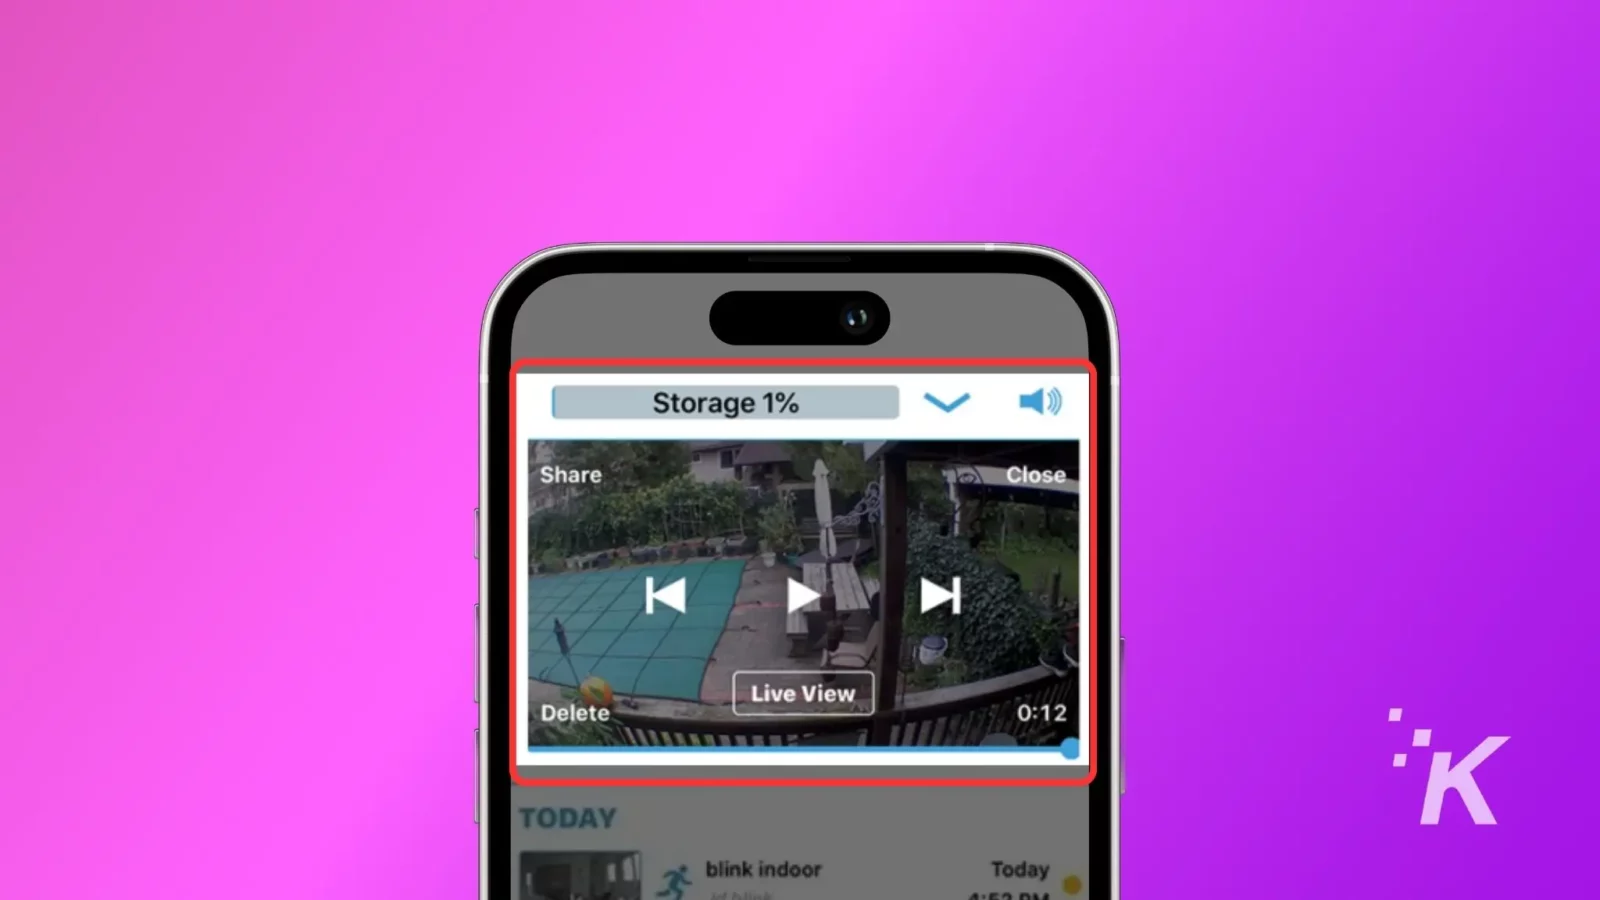
- Tap on the video player to bring up the actions overlay.
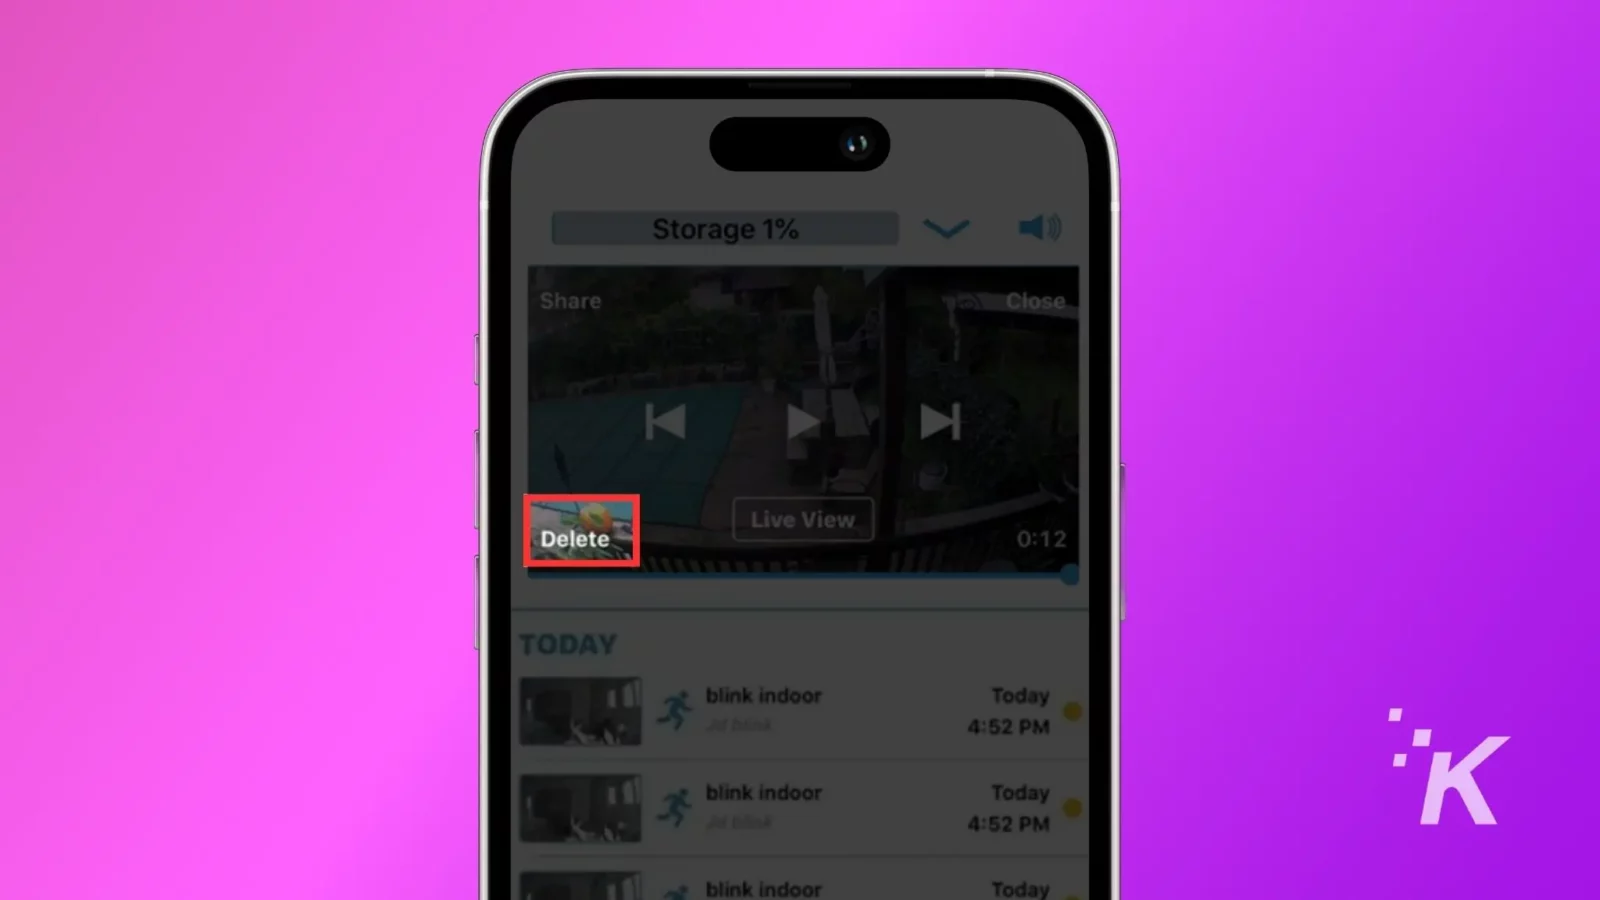
- In the actions overlay tap on the Trash Can or Delete Button to delete the video.
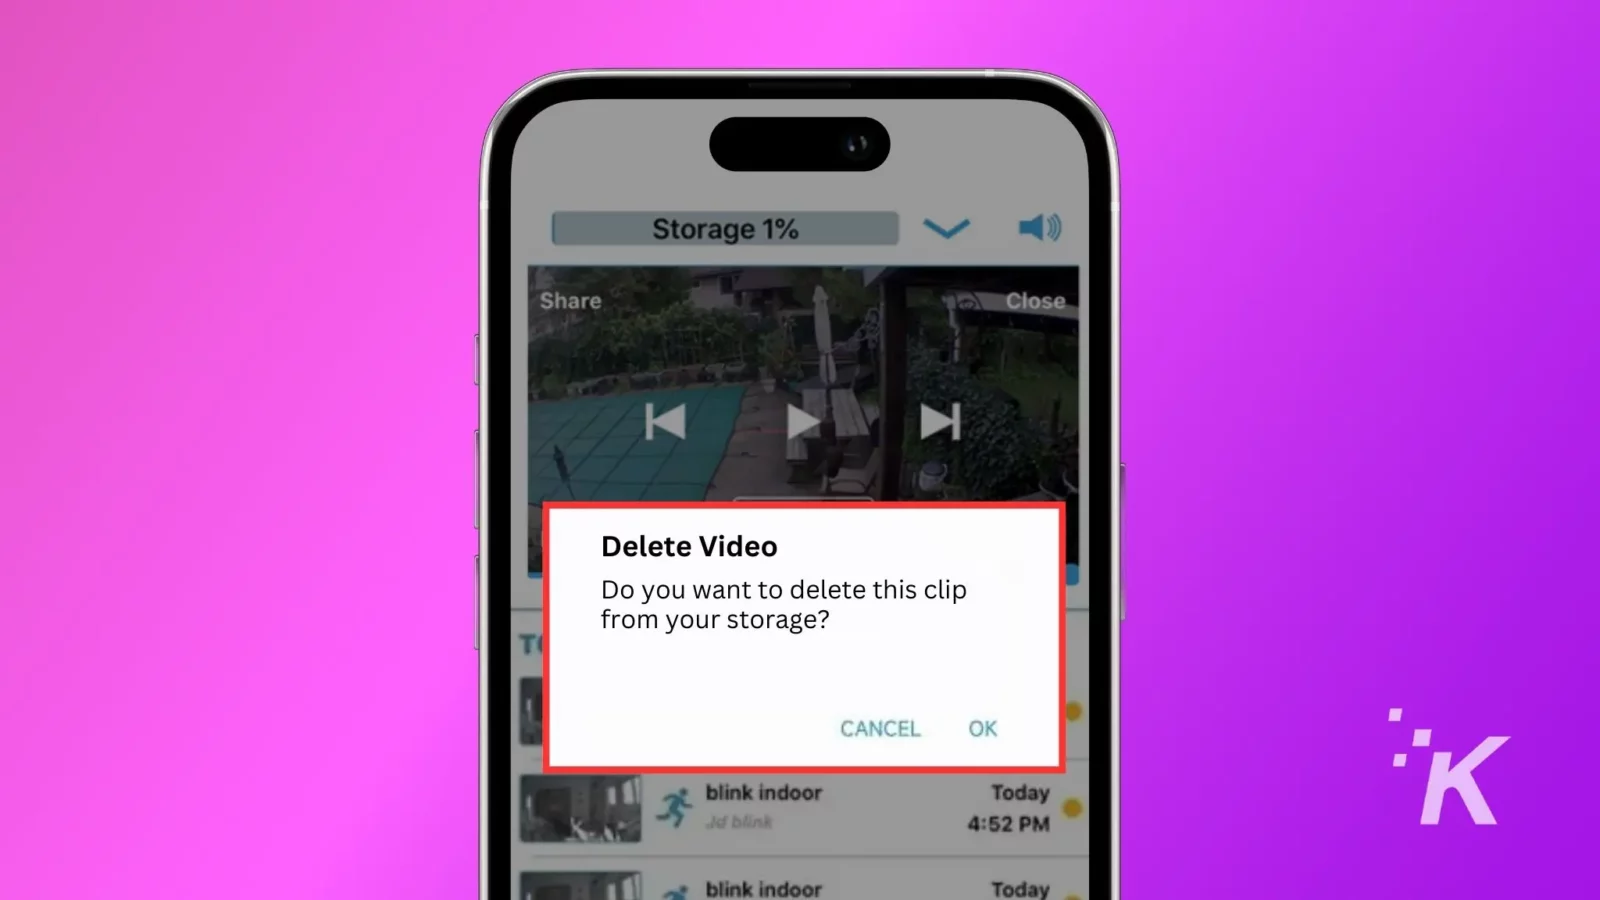
- A popup will appear on the screen, tap on yes to confirm the deletion.
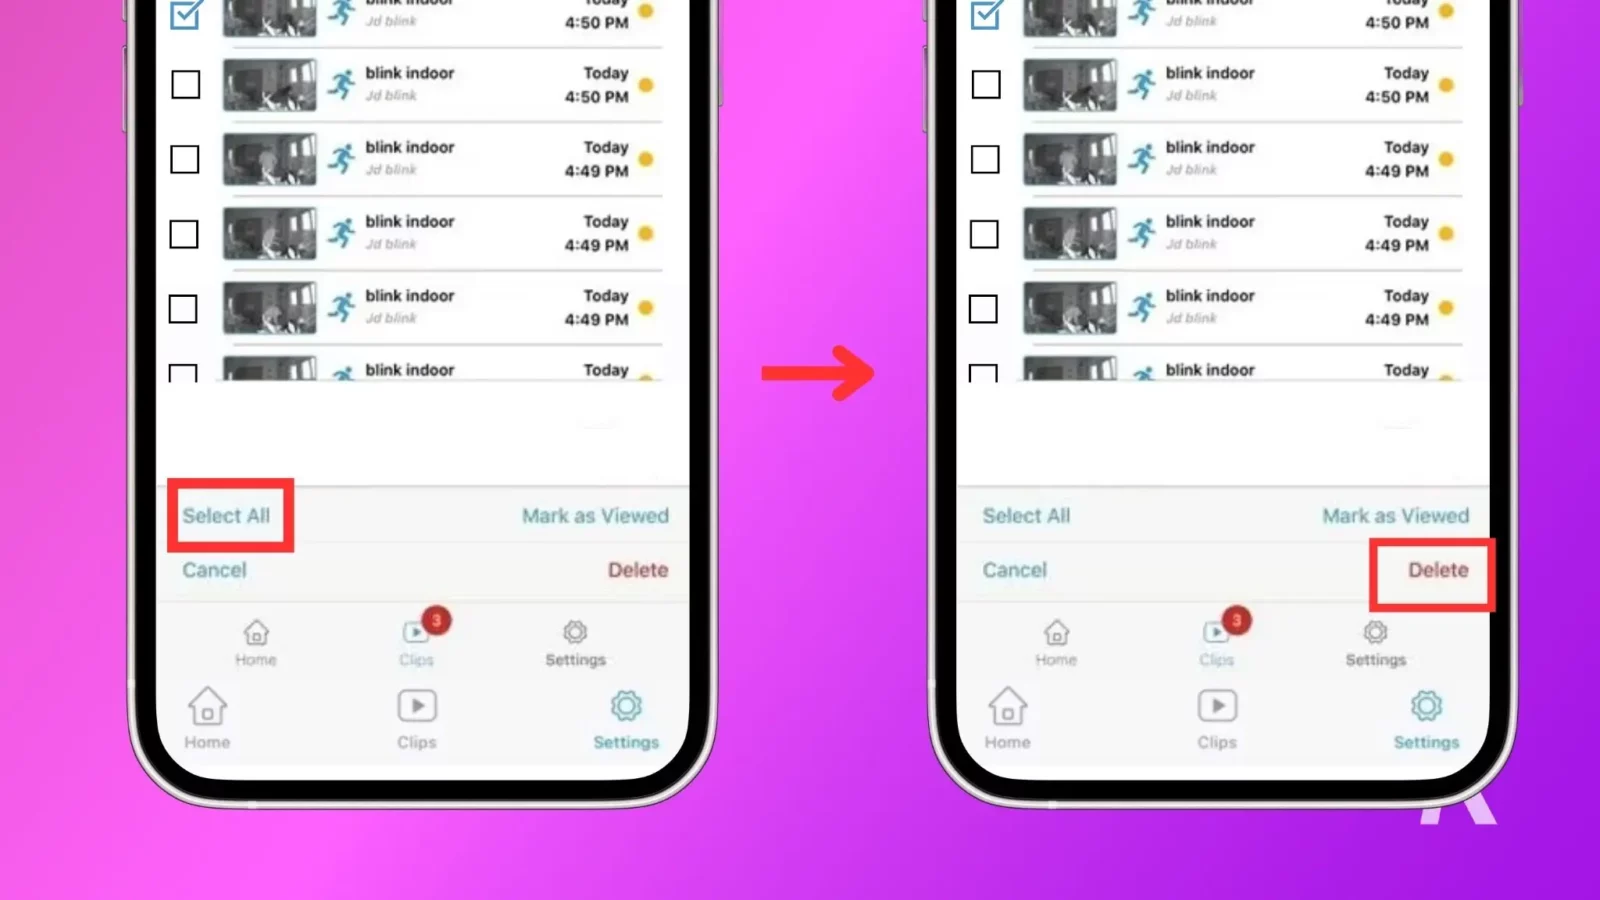
Here’s how to delete more than one clip at once
- Open the Clips section within the Blink App to see the motion clips.
- On iOS, tap on Edit and mark the check box. On Android, tap and hold a clip to select it.

- Now mark clips for deletion.
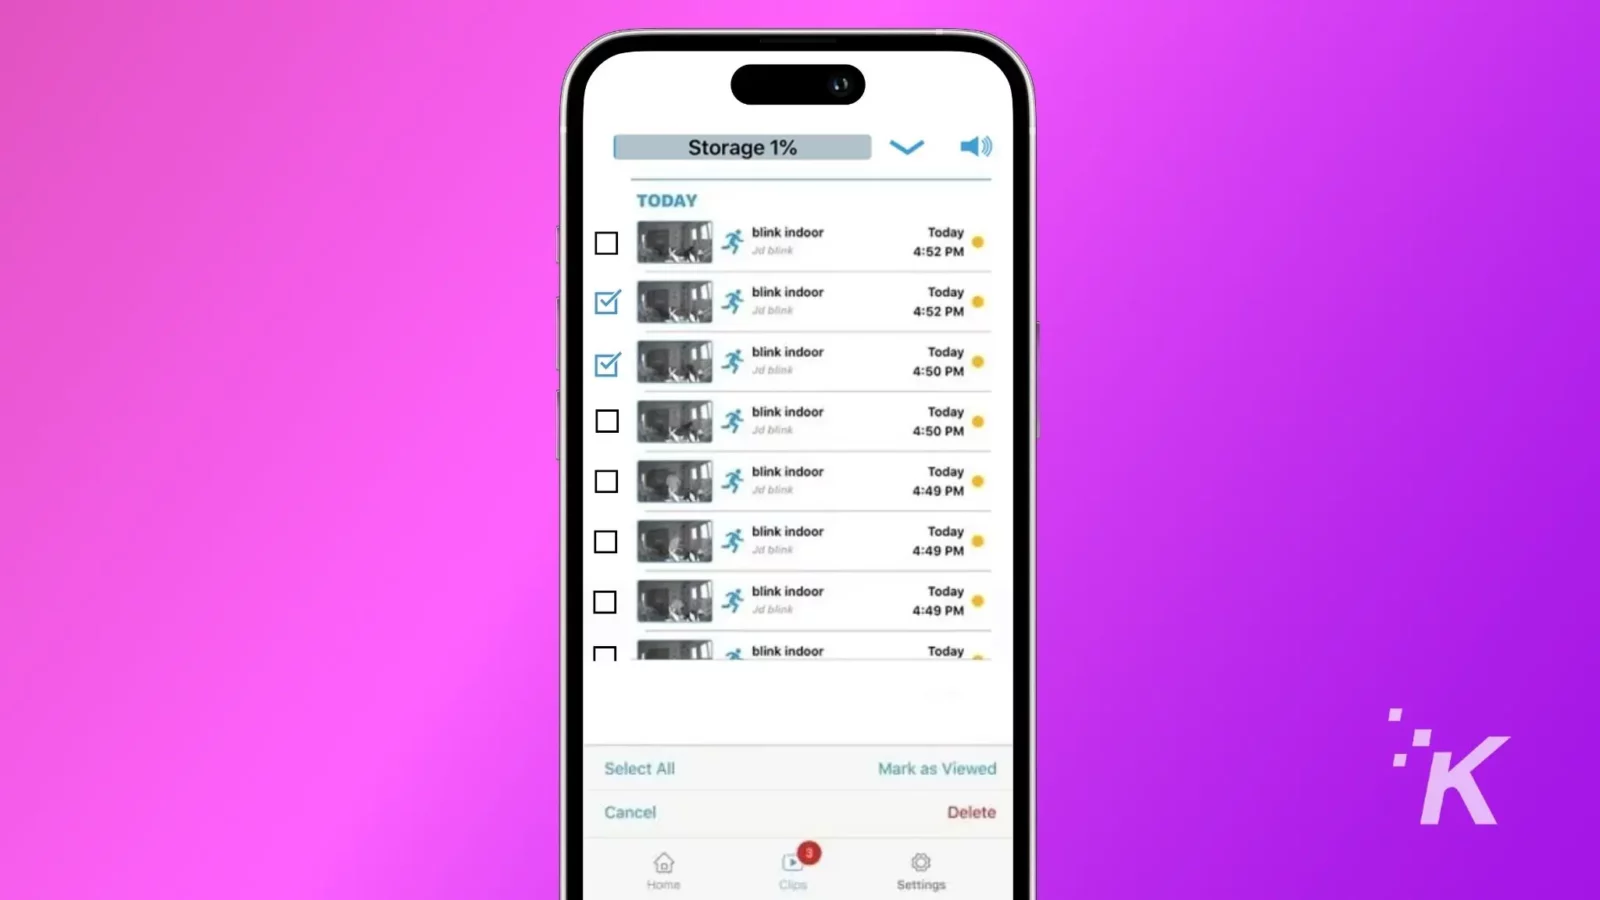
- You can choose Select All to mark all clips and then tap Delete to remove all selected clips in one go.
Delete a Blink video stored on your USB flash drive
You can access the videos stored on your local drive through the Blink app, and delete them one by one. To do so, follow the same process as if it was on the cloud storage above.
However, if you want to delete multiple clips from your Blink cameras stored on your local drive, you need physical access to the drive.
- Eject the USB flash drive from the Sync Module.
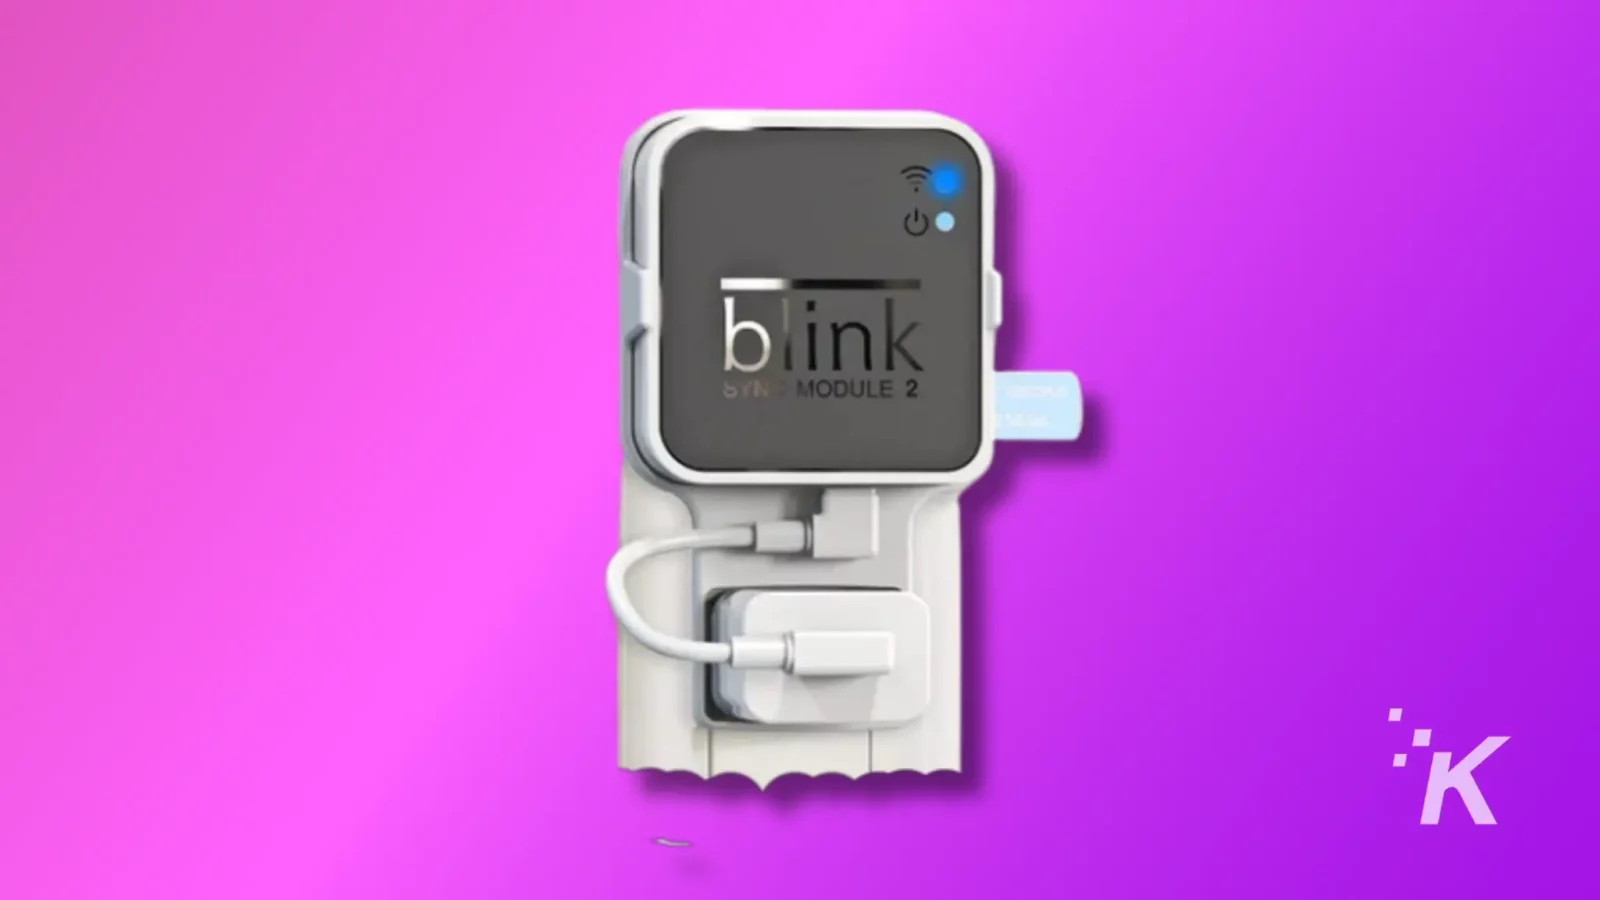
- Connect the USB drive to your computer to access the video files.
- Open the USB drive on your computer and delete as many clips as you want.
Now when you plug the USB drive back into the Sync Module, you’ll have plenty of storage space.
Now you know how to clear out your Blink video storage
Subscribers to Blink’s cloud storage plans get one of the best features included–the ability to auto-delete footage after a certain number of days.
Seriously, this is great. The likelihood of you needing a clip from weeks ago is low, and local storage options fill up quickly. It’s also a tedious job to clear local storage, even if you use a computer to access the drive.
Have any thoughts on this? Drop us a line below in the comments, or carry the discussion to our Twitter or Facebook.
Editors’ Recommendations:
- How to set up your Blink camera
- How to do a Blink Camera reset
- How to share Blink Camera access
- Blink camera Wi-Fi issues – quick fixes