Just a heads up, if you buy something through our links, we may get a small share of the sale. It’s one of the ways we keep the lights on here. Click here for more.
Facebook started in 2004, as a platform for college students at specific schools, and then was made public to the entire planet in 2006. Now in 2023, some users have photos, videos, and posts from almost two decades.
If you are contemplating leaving the platform due to reports over how your data was mishandled, but have been worried about losing your content, know that you can take it with you.
There is a way to download all of your content from Facebook. You do not have to worry about Facebook holding your media and data hostage. Take charge and snatch it back from them.
How to download your Facebook data and photos

Log in to your account
Head to Settings
Start the download process
Request your information
Wait for Facebook to package your information
If you want to permanently delete your Facebook account, follow the steps below.
How to permanently delete your account on Facebook
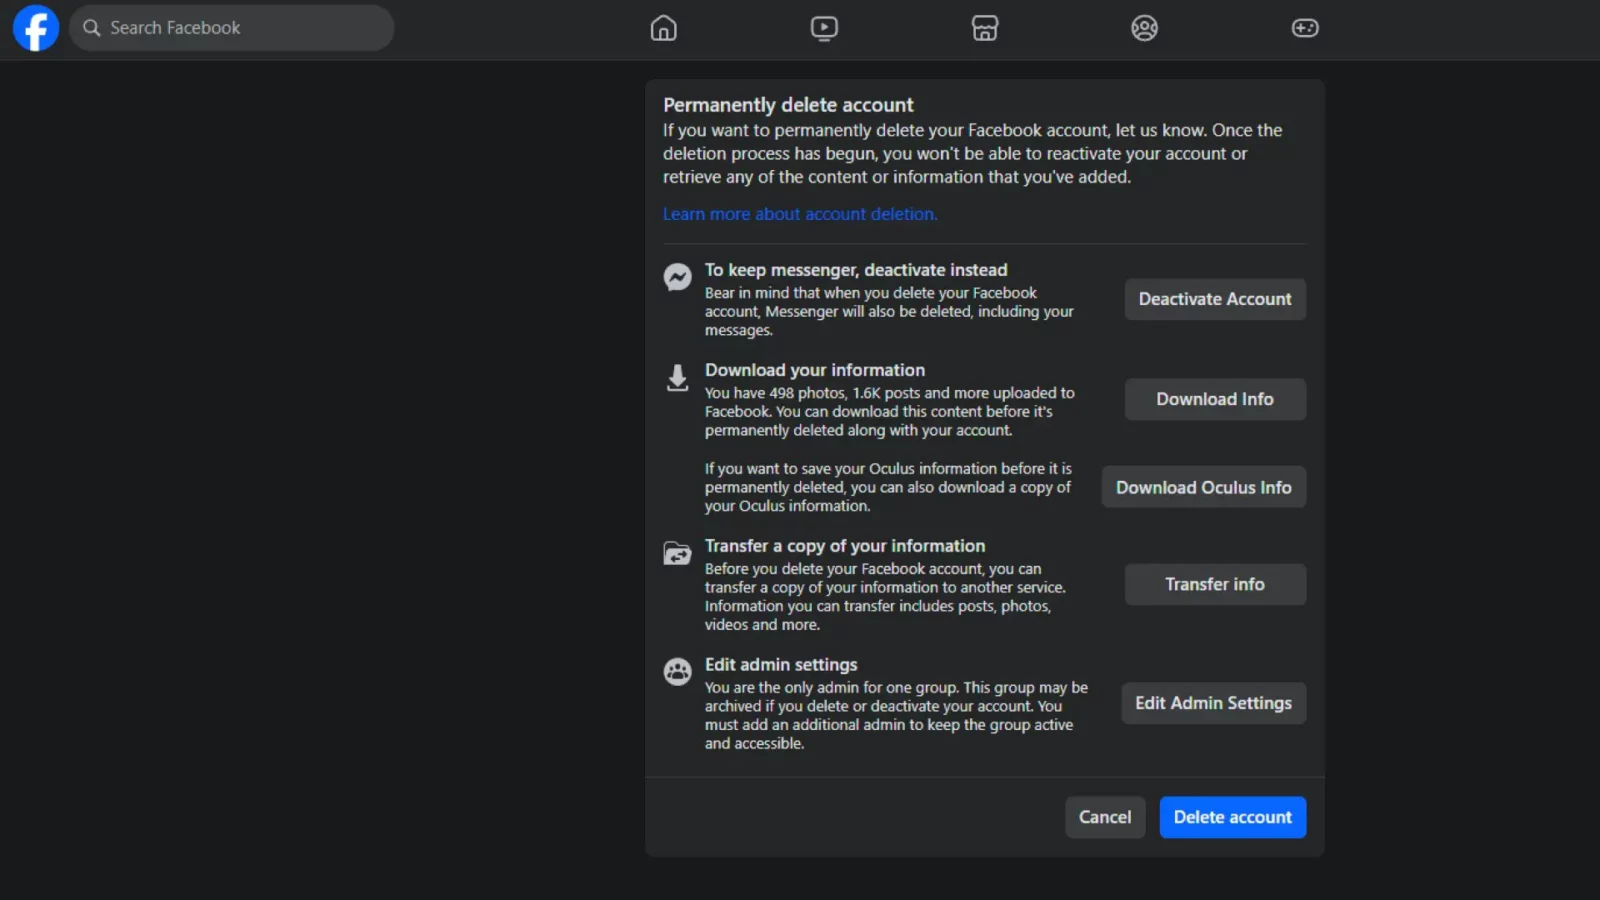
- Click on this link. This link is deep within Facebook’s Help section and is somewhat hard to find.
- Click on Delete account, enter your password, and confirm by clicking on Delete account again.
Meta says that you can reactivate your account at any time in the 30 days following the deletion request. After that, the deletion process will start and you will lose access to your data and uploads.
After you are done with deleting your account, make sure you remove the Facebook app from all of your devices including cell phones, tablets, smart TVs, and anywhere else you have it.
Another good preventive measure to take to ensure all of your data is deleted is to delete all of the other third or first-party apps you have connected to Facebook before you delete your account.
It seems like other applications collect data from Facebook, so it is better to be safe than sorry.
Facebook still tracks you even if you don’t have an account, but at least you’re not giving them additional information.
What do you think about the recent Facebook reports about the social media platform’s data collection? Do you feel safe on the website? Are or have you deleted your Facebook account? Let us know down in the comments or carry the discussion to our Twitter.
Editors’ Recommendations:
- Instagram and Facebook track you on other websites – here’s how
- Meta tracks you on Facebook and Instagram through in-app browsers
- Surprise, surprise – Facebook still tracks you even if you deactivate your account
- How to create an anonymous Facebook account
Follow us on Flipboard, Google News, or Apple News