How-To
How to quickly record your Mac’s screen
We’ll walk you through each step of recording your Mac’s screen here.

Just a heads up, if you buy something through our links, we may get a small share of the sale. It’s one of the ways we keep the lights on here. Click here for more.
If you’ve ever had something hectic take place on-screen but weren’t quick enough to record it, you’ll understand the pain of having to rely on your memory to capture epic moments.
But it doesn’t have to be that way. With quick fingers and a certain level of calm, you can swiftly start a screen recording session whenever the need arises.
The steps are simple once you know them, and no on-screen event needs to go unrecorded when you’re around. Let’s discuss how to quickly record your Mac’s screen.
Start screen recording in macOS

If you need to record your screen in macOS and you’re on Mojave or newer, follow along with the quick guide below and record to your heart’s content:
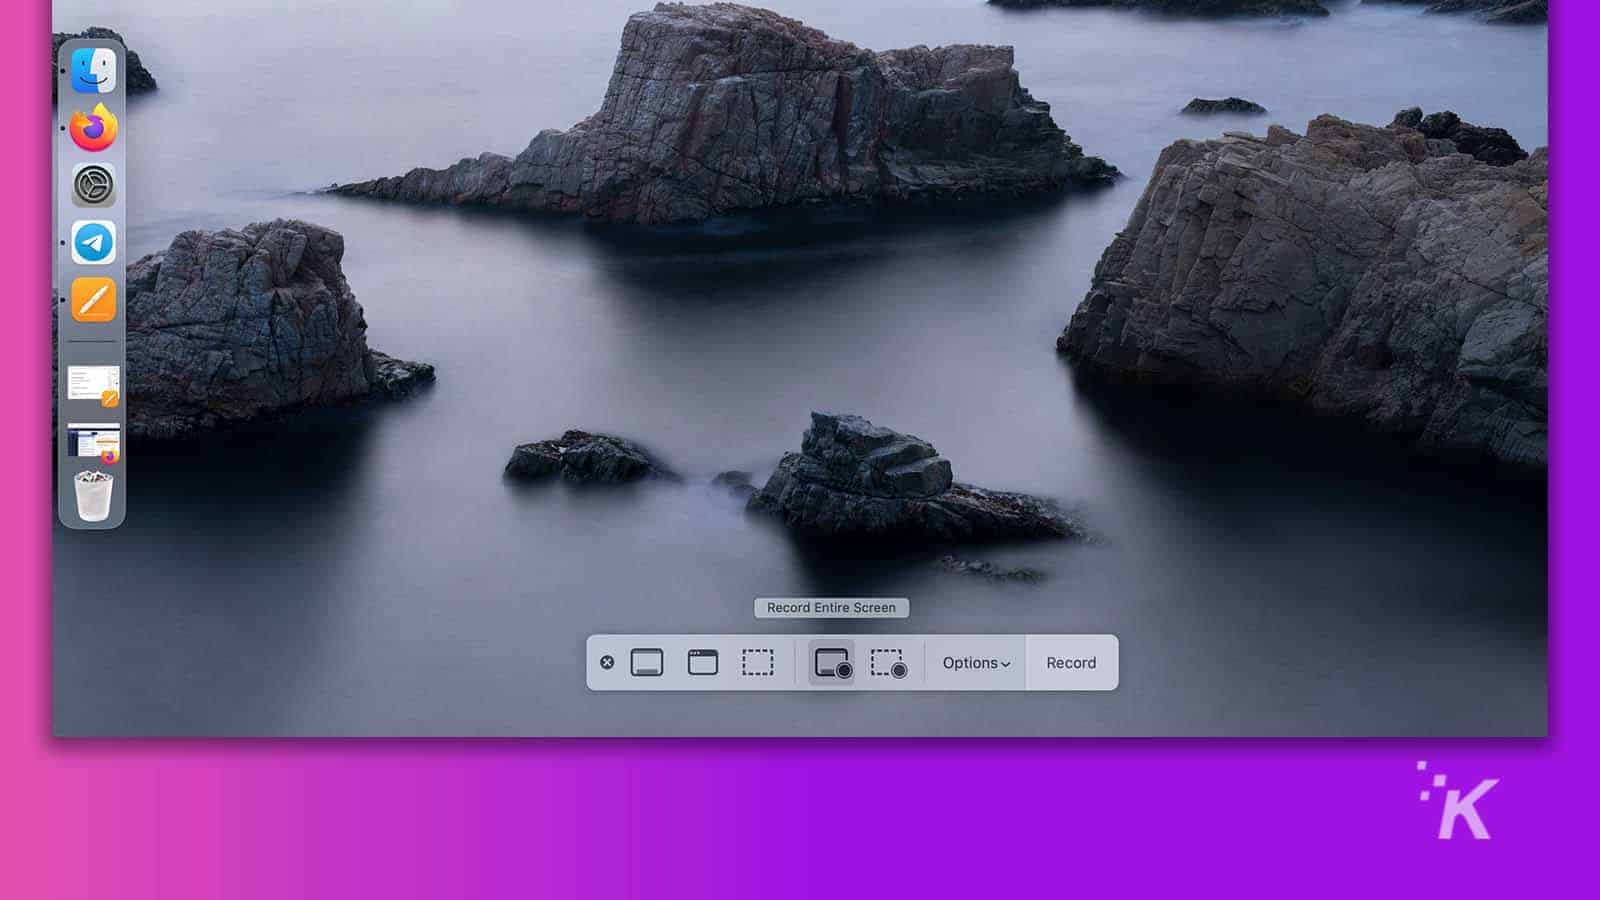
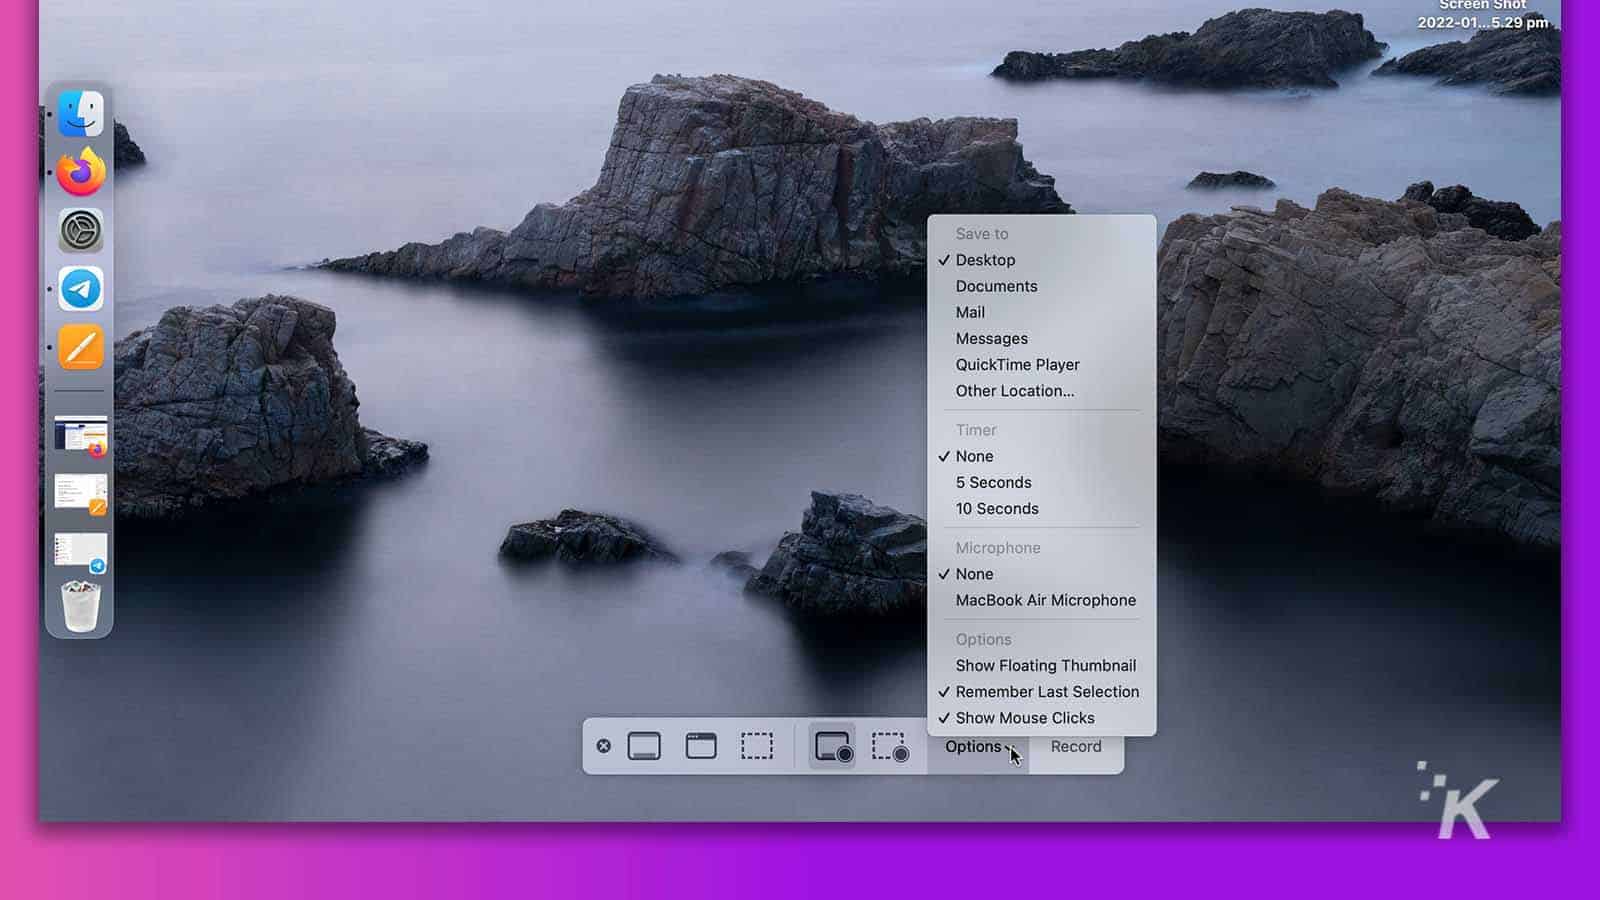
When the recording starts, a Stop button will appear in the top menu bar. Clicking stop at any time will end the recording and save the movie file to the location specified in Options.
Other important settings include Timer for starting a countdown when you hit record, Microphone for simultaneously recording sound, and Show Mouse Clicks to animate all clicks in the final video.
Use QuickTime to record your Mac’s screen
If you’re using an OS earlier than Mojave, you won’t have access to the screenshot bar. But that doesn’t mean you can’t capture epic moments. Even in ancient times, Apple still provided an app for recording your screen.
Here’s how to record your screen using QuickTime:
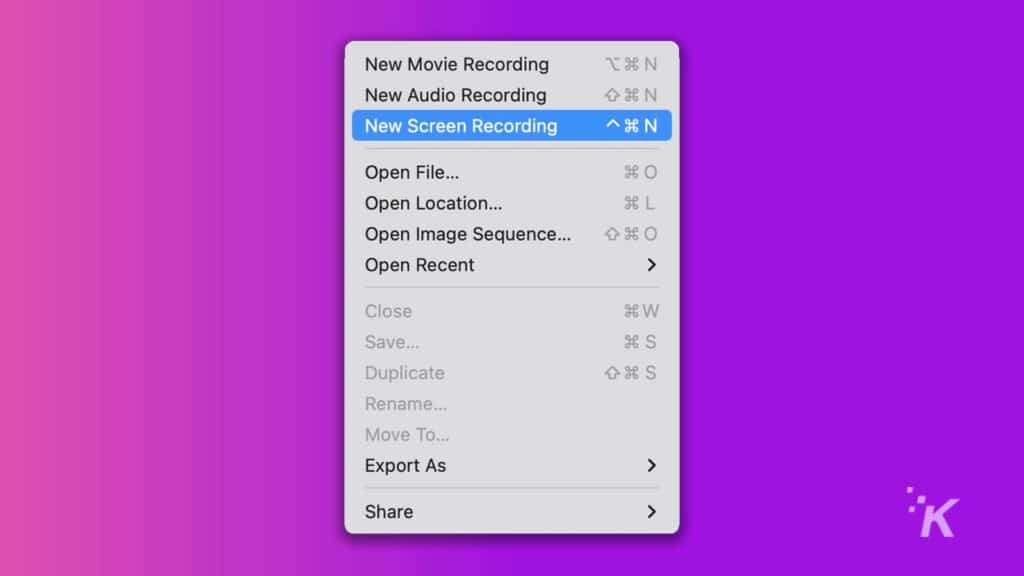
- Launch QuickTime Player
- Click File > New Screen Recording
- Click the Downward arrow beside the Record button and change settings as required
- Click Record
You can end the recording at any time by clicking the Stop button in the menu bar. If you try to record your screen using QuickTime in macOS Mojave or later, the screenshot bar will instead appear.
Screen recording is simple in macOS
The screen recording tool in macOS is fairly simplified. While it definitely does an excellent job of capturing your screen, it doesn’t provide any fancy features or super-special settings.
READ MORE: How to screen record on iPhone
However, when you need to quickly capture those hectic on-screen happenings, the macOS screen recording tool gets it done.
Have any thoughts on this? Let us know down below in the comments or carry the discussion over to our Twitter or Facebook.
Editors’ Recommendations:
- Sleep vs. shutdown: what’s better for your Mac?
- How to type out emojis on a Mac
- How to change icons for files and folders on Mac
- This app turns your iPhone into a wireless mouse for your Mac
Follow us on Flipboard, Google News, or Apple News