Just a heads up, if you buy something through our links, we may get a small share of the sale. It’s one of the ways we keep the lights on here. Click here for more.
Quick Answer: To screen record on iPhone, swipe from the right-hand corner down to open Control Center. Then, tap the Record button, and a three-second countdown will begin, giving you time to navigate to the screen you want to record.
Ever feel like your iPhone is just full of surprises? Cue iOS’s built-in screen recording feature – it’s a game-changer.
Screen recording on an iPhone lets you quickly record whatever is on your screen, but to use it; you’ll need to know how to screen record on iPhone.
Screen recording is great. Maybe you want to save clips of the game you’re playing or need to show a family member how to do something on their own phone. Regardless of the reason, the feature is extremely beneficial.
Once recorded, you can send the clips to your friends, upload them to Twitter, or add them to your Instagram story.
If you want to start using this feature, you’ll first need to set it up. Don’t worry; we’ll walk you through everything you need to know about recording your screen on iPhone.
Here’s how to turn on screen recording on iPhone.
How to add the screen record widget on your iPhone Control Center
Unlike Android phones, you won’t need to download an app or root your device to record your screen. Thankfully, it’s baked into iOS, but you’ll have to set it up first.
What we’re essentially doing here is telling our iPhone that we want the screen record widget accessible from our Control Center. This way, it’s easy to reach when we need it. Here’s how to do it.
Settings
Control Center
Add the screen record widget
That places the shortcut for Screen Recording into the Control Center. While you’re there, ensure the toggle next to ‘Access Within Apps‘ is set to ‘on’
How to screen record on iPhone
You’re now all set to start recording your screen.
- Open the app or website you want to record. You could also record your homescreen or anywhere else you deem fit. Remember, you can pretty much record anything on your iPhone.
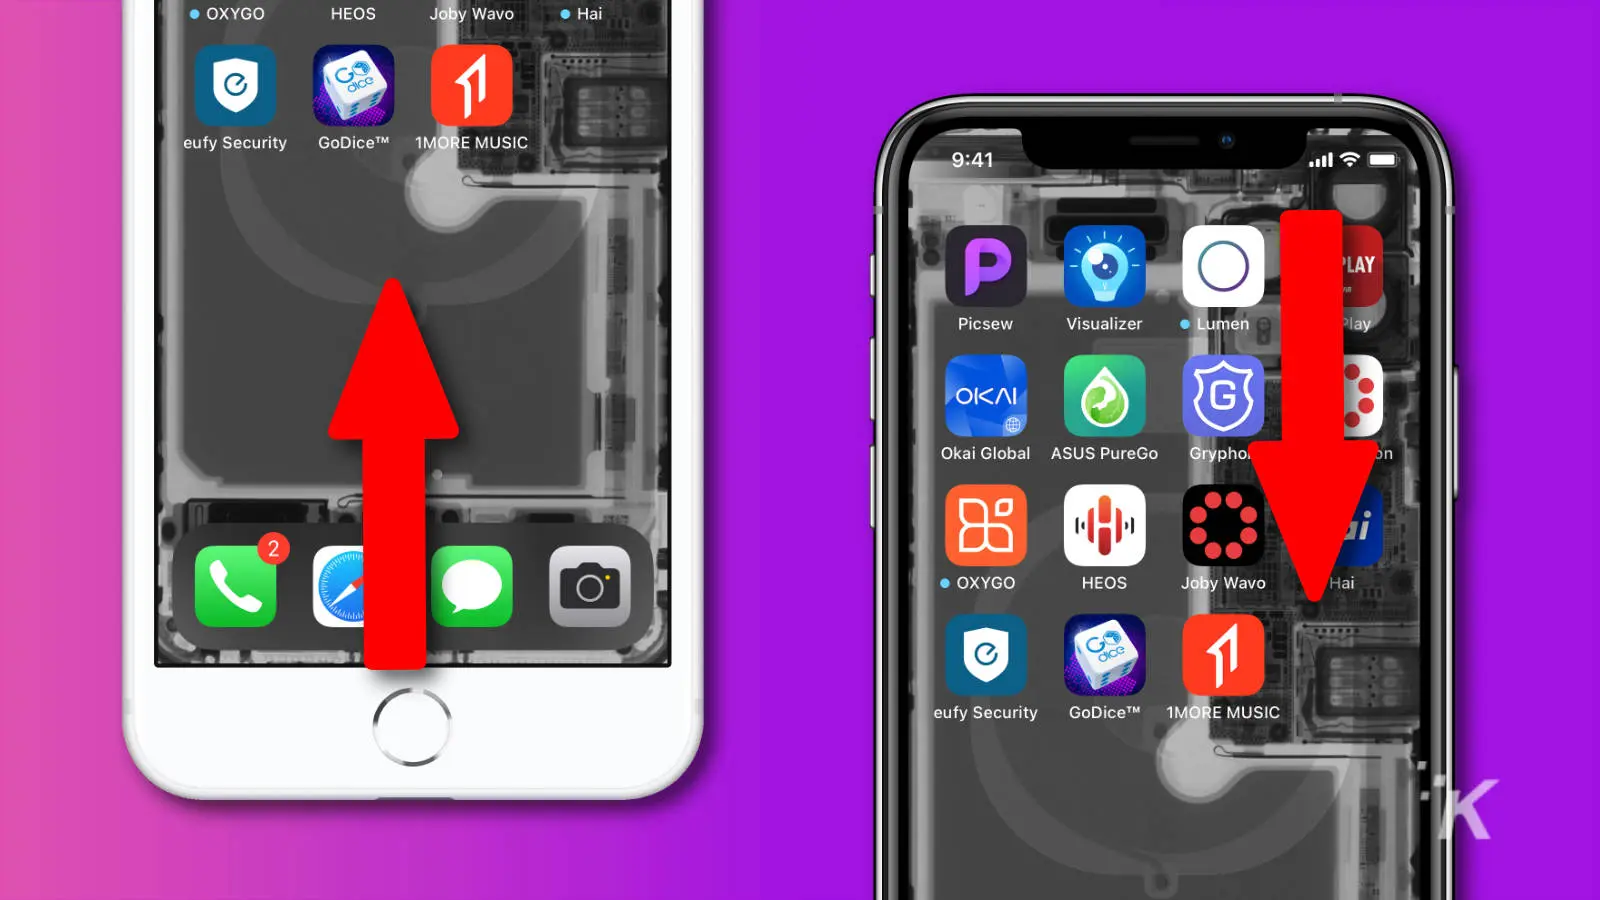
- Open the Control Center. On iPhones earlier than the iPhone 8, that means swiping up from the bottom, and on the iPhone X or later it’s pulling down from the top-right corner
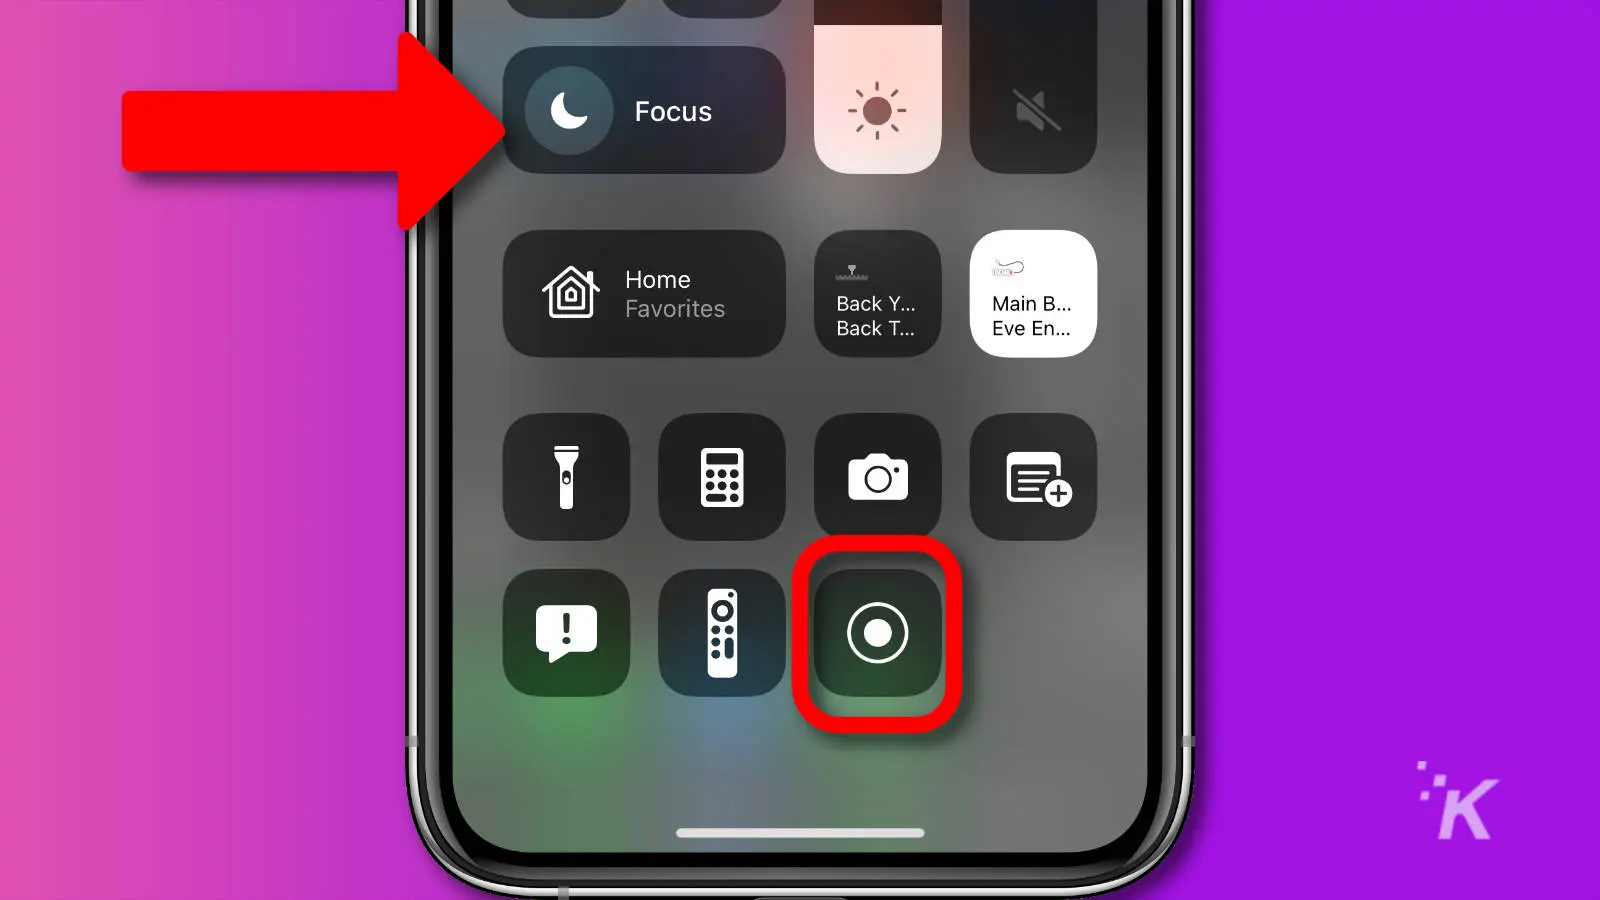
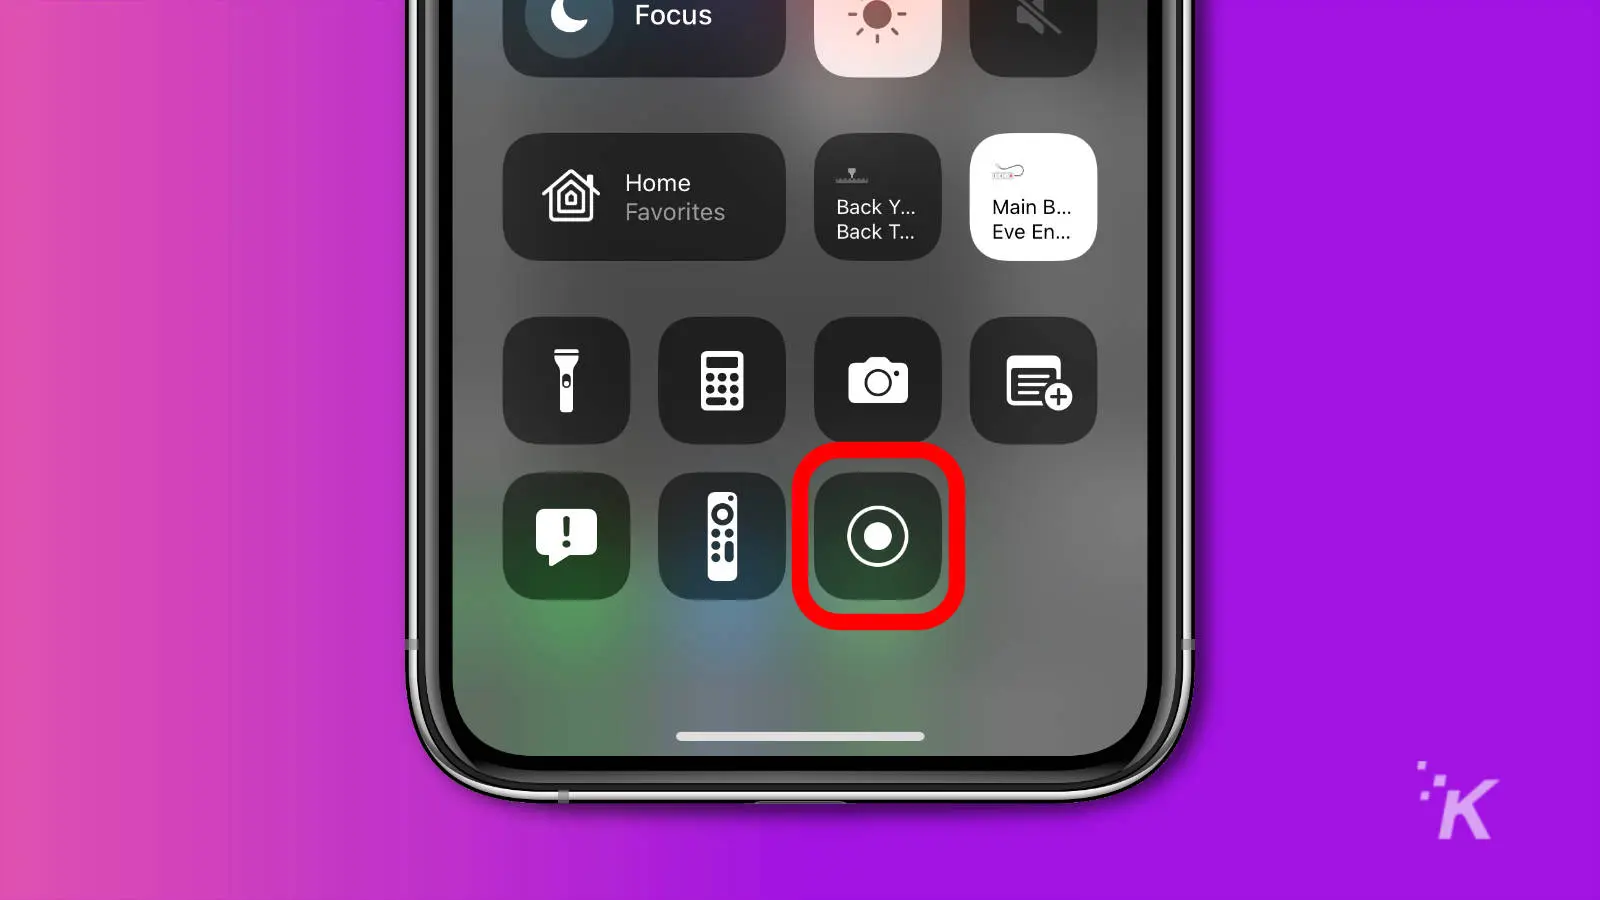
- Tap the Record Screen (the circle) icon to start recording. It won’t start immediately; you get a three-second pause before it records so you can switch back to the app you want to record
- To stop recording, swipe to get to the Control Center again and tap the Screen Record button one more time
For folks who learn better by watching, we made a step-by-step video outlining the instructions above
It’s also worth tapping the Crescent Moon or Focus icon (shown above) to set your iPhone into Do Not Disturb mode so you won’t get notifications in your recording.
While recording, you’ll see a red bar at the top of the screen. Newer iPhones with a notch will have the red bar at the top-left. That’s a visual indicator to remind you that you’re recording.
You can tap the bar at any time to get a pop-up message that asks if you want to stop recording.
How to record your voice while screen recording on iPhone
The above method lets you record both the video and audio generated by your phone, but you might want to record yourself talking at the same time.
To do that, turn on your microphone; the process is almost the same.
- When you’re in the Control Center, but before you start recording, press and hold the Screen Record button
- Then tap the microphone button on the pop-up screen to turn your microphone on
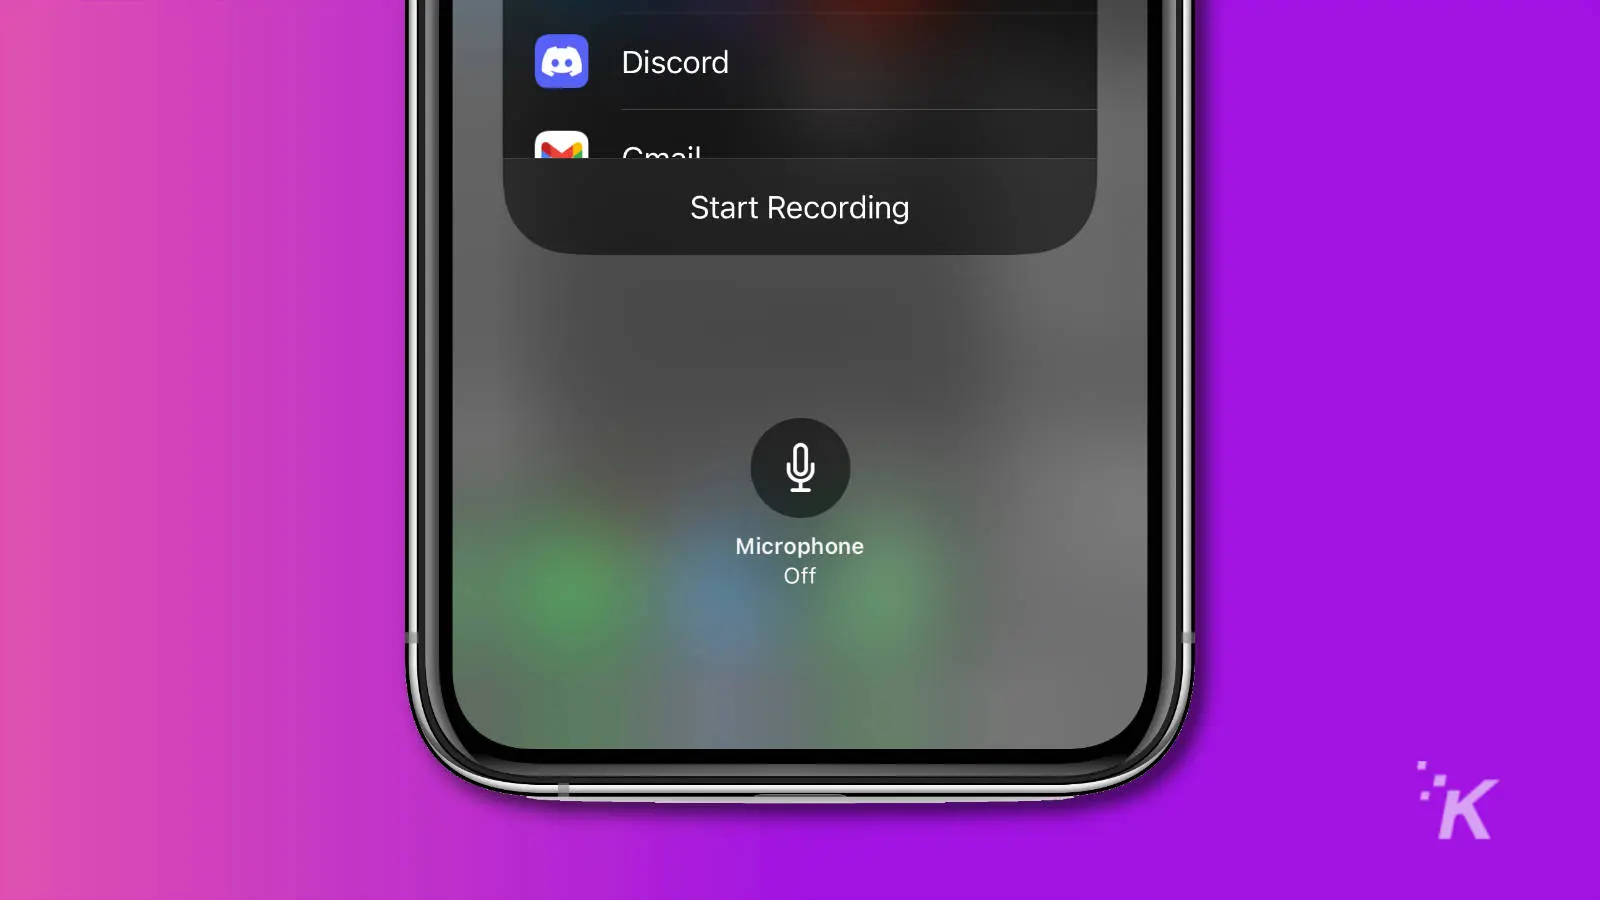
- Lastly, tap Start Recording to start the three-second timer letting you know recording will start soon
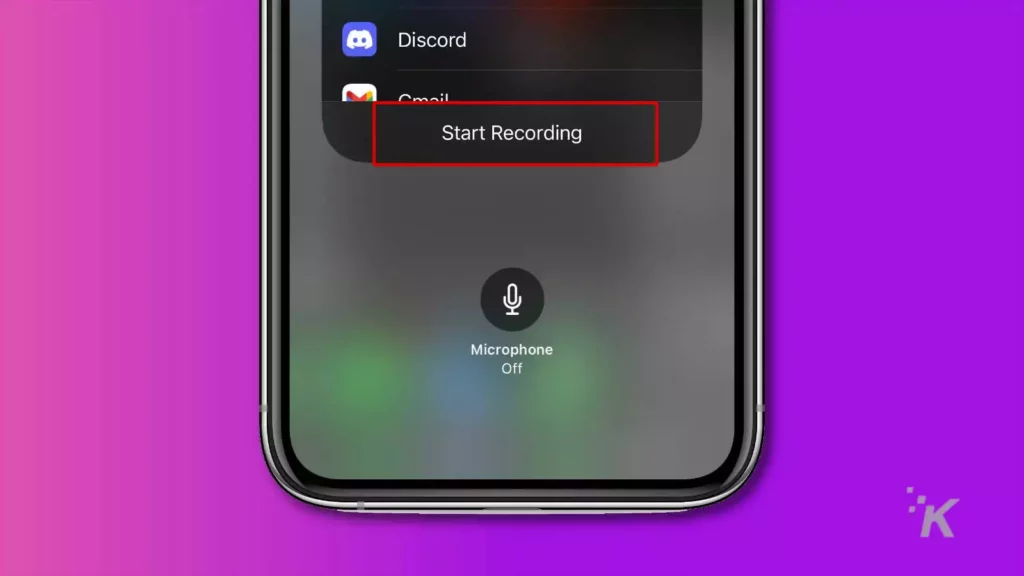
The microphone setting saves, so the next time you do a Screen Record it will be on. Turn it off before recording if you don’t want it.
Where to find your iPhone screen recordings
Once your recording ends, your newly generated screen recording will be found with the rest of your photos and videos in the Photos app.
Your recorded videos give you all the options you normally get with iOS videos. You can send them to friends or other apps. You can also use the built-in edit feature to trim the length.
Apple’s screen record feature is great for preserving content
Whether you want to record your screen for yourself or to share something with your friends, the iPhone’s screen recording feature is a great addition to your phone.
We’re not sure why Apple doesn’t include the screen record button by default in the Control Center, but thankfully, you can turn it on in just a couple of steps.
What do you think? Do you see yourself using the screen recording feature? Carry the discussion over to our Twitter or Facebook.
Editors’ Recommendations:
- How to customize Slack’s new redesign
- Can the iPhone X wireless charge?
- Facebook now has a quiet mode – here’s how to turn it on and off
- How to snooze notifications on Slack so alerts don’t drive you up the wall






BlackScreen
June 21, 2023 at 1:13 pm
Thank you so much admin for the great post
Florence Jenny
July 6, 2023 at 6:10 am
Thank you tomcyberghost