How-To
How to stop Windows 11 apps from opening during startup
Eliminating extra startup apps can help your PC boot a lot faster.
Just a heads up, if you buy something through our links, we may get a small share of the sale. It’s one of the ways we keep the lights on here. Click here for more.
Over time, our PCs can accumulate a lot of applications, and some of them may automatically open on startup on Windows 11. However, knowing how to stop apps from opening can actually benefit your system.
When you have too many apps launching at startup, the system can take longer to boot, and overall performance can decrease.
Uninstalling unwanted software is a great way to free up resources, including hard drive space. But not all applications deserve to be deleted.
Fortunately, Microsoft makes disabling startup items easy in Windows 11. Let’s discuss how to prevent apps from opening automatically when your PC boots.
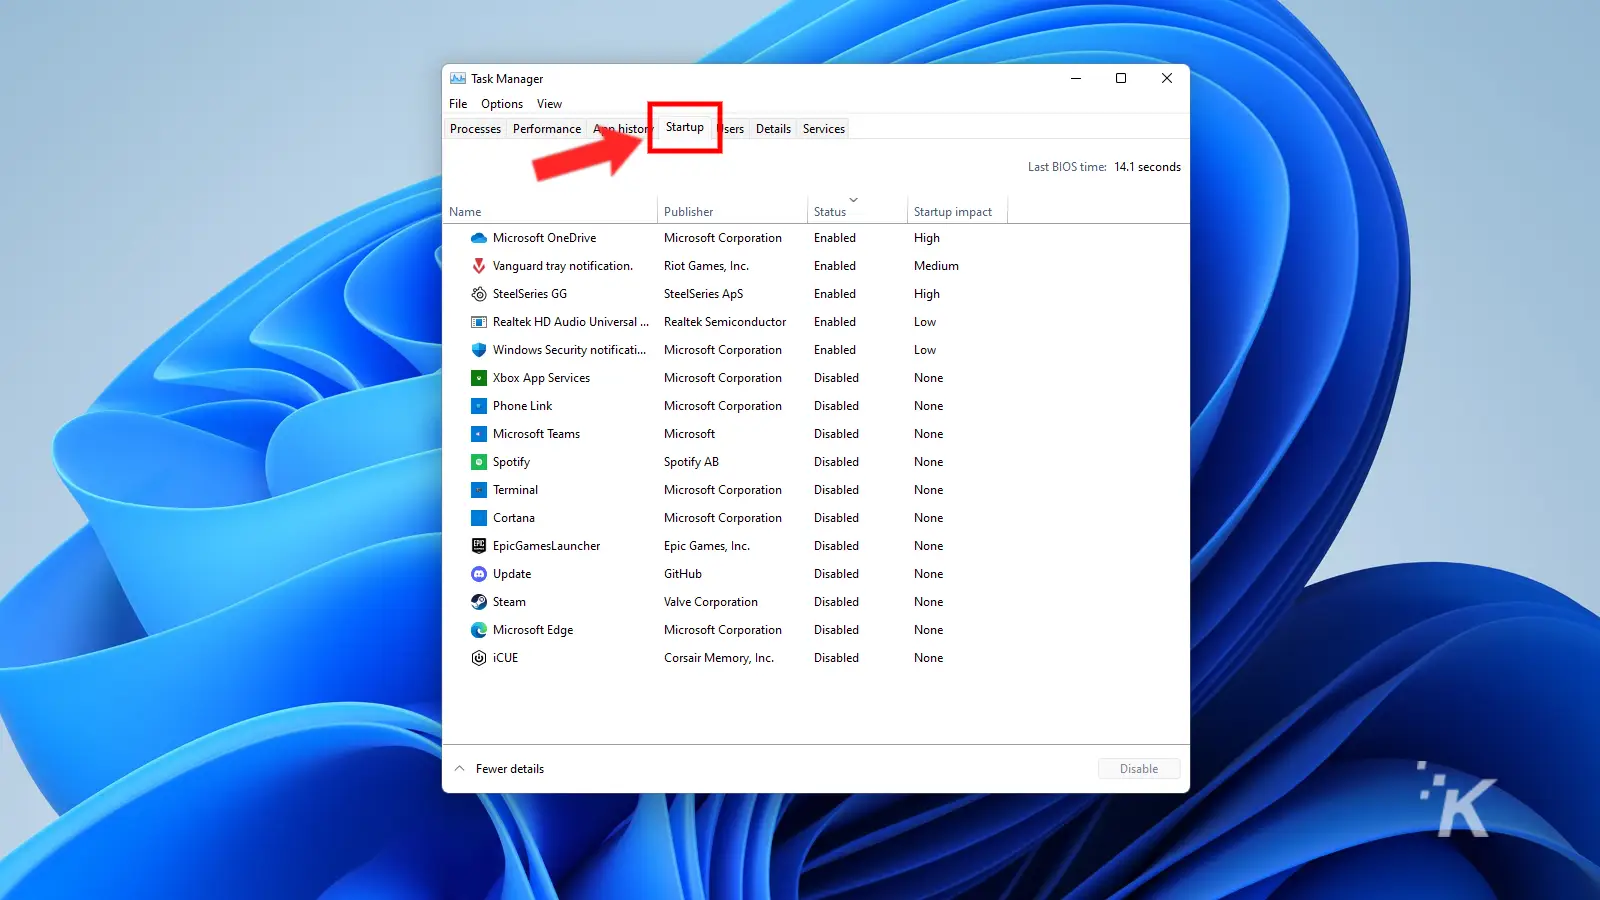
Use Task Manager to disable Windows startup items
Using Task Manager is one of the quickest ways to modify the startup behavior of certain applications on Windows 11. With just a few clicks, you can stop any unwanted software from launching when your PC boots.
Here’s how to disable Windows startup items with Task Manager:
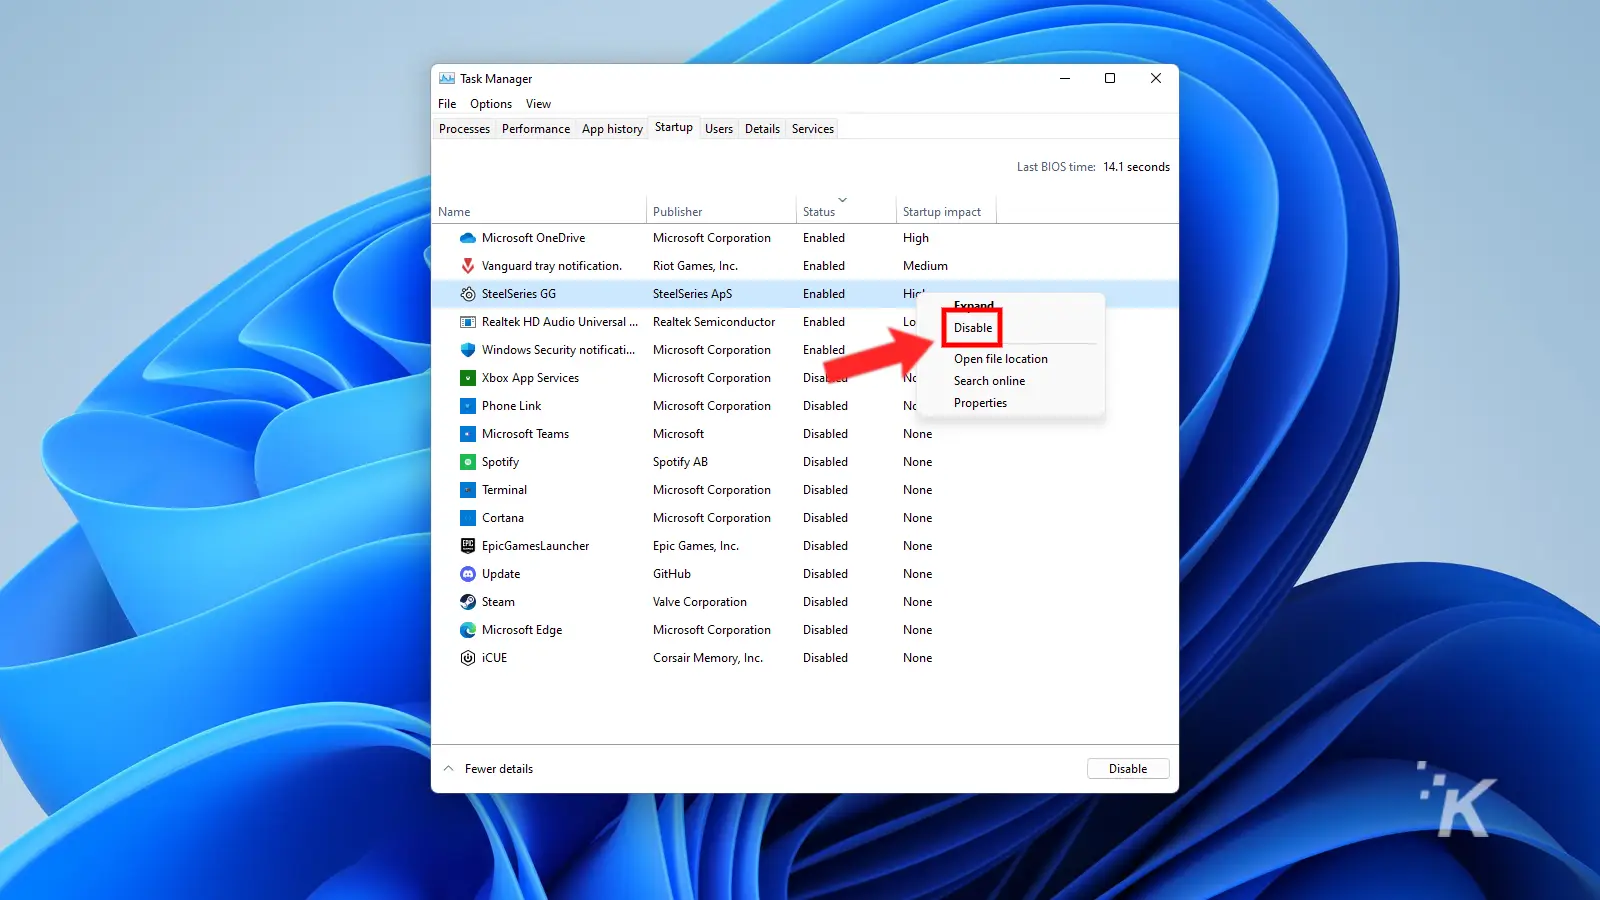
If you wish to reinstate any applications, you can do so by selecting Enable for the relevant items.
Stop apps Windows 11 apps from opening using the Settings app
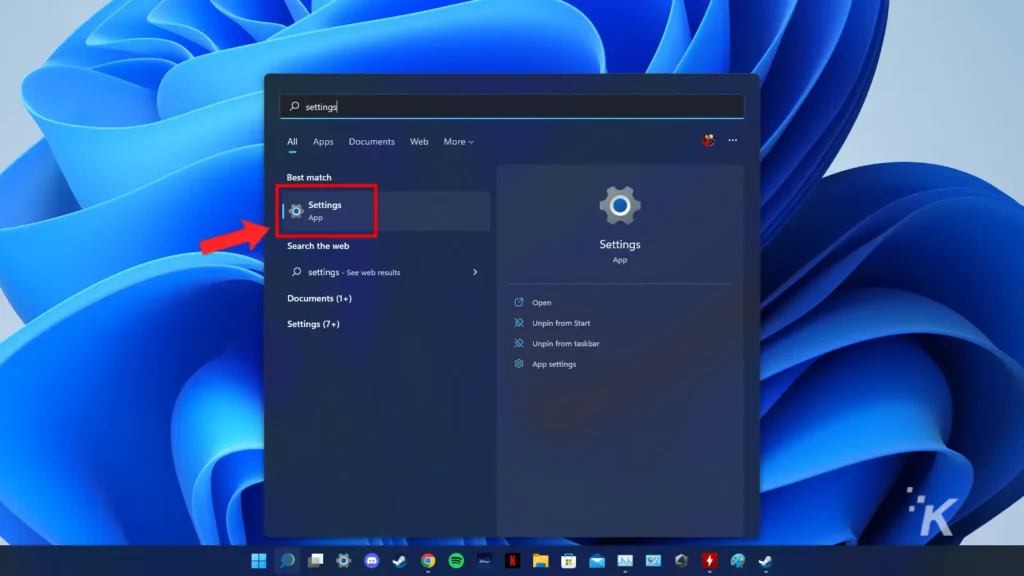
If you prefer a slicker interface, the Windows 11 Settings app also provides a simple way to stop apps from opening on startup.
Here’s how to disable Windows startup items in Settings:
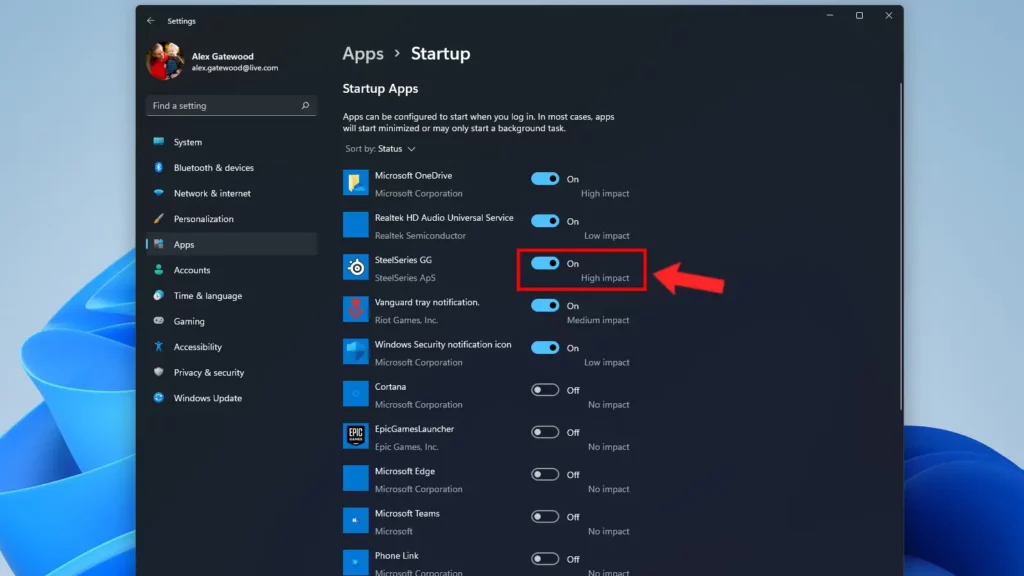
- Launch the Settings app
- Go to Apps > Startup
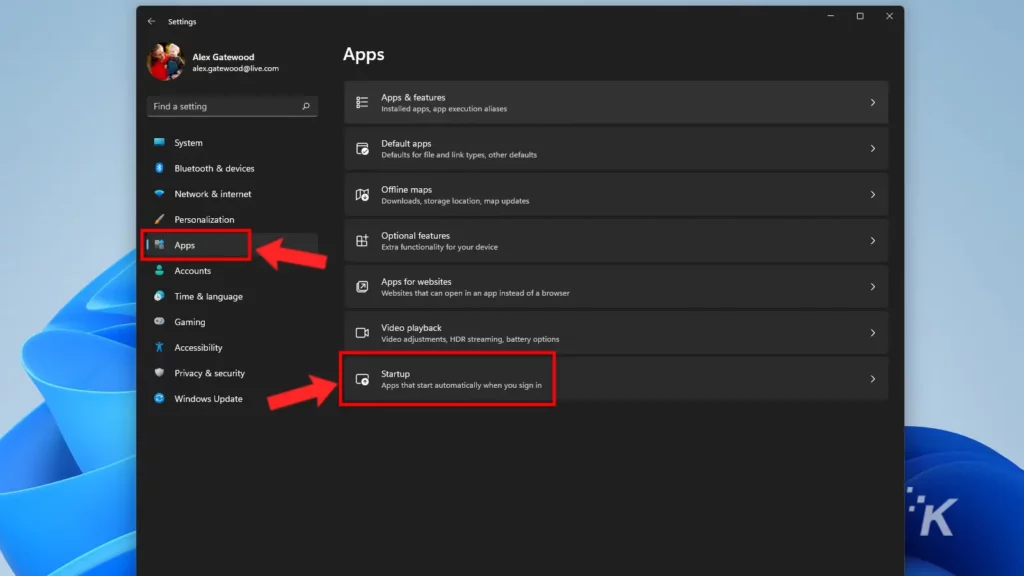
- Toggle off any applications you don’t want launching during startup
Use System Configuration to disable Windows processes
If you want more control over which processes are active on your PC, you can use System Configuration to disable certain items. However, you should only untick entries that you know and understand.
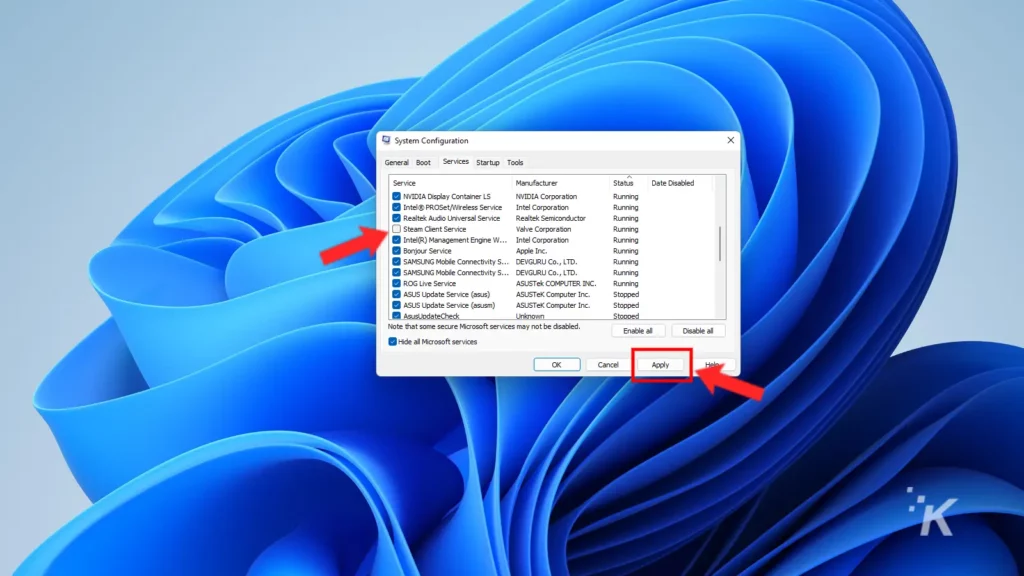
Otherwise, you risk destabilizing the system. Ideally, you should enable the Hide all Microsoft services option to display only third-party processes, which shouldn’t be essential to the operating system.
Here’s how to disable Windows processes in System Configuration:
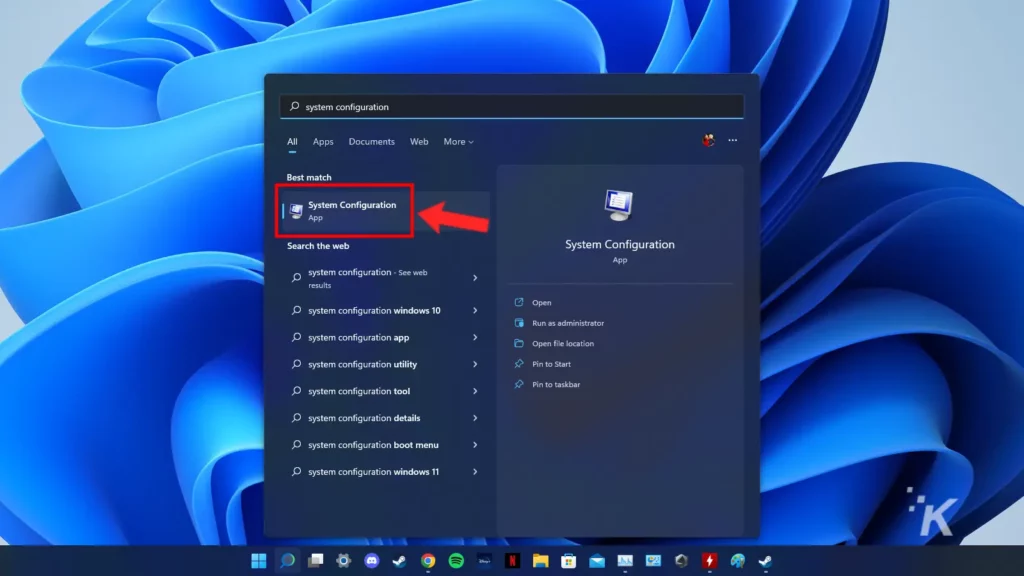
- Launch System Configuration
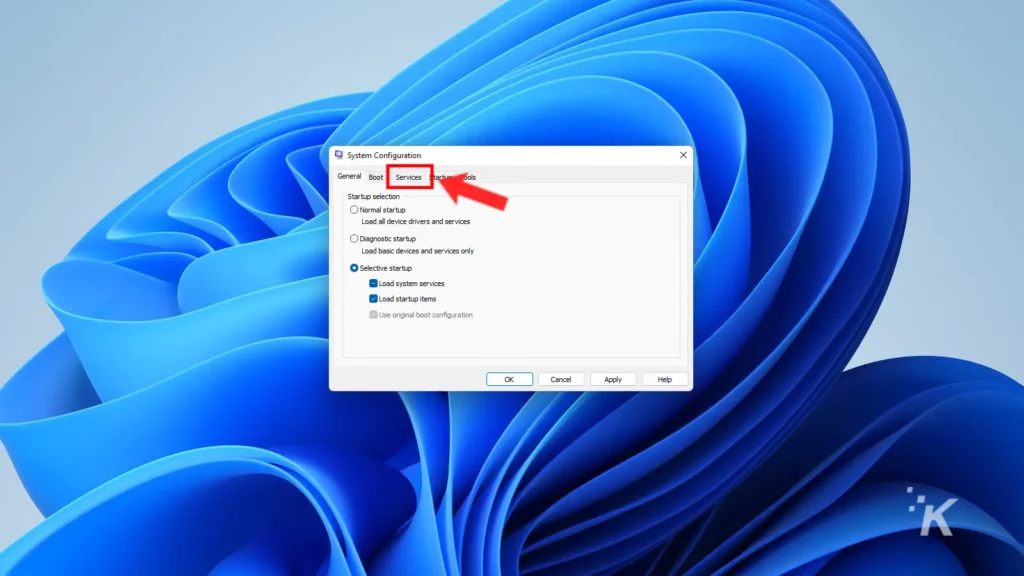
- Click the Services tab
- Untick any items you want to disable and click Apply
Disabling unnecessary services may provide a performance boost. With that said, most processes are there for a reason, and uninstalling unwanted software is a more effective way to clean up the system.
Which Windows startup items are necessary?
If you need certain apps to be ready for action whenever your Windows 11 PC boots, keeping them as startup items may be ideal.
However, some software will sneakily add itself to the boot list during installation, causing unnecessary system slowdown.
The fewer apps you have trying to launch during startup, the quicker the process will be. Therefore, rarely-used applications have no business opening when your PC boots.
Have any thoughts on this? Carry the discussion over to our Twitter or Facebook.
Editors’ Recommendations:
- How to turn off automatic updates on Windows 11
- How to automatically free up disk space in Windows 11 when storage runs low
- How to create, customize, and delete Google Chrome profiles
- Here’s how to open multiple websites with a shortcut in Windows 11
Follow us on Flipboard, Google News, or Apple News