How-To
How to add Windows XP screensavers to Windows 11
Miss the old screensavers from Windows XP? You can have them back.
Just a heads up, if you buy something through our links, we may get a small share of the sale. It’s one of the ways we keep the lights on here. Click here for more.
Do you miss the days when Windows was a little less polished, but still full of personality? Remember using screensavers? Those 3D pipes snaking around your screen sure were mesmerizing. If you want those back, you’ll need to know how to add classic Windows XP screensavers to Windows 11.
Sadly, Microsoft has kicked most of the classic screensavers to the curb and they are no longer available directly within Windows 11. But you have access to the internet, and the internet never forgets. That includes classic Windows screensavers.
Thankfully, Windows 11 still supports classic Windows XP, NT, and 98 screensavers. That means you can still install them and add them to your desktop. We’ll show you how it all works, where to get the screensavers, and how to activate them below.
Log in to an administrator account on Windows 11
Before installing XP screensaver packs, you need to log in to an administrator account. You can verify whether or not you’re signed in to an administrator account by following these steps:
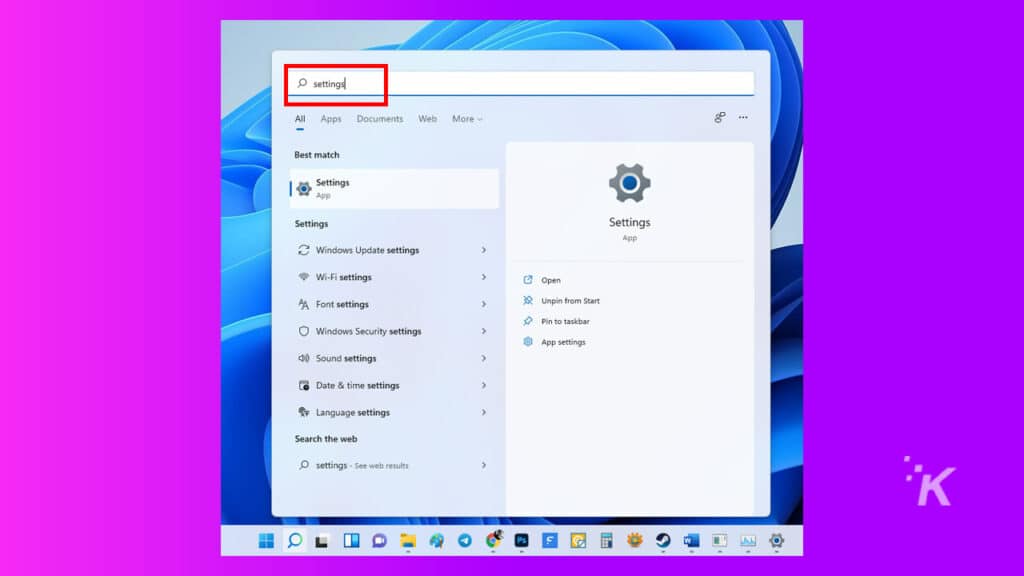
1. Open the Start menu, type Settings, and press Enter to launch the Settings app
2. Then, head over to the Accounts section in the left pane
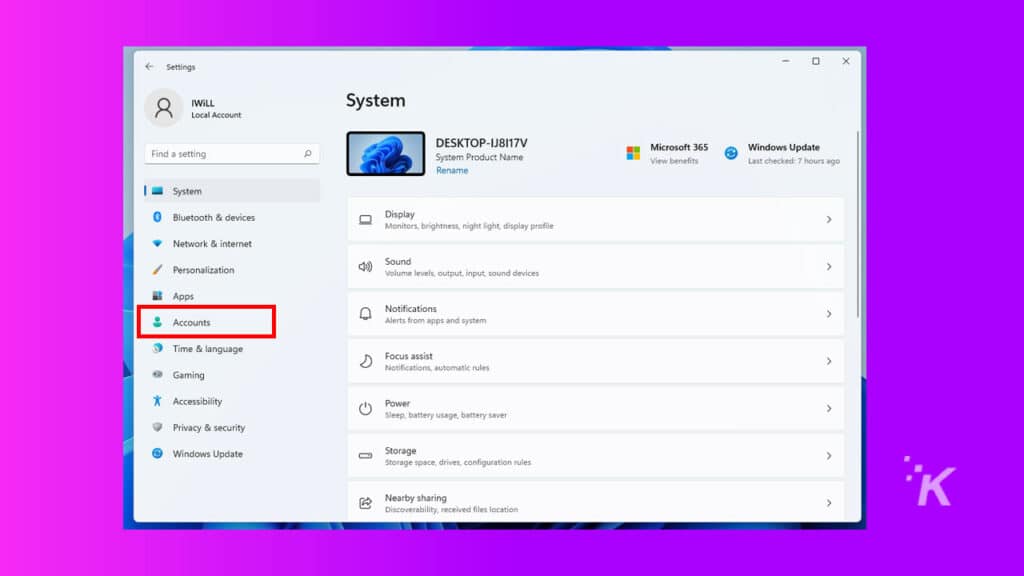
3. If Administrator appears under the account name, you are signed in as an administrator on the computer and can move on to the next stage; otherwise, seep reading

4. If you’re not already signed in as Administrator, click on your account name and then click Sign out. On the next screen, log in with the administrator account.

Typically, the first account you set up will have administrator privileges, so if you are using your own computer for this, you should already have administrator access.
Download XP screensaver ZIP file
After logging in as administrator, you must download the classic XP screensaver files. To do this:
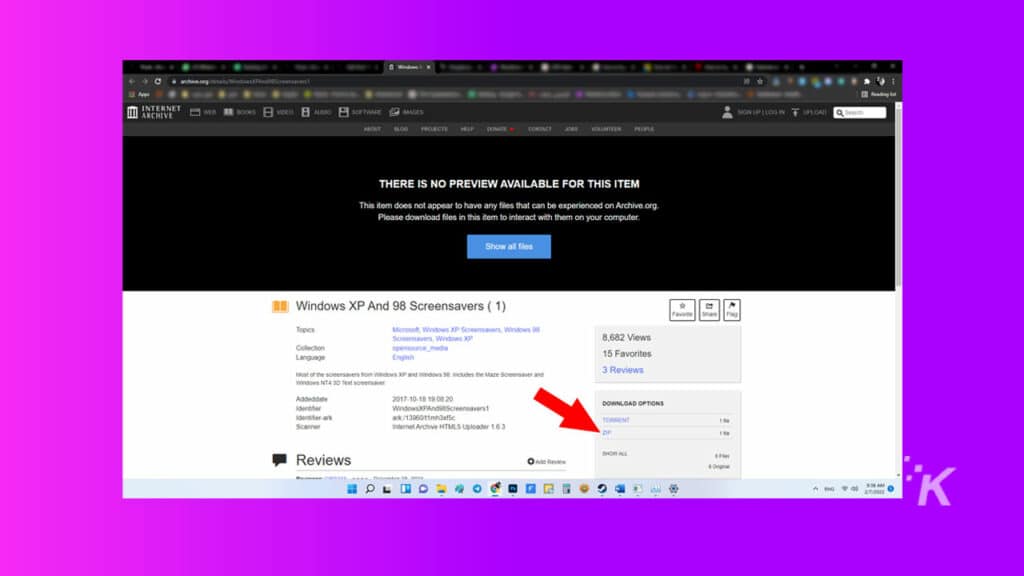
1. First, head over to the Internet Archive website
2. Once the website has loaded, click ZIP to download the Windows XP And 98 screensavers
The download should begin automatically. Once it is downloaded, you’ll need to follow the steps below to extract the ZIP file.
Extract the ZIP files for Windows 98 screensavers
Before you can use the downloaded files, you must unpack them. To do that, follow along below:
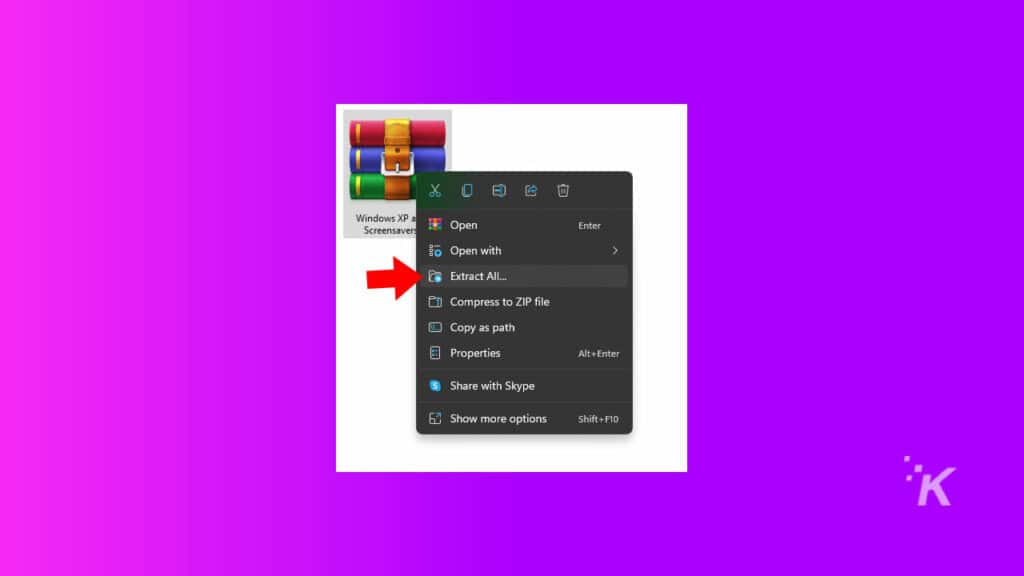
1. Right-click on the Windows XP and 98 Screensavers ZIP file in your download folder and select Extract All
After unzipping the folder, you’ll find ten vintage SCR files that tell Windows that they are meant for screensavers. Three of them are included in Windows 11, but new ones include:
- 3D Pipes
- 3D Flying Objects
- Flying Windows
- Marquee
- Starfield
- 3D Maze
- 3D Flowerbox
As you can see from the list, there are some truly classic options available, like Flying Windows and 3D Maze available to choose from.
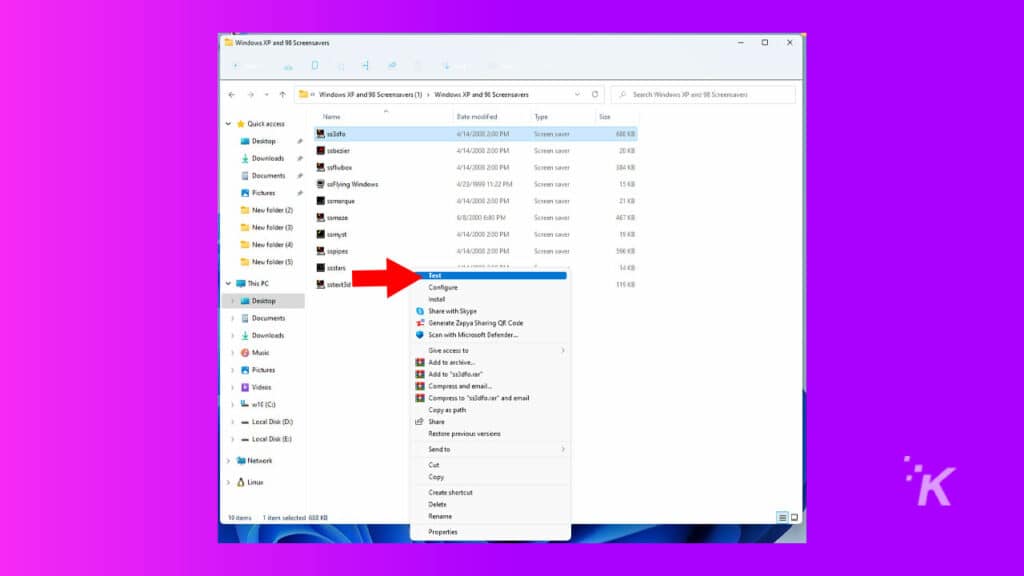
How to test your new screensavers on Windows 11
Before we start the process of adding the screensavers to the system32 folder, you can test them first.
READ MORE: How to copy multiple items to the clipboard on Windows and Mac
To do that, right-click on the file, select Show more options, and choose Test. That will bring the screensaver up to make sure the download worked without any issues.
Now that you know the files are working correctly, it’s time to add them to Windows 11 in a way that lets you them as your actual screensaver.
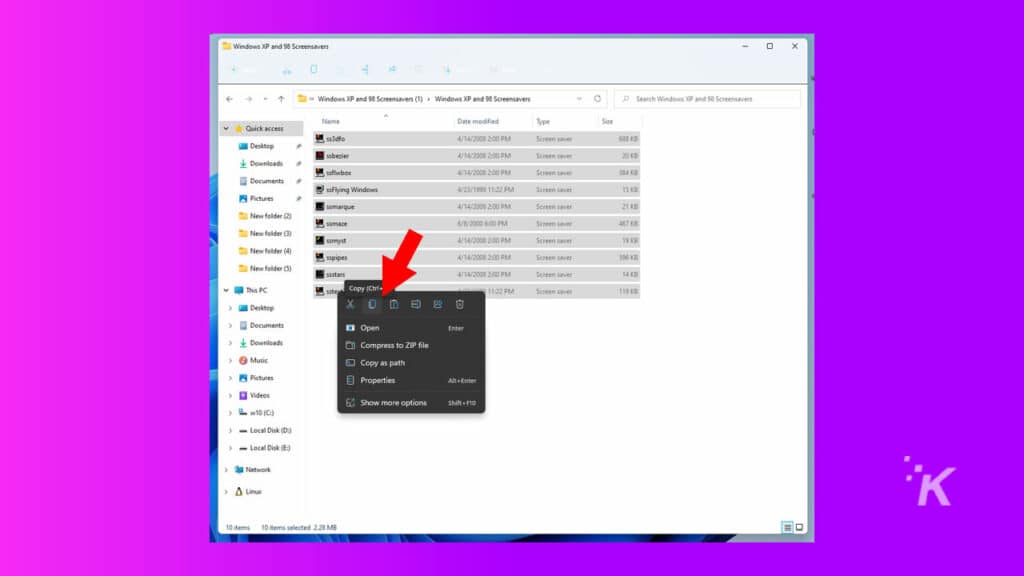
Installing classic XP screensavers on Windows 11
Now that you have unzipped the downloaded files and tested them out, it’s time to move the SCR files into the system32 folder in your Windows C: drive. Here’s how:
- Select all the SRC files in the folder by pressing Ctrl+A to Select-All. Then, right-click on one of the files and click the Copy icon or press Ctrl+C
- After that, browse to the C: Windows\System32 directory using File Explorer and Paste the copied files directly in System32
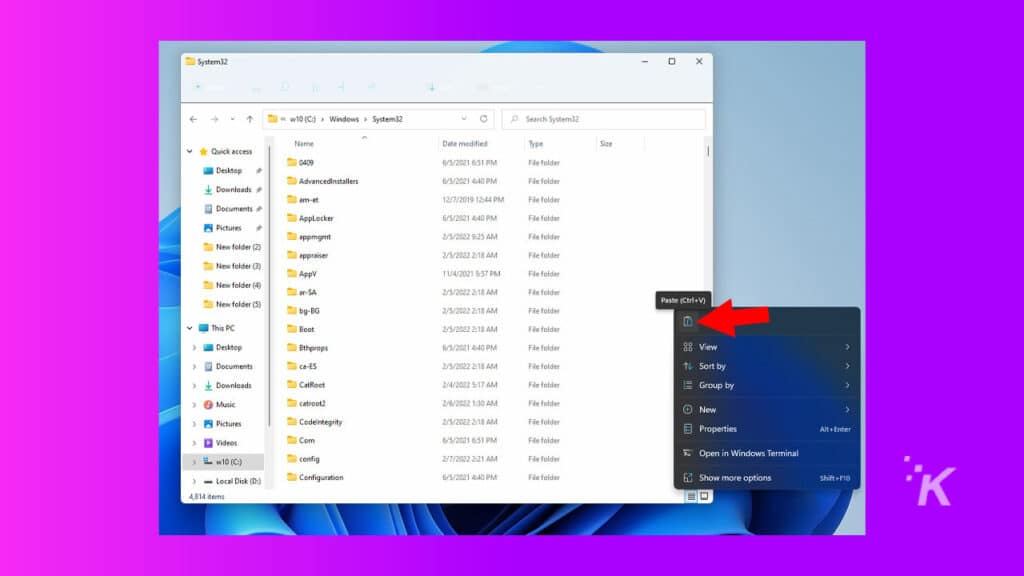
Windows will now install the screensavers for you and add them to the files you can access for Windows 11 screensavers. We’ll show you how to change your screensaver below.
How to change your screensaver on Windows 11
Now that you’ve installed the screensavers, it’s time to start using them on your computer. Follow the steps below:
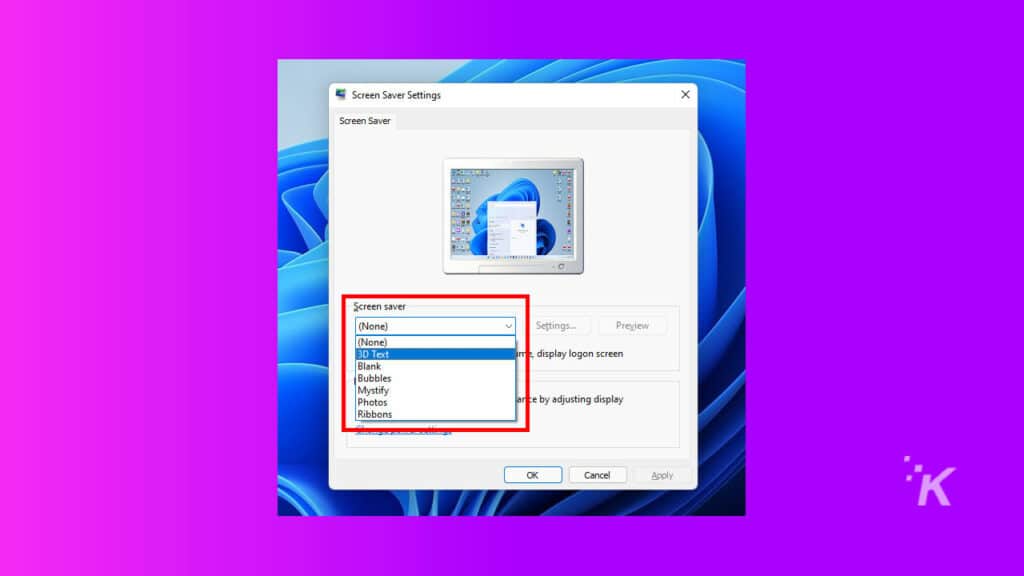
- To begin, click on the Start menu and type Change screen saver, then press Enter.
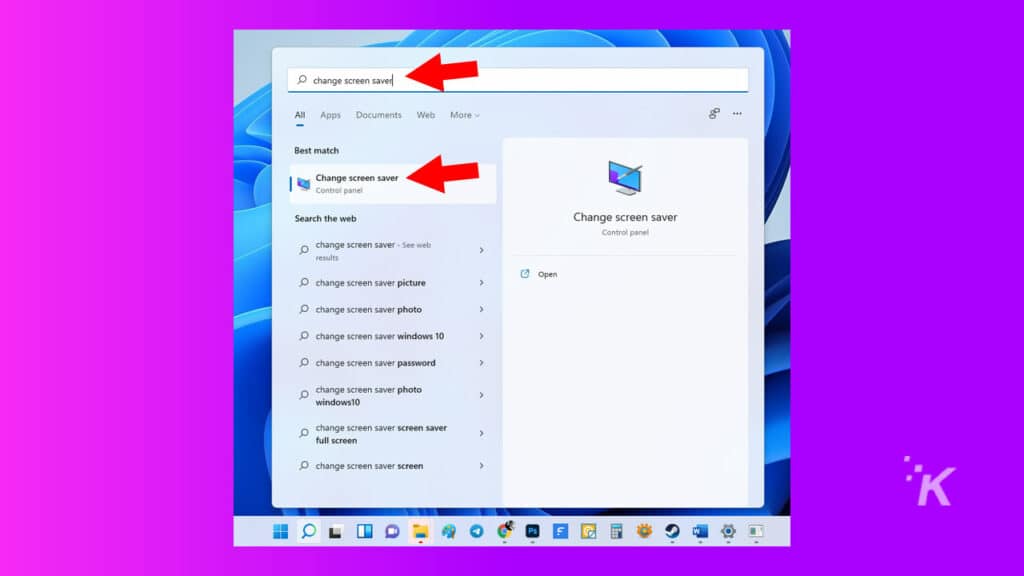
- Choose one of the installed screensavers from the drop-down list under Screen saver when the Change screen saver window appears.
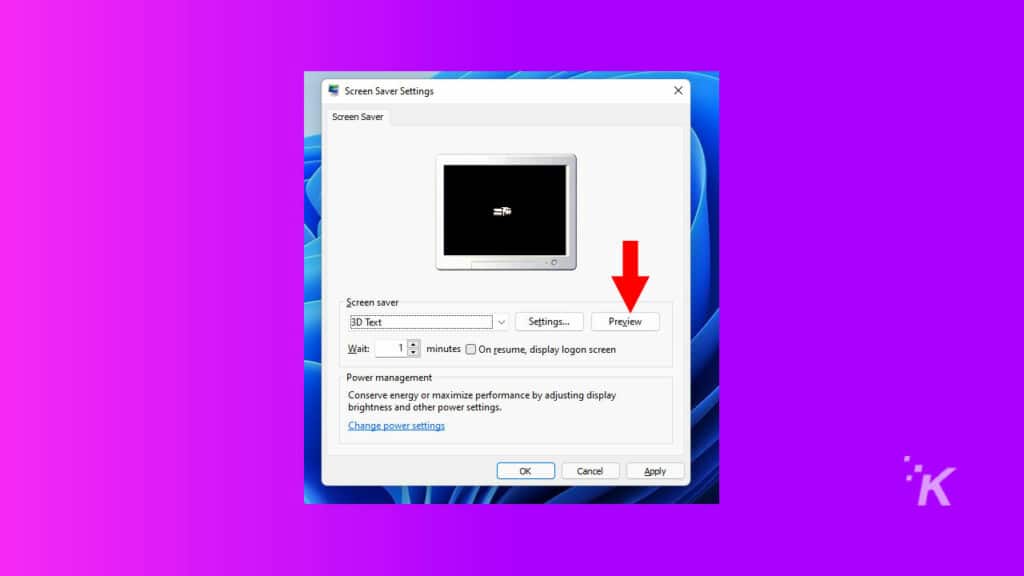
- If you want to see a preview, click on the Preview button on the right side of the window.
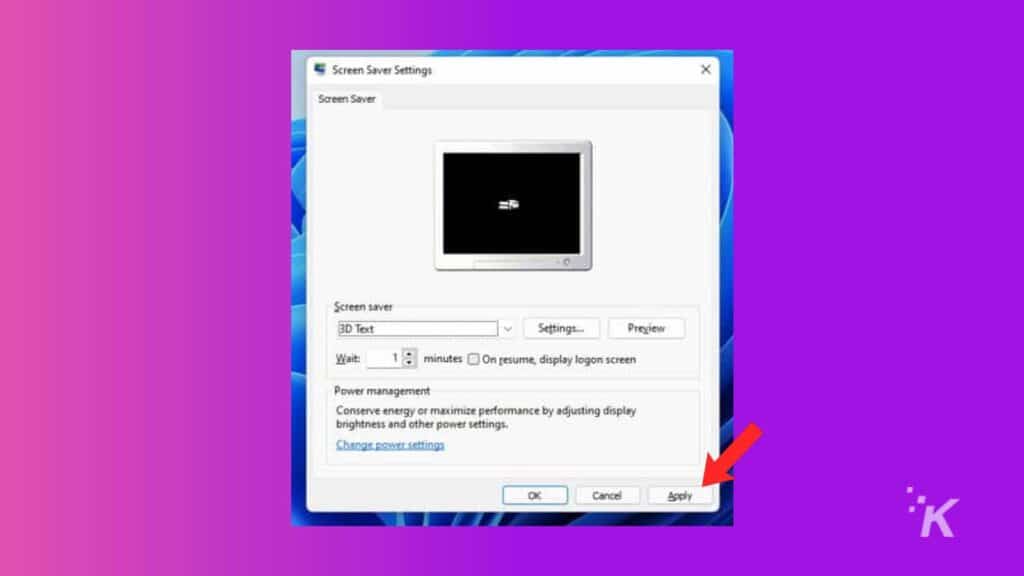
- Once you are happy with your selection, click Apply and then OK
There are also more settings that you can apply to your screensavers. For instance, you can adjust the duration or even change the text in the screensaver.
Windows 11 screensavers don’t have to be boring
While computers have advanced and you rarely even see screensavers anymore due to how monitors are made, they can still be a great way to personalize your PC. And what better way to do that than through some retro XP screensavers?
Have any thoughts on this? Let us know down below in the comments or carry the discussion over to our Twitter or Facebook.
Editors’ Recommendations:
- How to use the clipboard manager in Windows 11
- How to uninstall Windows 11 updates
- Android apps and taskbar upgrades are coming in the next Windows 11 update
- How to change the default browser in Windows 11
Follow us on Flipboard, Google News, or Apple News