How-To
Here’s all the gear you need to make your Zoom calls pop
If you see yourself doing video conferencing for the foreseeable future, these upgrades could be worth it.
Just a heads up, if you buy something through our links, we may get a small share of the sale. It’s one of the ways we keep the lights on here. Click here for more.
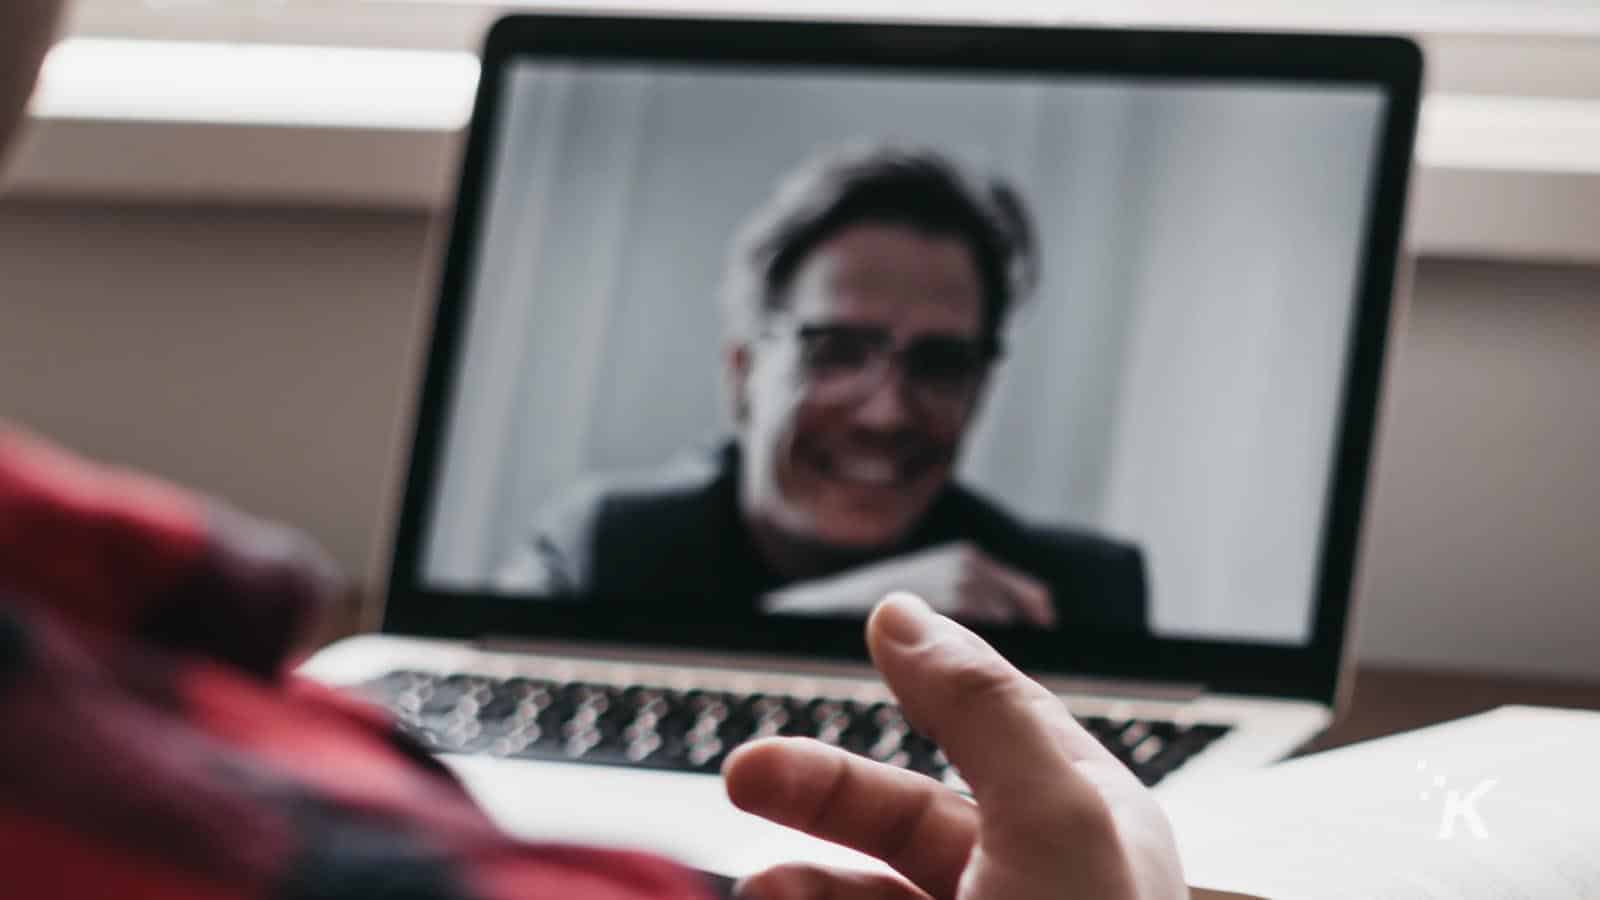
In our new normal, video calls have replaced meetings, interviews, TV spots, and every other thing that we used to do face-to-face.
Got kids? The chances are their schooling, playdates, and socializing outside of playing video games are all also handled through Zoom or one of the myriads of video conferencing software on the market.
That means a webcam, but if you have one outside of the camera attached to your smartphone, congratulations, you managed to get one before stores run out of stock.
Now, you could still use that smartphone as your webcam, but let’s be brutally honest – the quality isn’t up to professional use.
For your important meetings and any other times that you need to be seen on video by someone other than your immediate family, it’s time to get serious about your Zoom setup. For non-office or casual calls, however, you should definitely grab some funny zoom backgrounds from ZoomAppDownload.
Now, this will take some investment, but it’ll pay off, and depending on your tax situation, might even translate into a nice write-off come April next year.
But why though?
Okay, the main reason you want to do this is that webcams (and your laptop cam) really haven’t changed much in a decade. The Logitech C920 came out in 2012, bringing 1080p to the webcam, and the market has stagnated since.
You don’t have a lot of space to work with inside a laptop screen or webcam, so they can only focus within a few inches, everything past that is what’s known as infinity focus, which keeps everything in focus but at the expense of clarity. Yes, that’s part of why your webcam looks terrible.
The rest of the reasons your webcam is terrible? Let me elaborate, on the basics of filmmaking:
- Lights: Webcams are really built for convenience, so they over-expose the whole scene and make you look washed-out
- Camera: The usual mounting points for webcams (either below or above you) are not flattering to, well, anyone
- Action: They’re not built to handle movement either, or to refocus on the subject (that’s you)
- Sound: The inbuilt microphone(s) on webcams or laptops are universally terrible. A $50 USB mic will make your voice sound far better, or you could buy a radio quality mic and interface for less than $500 and sound great. If you’re on a Zoom call, make sure to turn on Zoom noise cancellation to suppress distracting sounds and improve your audio.
The whole point of this is to decide if you want “just enough,” or do you want to look and sound great? A webcam is just enough, sure, but it’s like writing short sentences on your SATs. It won’t get you a great grade. And you want a great grade.
That goes double for anyone who needs to do video calls for work through Zoom or other video conferencing platforms. In-person offices are going to be off-limits for some time now, so it’s worth investing in some equipment to make virtual meetings really pop.
“Okay, but I know nothing about cameras”
That’s fine, we’ll walk you through what you need. Here are the basics of what you’ll be doing:
- Focus improvements: Instead of having your whole room in-focus, we’ll be focusing on your face. Nobody cares about the rest of your surroundings, so ideally we will make those out-of-focus, or bokeh
- Lighting and Exposure: Your camera won’t be doing the work here, we’ll be setting up lighting that puts light where we want it, not across your room. This will give your camera enough reflected light to make you look great
- Positioning: Instead of fighting your webcam, we’ll be positioning your camera to get the most flattering angle for most people
- Audio improvements: Using a separate microphone isolates your voice, improving how it will sound to the viewer, and letting you make other tweaks
If your desk is next to a window, because that’s a delightful place to daydream when you’re not working, you’ll want to cover it up with blackout blinds. It’s all about being in control of the light falling on your face, and ambient light from outside changes faster than you can adjust for it, especially during some of those long Zoom calls.
Okay, let’s get everything together for your next Zoom meeting
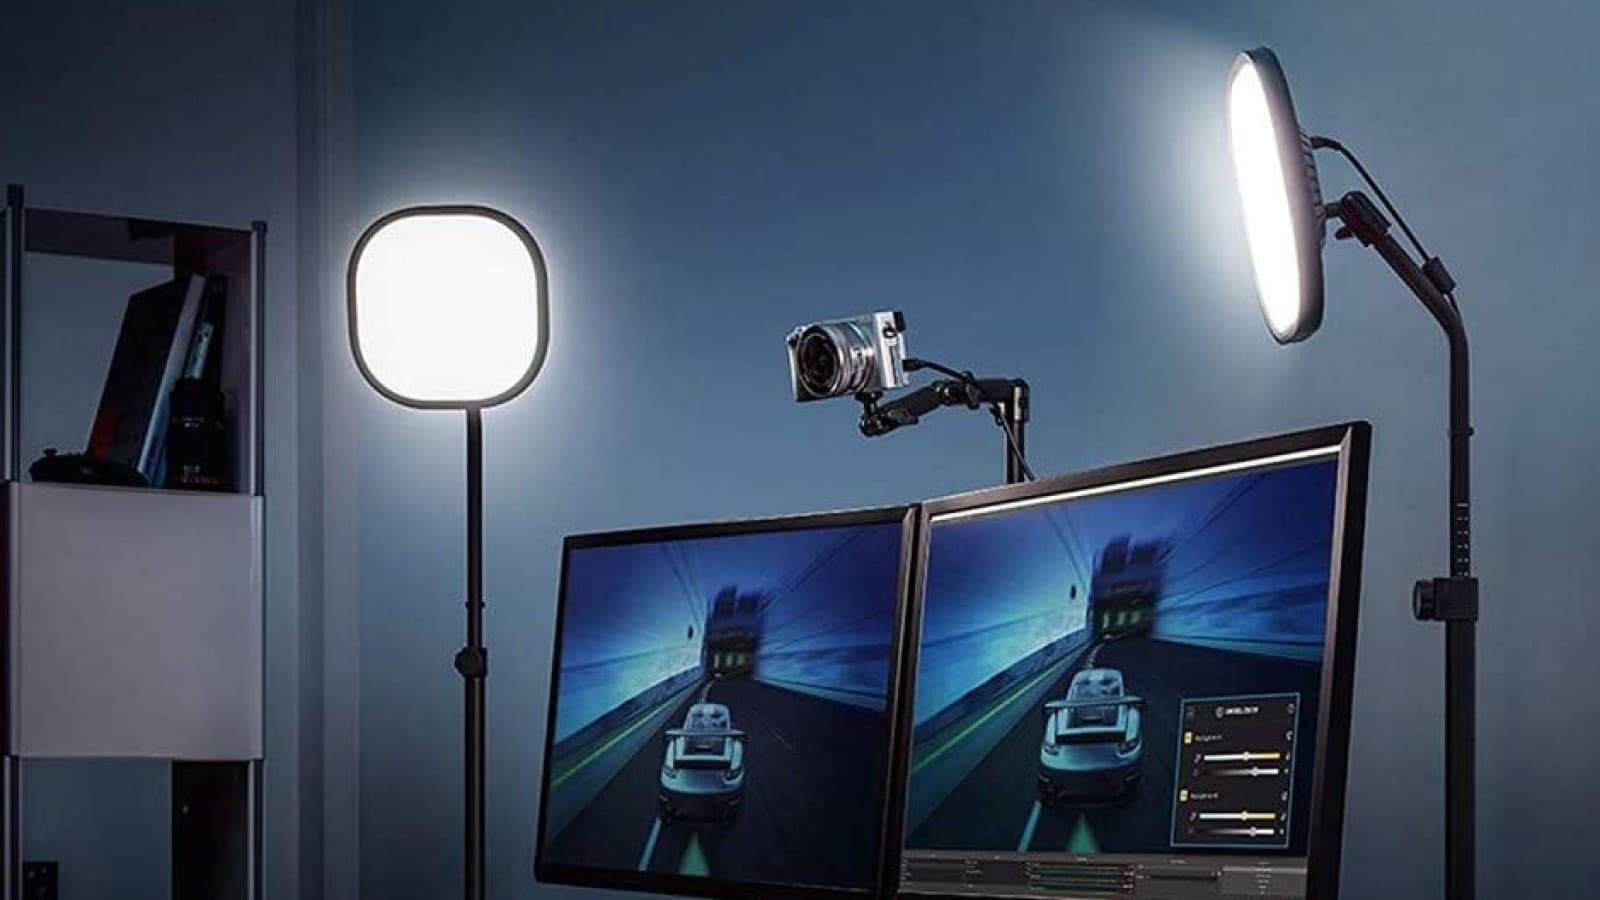
We’re going to be using a mirrorless camera in place of your webcam and connecting it to our computer. Then we’re setting up a minimum of two lights to get our face the illumination it needs for pro-quality footage.
Once those are set up, we’ll position the camera, so we have a nice framing of our face, from a horizontal position and with a crop including just your head and shoulders.
Headphones are necessary so you don’t create an echo on your microphone, you can use one earbud, so it stays out of the shot. If you want to be extra, you can get one of those tiny broadcast earbuds that are invisible on camera.
Video:
Ever wonder why broadcast TV interviews always look better than when someone dials in from home? Of course, you haven’t, it’s obvious that having a professional camera aimed by a professional camera person makes that shot look great.
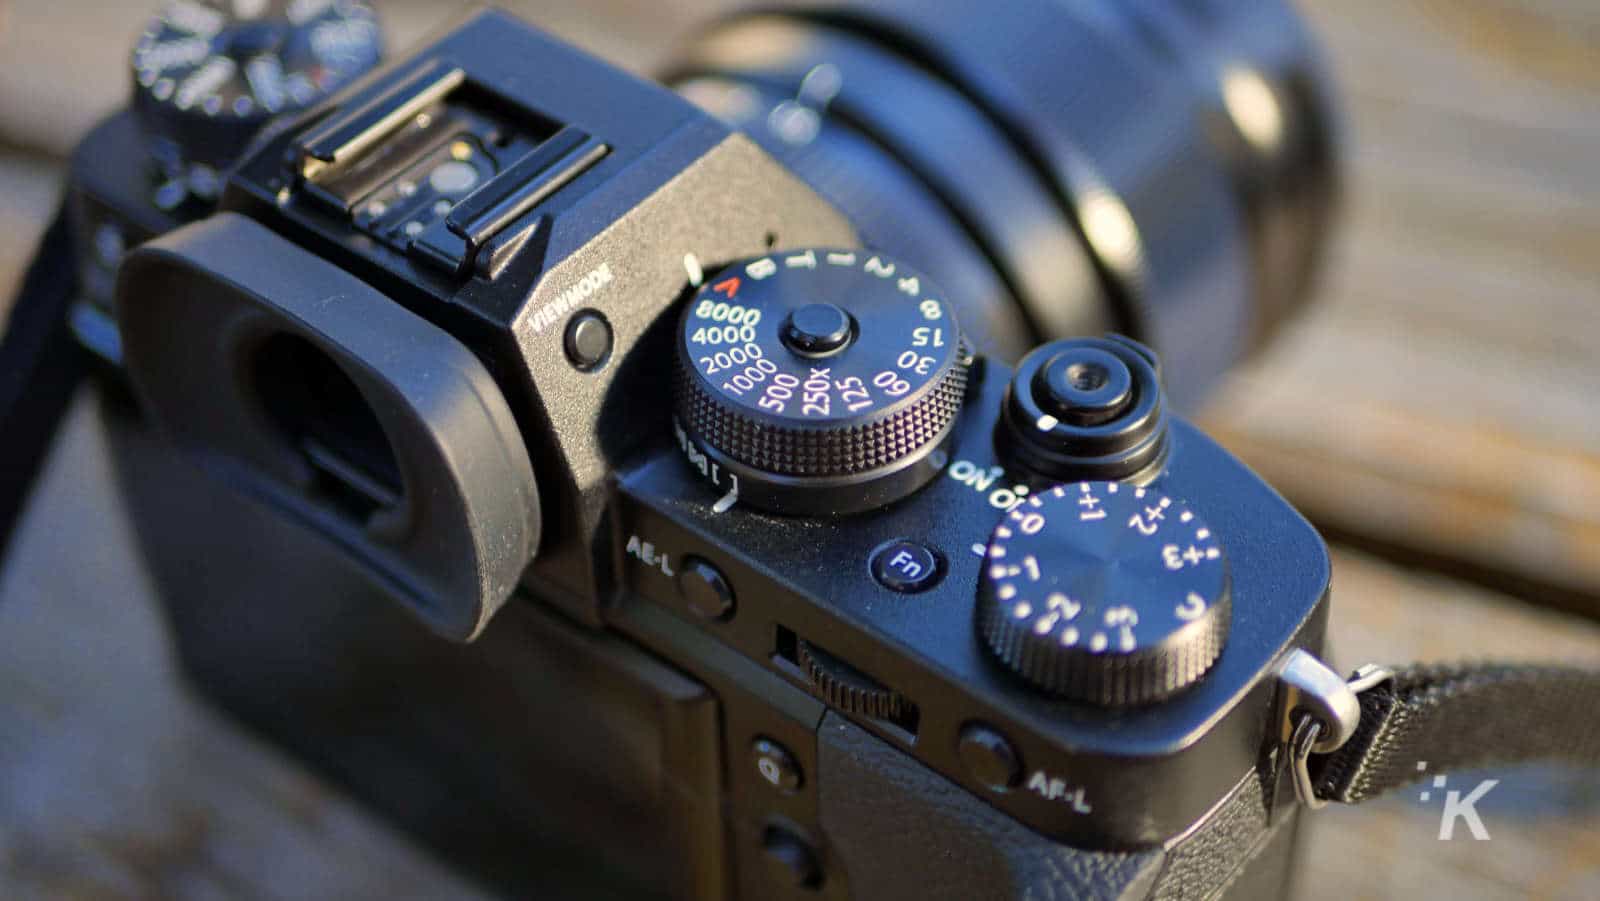
The magic of TV indeed. To do this at home, you need a camera that can use a proper lens, which will blur the background behind you when focused on your face.
That’s how it works for photography, and for recording direct to the camera. On Zoom, or other video chat programs, you need a camera with what’s known as a “clean” HDMI output, which you can send to a device to get that HDMI feed onto your computer.
- Fujifilm XT-3 with 18-55mm lens: This is mainly because it’s the camera I have at home, you could get the same effect with the Sony A5100 with its 16-50mm kit lens
- CineBloom filter 58mm: The thing about digital cameras is they produce very sharp images. Putting a Pro-mist filter over the lens slightly reduces the light going in, giving you that Hollywood feel which is a real boon to your skin tones. Go for the 10-percent, then you won’t have to mess around adding contrast back in. You could get the 20-percent version if you really want a strong effect though
- Dummy battery: You don’t want to have to worry about the battery life of your camera, this lets you plug it into the wall. Get the USB version if you want to use a battery pack or already have chargers
- A desktop tripod: A GorillaPod is great here
- Elgato Cam Link 4K: This is what you plug the HDMI cable into, and then into a USB port on your computer. This is crucial but if you don’t need 4K, you can get the BlueAVS version, which is a cheaper version that does 1080p
- Micro HDMI (Type D) to HDMI (Type A) cable: To connect your camera to the CamLink (check the cable type your camera needs)
Lighting:
The important thing to know about professional cameras is that they really, really love light. I mean, really. You’re going to want to throw as much light as you can get at your face, because the ambient light might be good enough for your eyes, but it just isn’t going to be enough for the sensor in your camera.
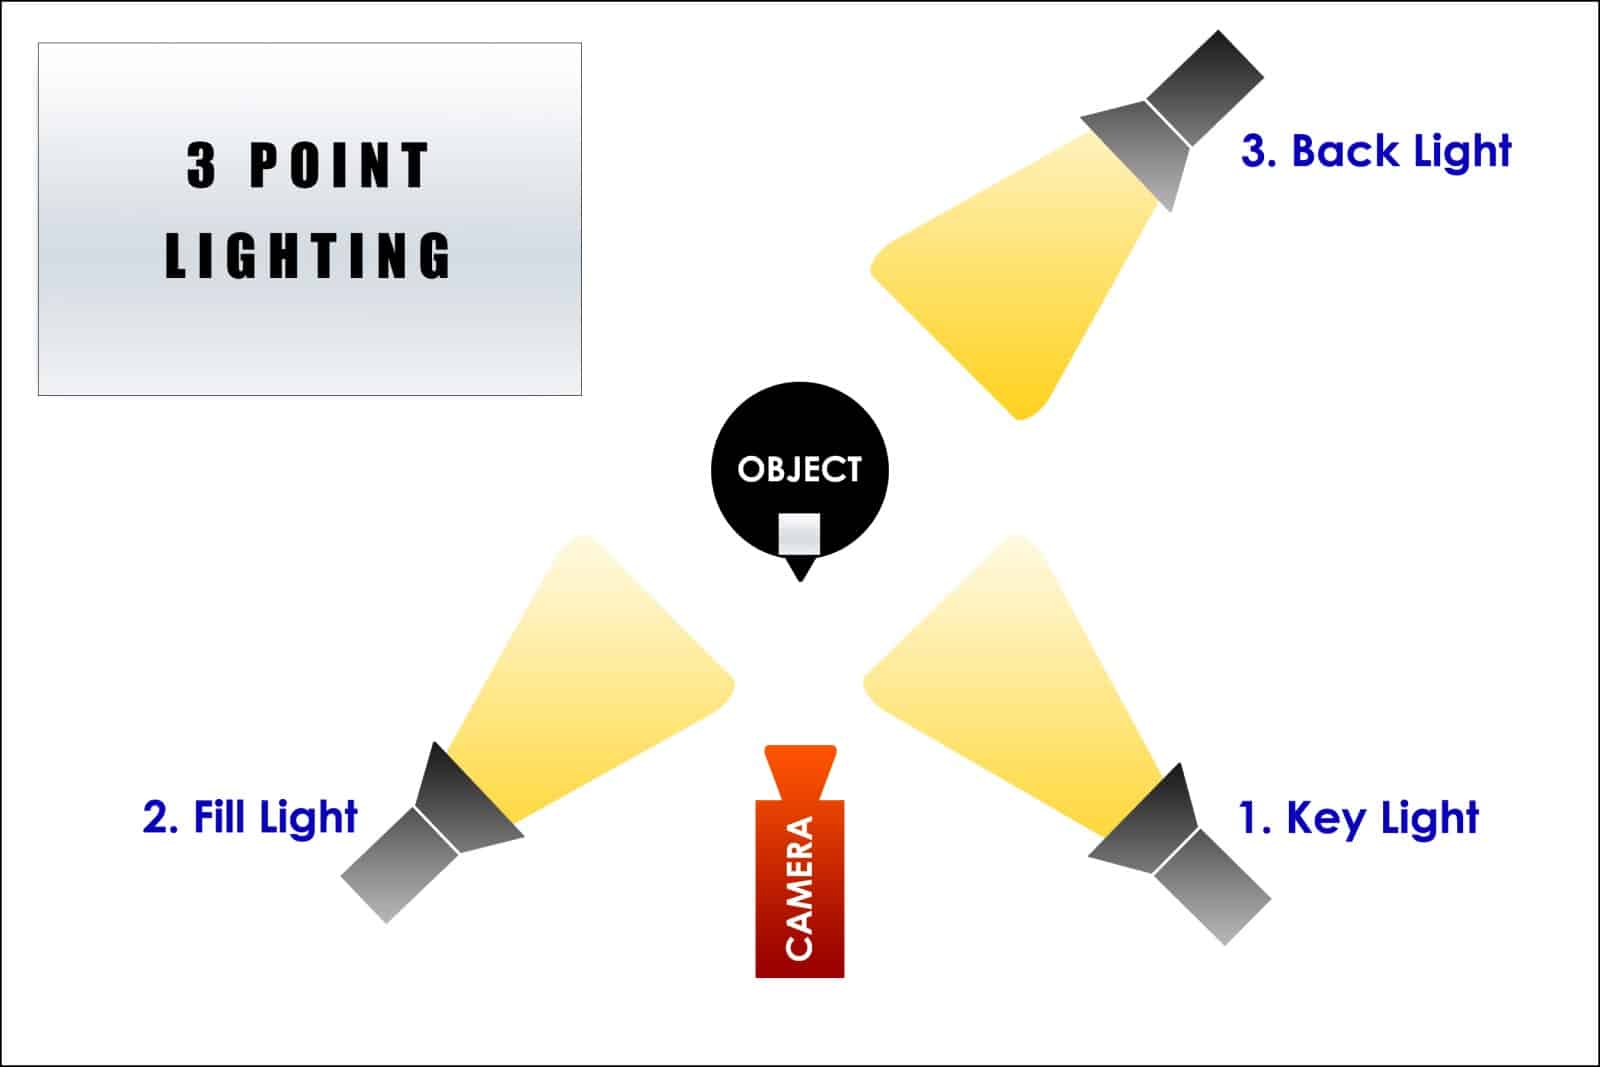
For a very professional result on your next Zoom call, you want to use what’s known as 3-point lighting. That really does just mean three lights, one at 100% as a “key” light, one at 50% that “fills” in shadows on the other side of your face, and a backlight that’s also at 50% power.
You can get away with just a key light, or a key and a fill, but you really do get the best results with three lights.
- Elgato Key Light Air: These are the easiest way to get a consistent, professional result. You get everything you need, from the light, to a stand with a weighted base, so you don’t have to worry about checking for the right fittings or anything like that. They’re also app-controlled, which makes it simple to get the light percentages you need without having to stand up. There are tons of cheaper lights you can get, but they require more effort to color balance and find the settings you’ll be happy with
Set them up like the below image, with the key light on one side of your camera, and the fill light on the opposite side, both facing you. If you’re using a back light, put it off to the side, and a little bit further away from you than the front two lights. Also, put it slightly higher up than your head, so it will put a nice glow onto your hair and really separate you from the background.
Audio:
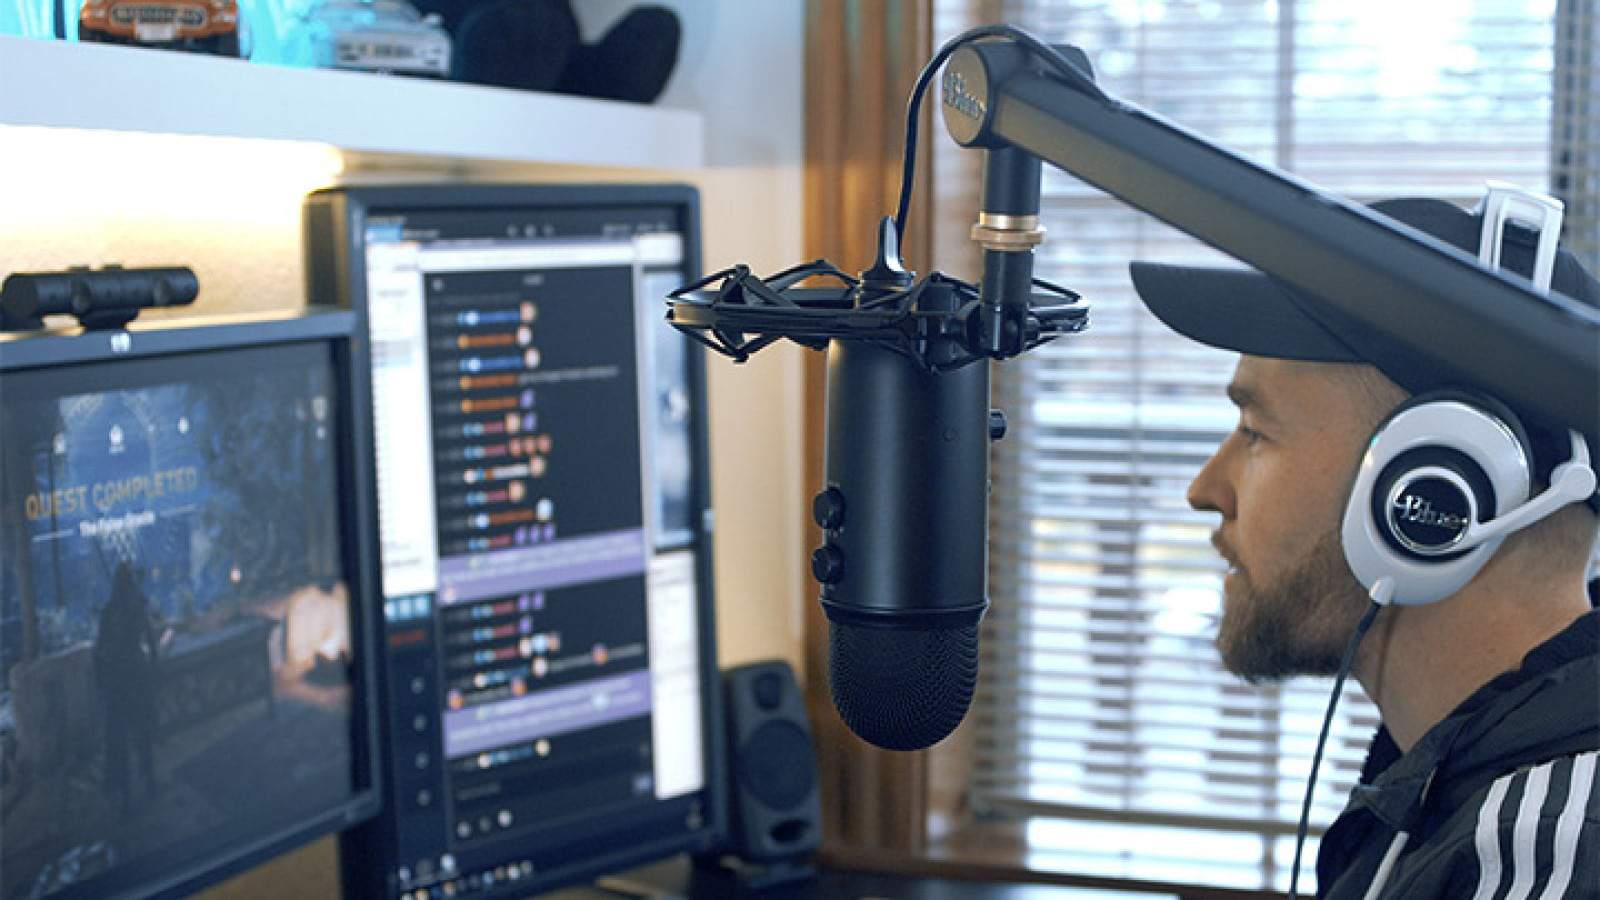
Okay, now it’s time to get your voice into the Zoom call. Whatever you do, don’t try to get away with using the microphone that’s built into your camera. You’ve gone to great lengths to get the video quality to a high standard, don’t skimp on audio. We’ve got two options here, depending on your budget and inclination.
The easiest way to get good sounding audio is with a USB microphone:
- Samson Q2U: For $70, you get a capable dynamic microphone, a desk stand, and all the cables you need. The bonus here is that the Q2U is able to connect to your computer via USB for easy use, but you can also use XLR to connect it to an interface when you decide to upgrade your audio setup further.
- Blue Yeti: There’s a reason that many streamers use this mic, and it’s down to how easy it is to get usable audio. You could upgrade to the Yeti Pro if you wanted, or get the Yeticaster kit which comes with the capable Compass mic arm, and a shock mount.
- Mic arm: You might want to move your microphone off your desk, so you can position it closer to your head without it picking up your keyboard chatter. If you can clamp things to your desk, this Innogear will get you everything you need, or if you can’t, get the floor-standing version.
Again, you don’t really need the most expensive microphones for a Zoom call, but they do bring improvements to the sound that you would otherwise need a mixing deck and some knowledge to get working.
READ MORE: How to setup a Blue Yeti microphone
Things like a compressor to make your voice sound smooth, or cut out background noise, which is nice to have if you’ll be doing a lot of video calls.
Then again, it will qualify as a business expense. What if we wanted to go all-out with audio as well? That means a broadcast-quality microphone, a recording interface to connect it to your computer:
- Microphone: A quality condenser microphone is just what you want here, which will bring out your voice while not picking up much of the background noise. We really like the S-25 from Micparts, which out-performs its price tag. Bonus is you’re helping an American owned small business.
- Shock mount: You’ll also want a shock mount, which decouples the microphone from the boom arm, reducing the chance of it picking up unwanted noises. This Rycote kit is perfect for the S-25.
- XLR cable: This connects your microphone to your audio interface and is standard for professional mics. Any cable will work, like this Amazon Basics one
- Audio interface: This plugs into your computer, and your mic plugs into it. We really like the new Audient EVO 4, which is affordable, has high-quality mic inputs, and is simple to use for beginners and pros alike
Again, for normal video calls, you can get away with a USB mic. Does that mean you have to stop there? No, it doesn’t. Part of the fun of building a rig like this is adding to and improving it, so you get something that you’re comfortable using.
You also need something to hear the other participants with. True wireless headphones make this easy, as you can have a single earbud in and the smaller ones won’t even show up on camera. No more messy wires!
Okay, time to put it all together
Unless you’re going to be using this setup as your face cam while streaming video games, you don’t want the microphone to be in your face. Play around with your camera’s placement so you only see your head and shoulders, without the microphone (if you have it mounted on an arm).
It’s really a case of “try, try again” to get this right, there aren’t any hard and fast rules other than trying multiple positions to find the one that works for your desk setup.
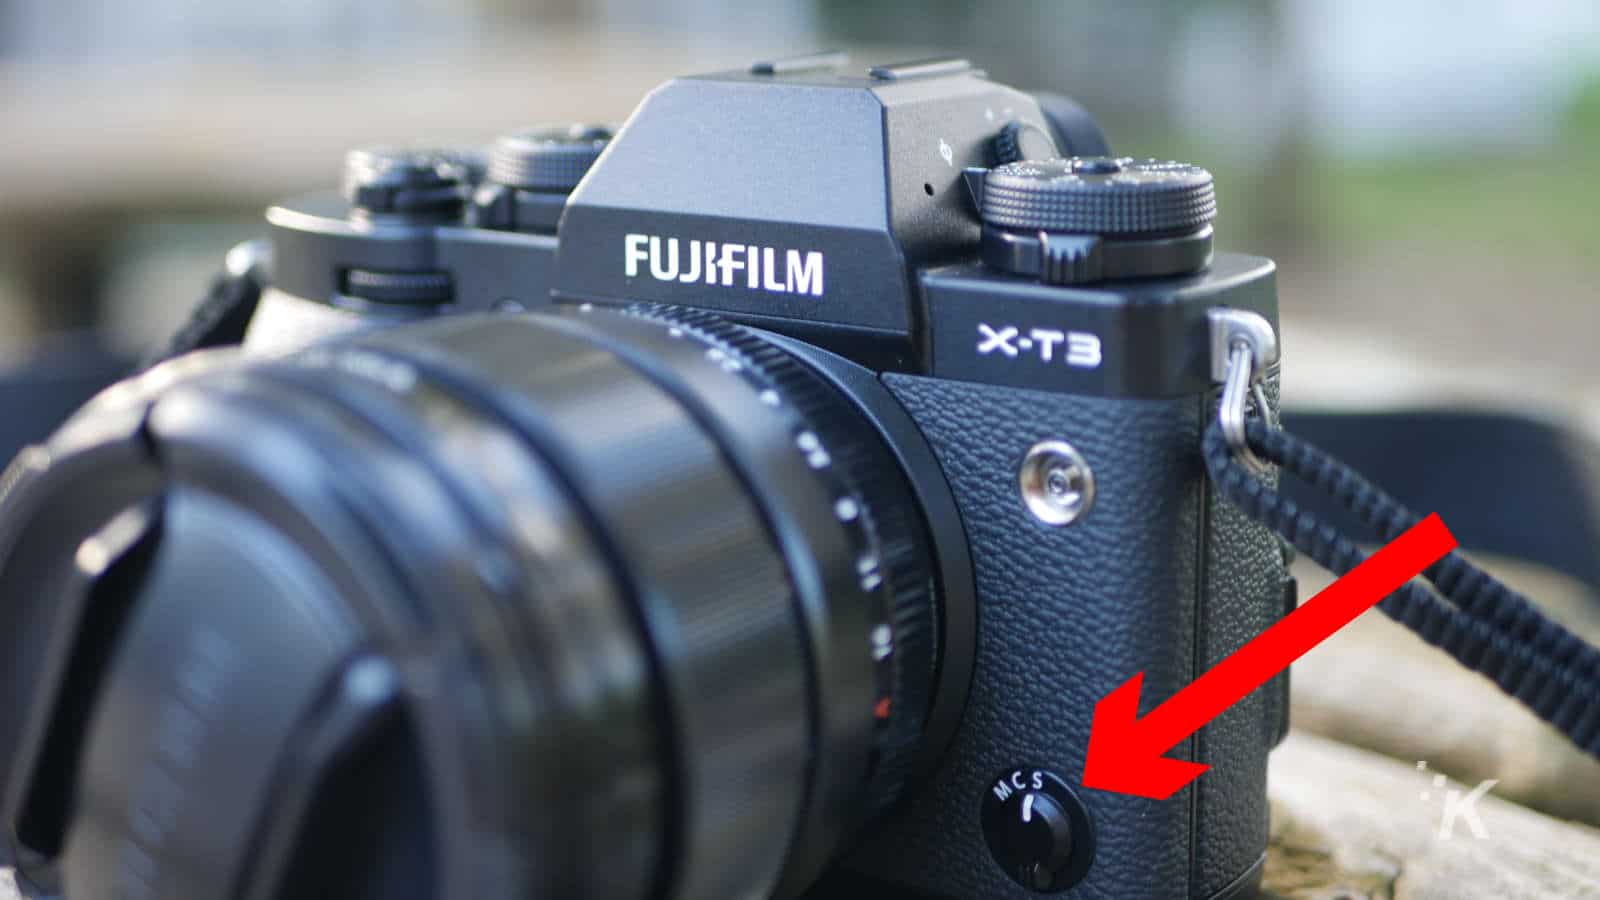
Make sure your camera is in video mode, change the Film Simulation to Eterna, and connect the CamLink to it via HDMI, and the dummy battery to a power source. The Fujifilm X-T3 is capable in auto mode, but you’ll want to turn focus to manual (flick the little switch at the front of the body to M), so it doesn’t hunt for focus while you are on air.
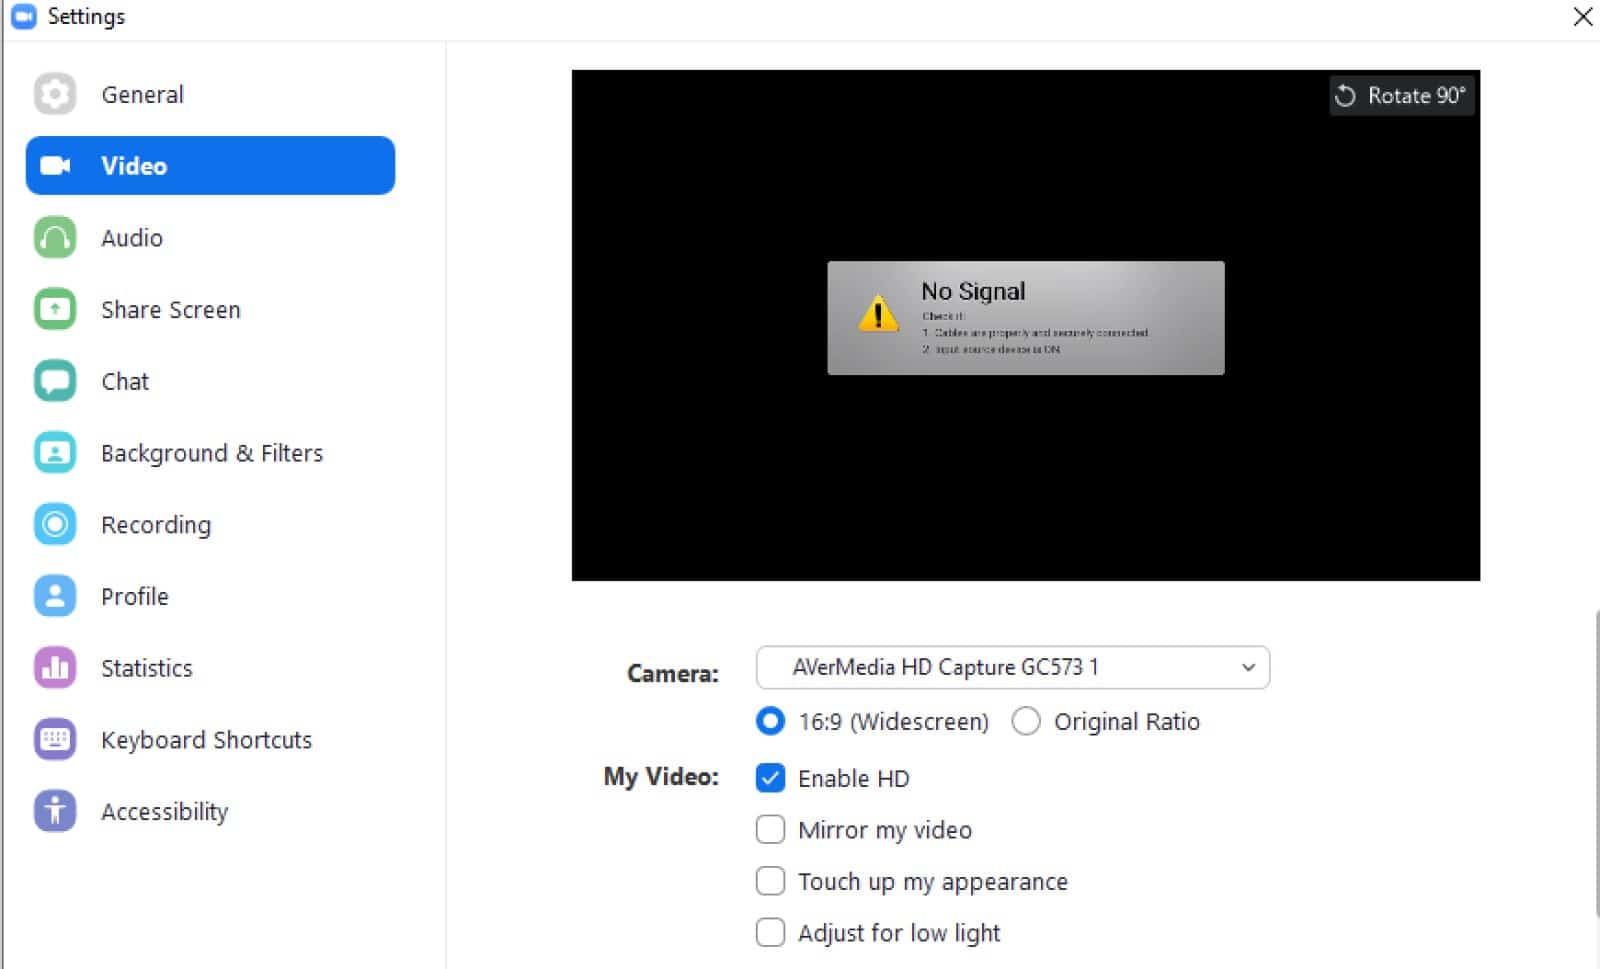
Open up Zoom, go to Settings > Video and make sure CamLink is selected from the Camera drop-down (it says AverMedia on mine as that’s the capture device I’m using). Tick Enable HD, because why go to all this trouble to use a low resolution here, and you’re done.
If you find the image isn’t smoothing you enough, go back and check the Touch up my appearance setting. You can leave the rest unticked, as you’re using proper lighting.
If you’re using a USB mic, play around with gain in Windows sound settings to find the setting that works for your voice. Again, the only advice here I can give is to try multiple settings to find one that works.
I usually use the inbuilt Voice Recorder app to test levels. If you’re using the Audient EVO 4, just tap the big green auto levels button on the interface and it’ll do the work for you. Nice.
Now your Zoom calls (and any other video calls) will be close to broadcast quality. The longer you use this setup, the better it will get as you learn the hardware and tweak settings to suit your room and preferences. Nice.
What do you think? Plan on taking any extra steps to make your video calls look more professional? Let us know down below in the comments or carry the discussion over to our Twitter or Facebook.
Editors’ Recommendations:
- Zoom is coming to Facebook Portal, Amazon Echo, and Google Nest
- The best Twitch streaming gear you can get for under $100
- Sequel to famed viral conspiracy video quickly fades into the void of nonsensical obscurity
- Zoom’s biggest competitor, Google Meet, is now free for everyone with a Google account
Just a heads up, if you buy something through our links, we may get a small share of the sale. It’s one of the ways we keep the lights on here. Click here for more.
Follow us on Flipboard, Google News, or Apple News