How-To
How to stop LinkedIn notifications from blowing up your inbox
Sick of LinkedIn notifications? You have options.
Just a heads up, if you buy something through our links, we may get a small share of the sale. It’s one of the ways we keep the lights on here. Click here for more.
We seem to have drifted into a state in which receiving constant notifications is the norm. But it doesn’t have to be that way.
Unnecessary alerts are distracting, time-wasting, and often designed by social media companies as bait to get you back on the platform. LinkedIn is a useful networking tool, but, like most social media sites, it can control you if you’re not careful.
Are you tired of unwelcome alerts blowing up your inbox? Let’s discuss several ways you can stop LinkedIn notifications from bombarding you.
Disable LinkedIn email updates
Most of the content LinkedIn throws at your inbox comes from email updates. You can, however, turn off most notifications with a few simple steps. Here’s how to manage your LinkedIn email updates:
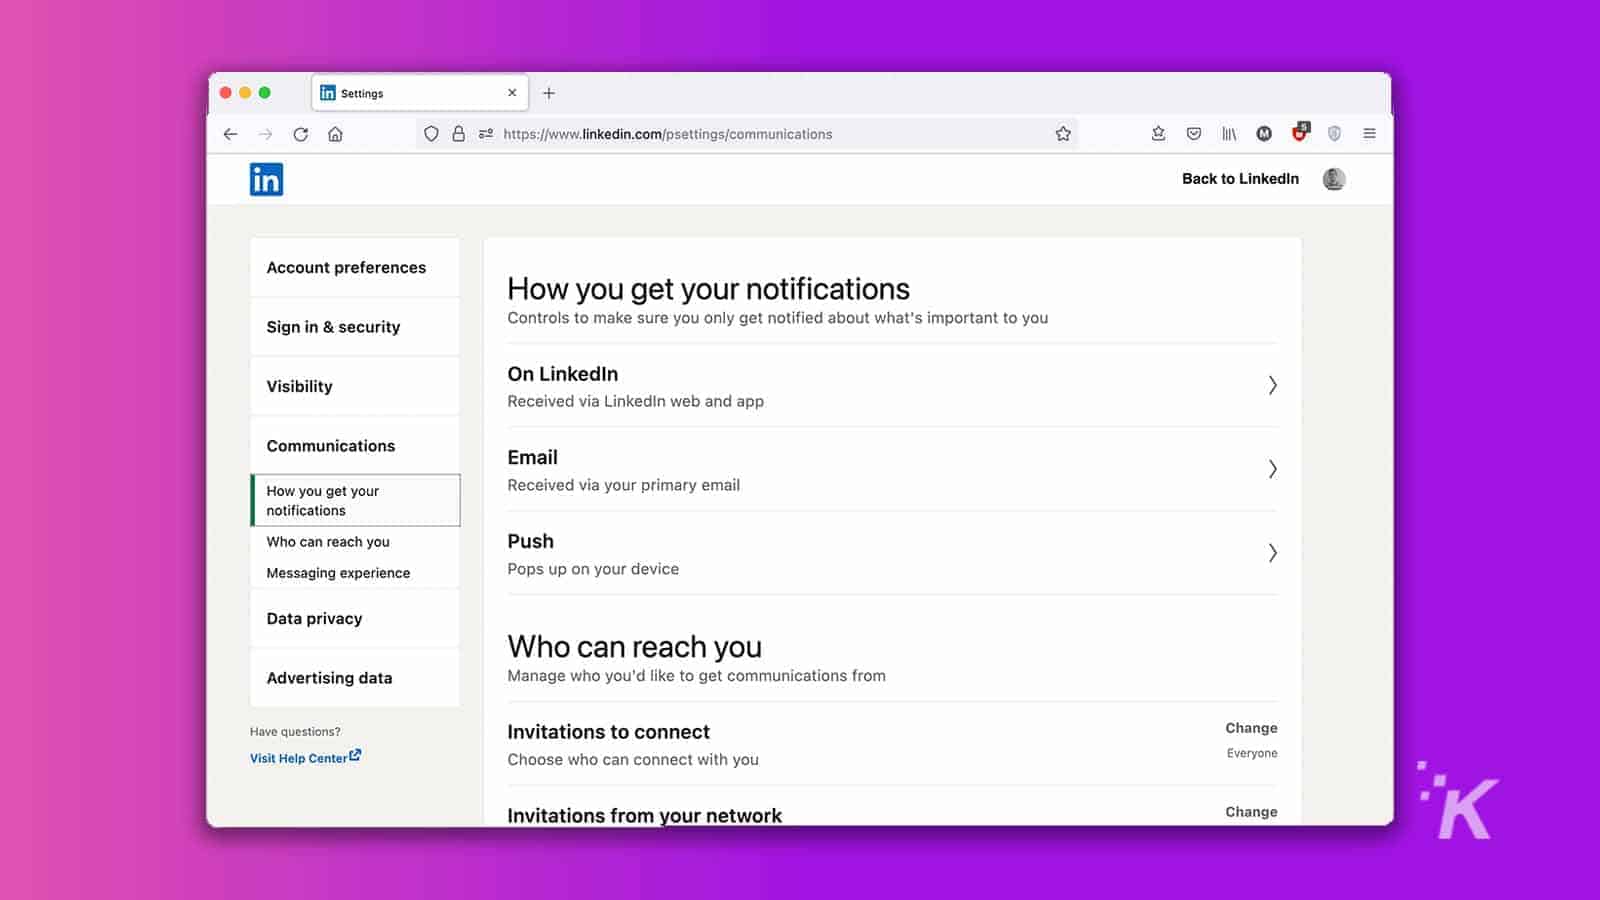
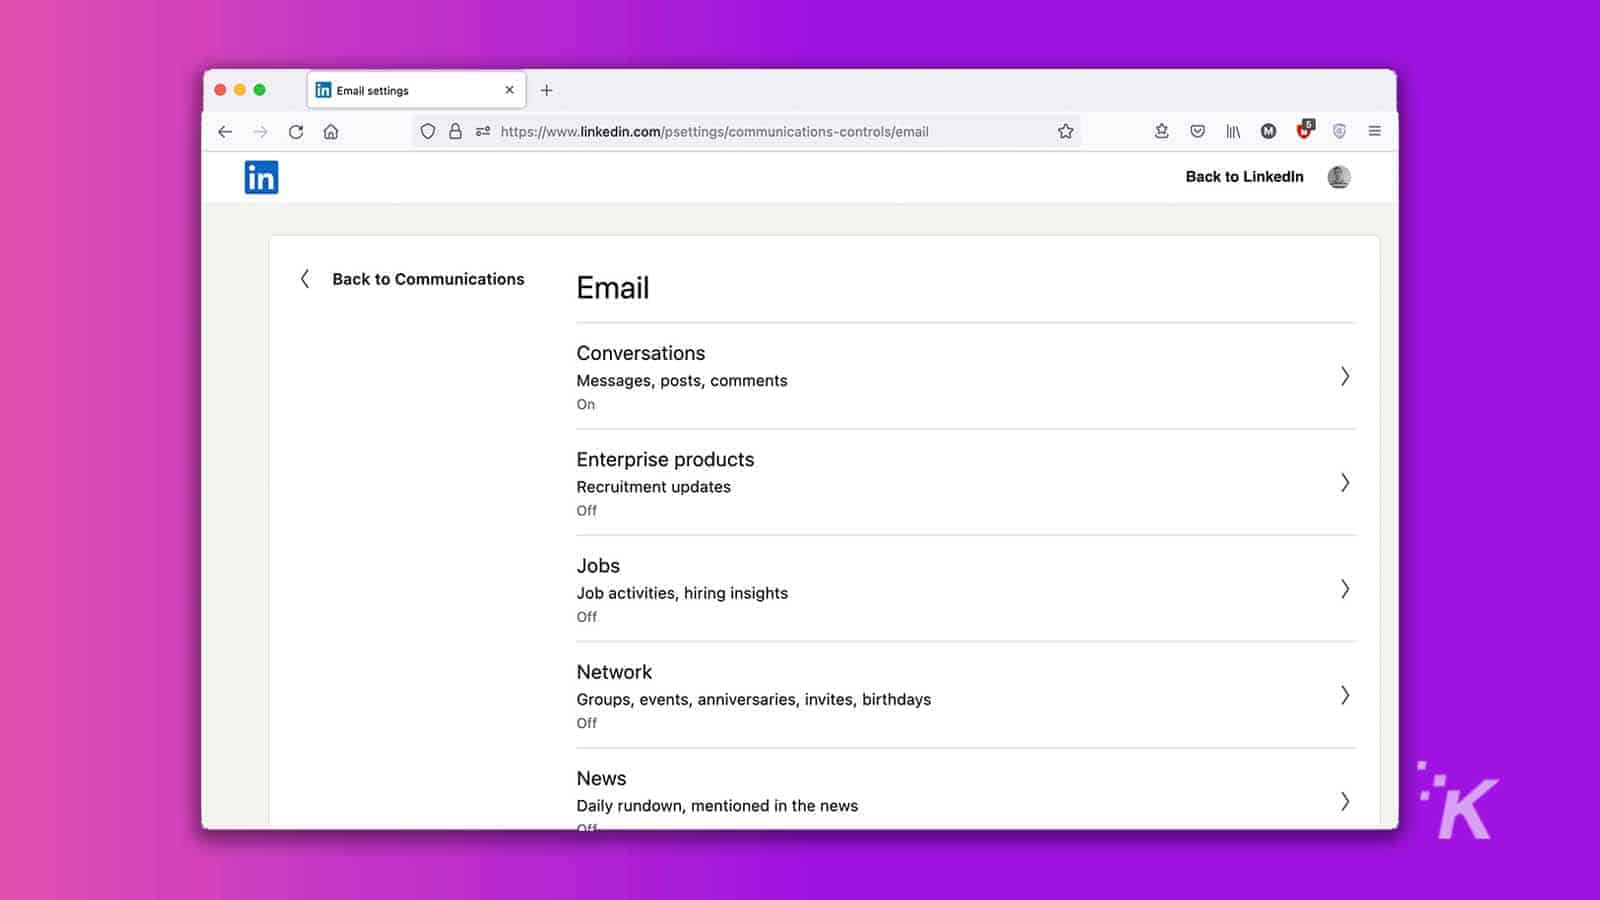
Unless you absolutely need to keep up to date with everything that’s happening on LinkedIn, you can disable most email notifications without missing anything of value.
Disable LinkedIn newsletter, research study, and other invitations
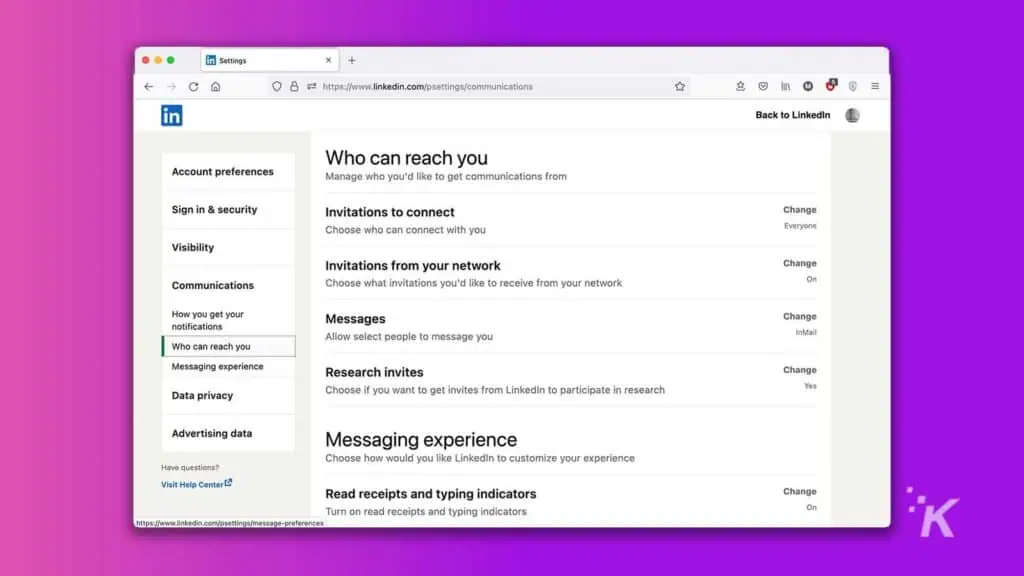
Disabling invitations is another way to reduce the number of LinkedIn notifications you receive. When the feature is turned on, people in your network can send you invites to events, newsletters, research studies, and more.
READ MORE: Notifications driving you crazy? This messenger app only delivers messages once a day
If none of that interests you, switching off invitations will stop the notifications from rolling in. Here’s how to disable LinkedIn invite notifications:
- Go to LinkedIn.com
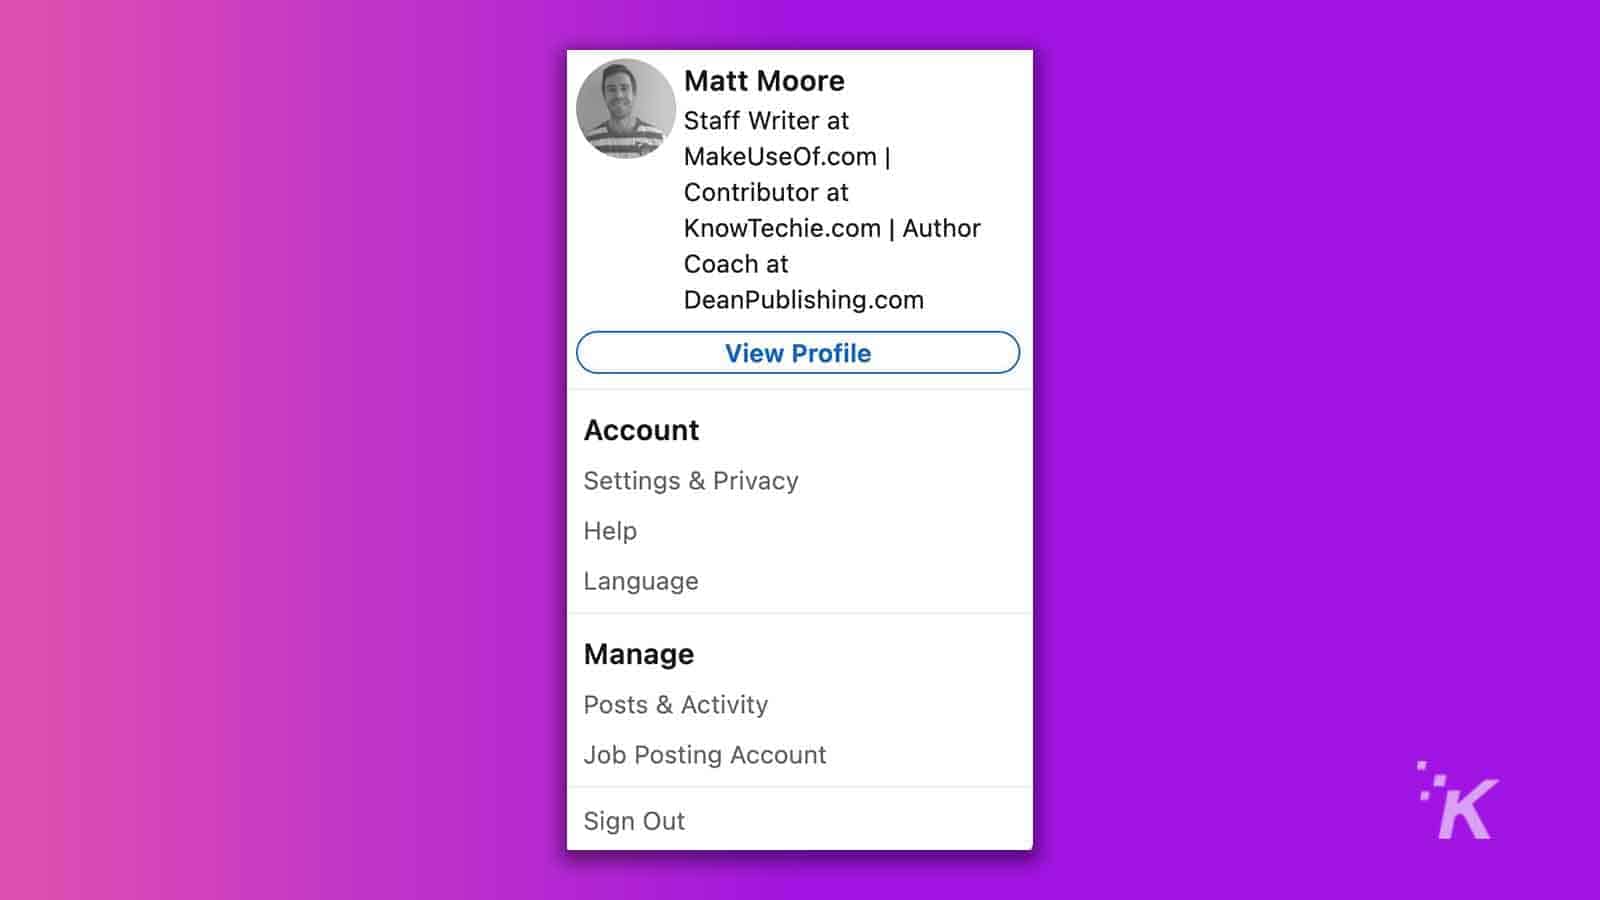
- Click your Profile picture in the top menu bar and select Settings & Privacy
- Go to Communications > Invitations from your network and Research Invites
- Switch off any notifications you no longer wish to receive
Change who can see your email address on LinkedIn
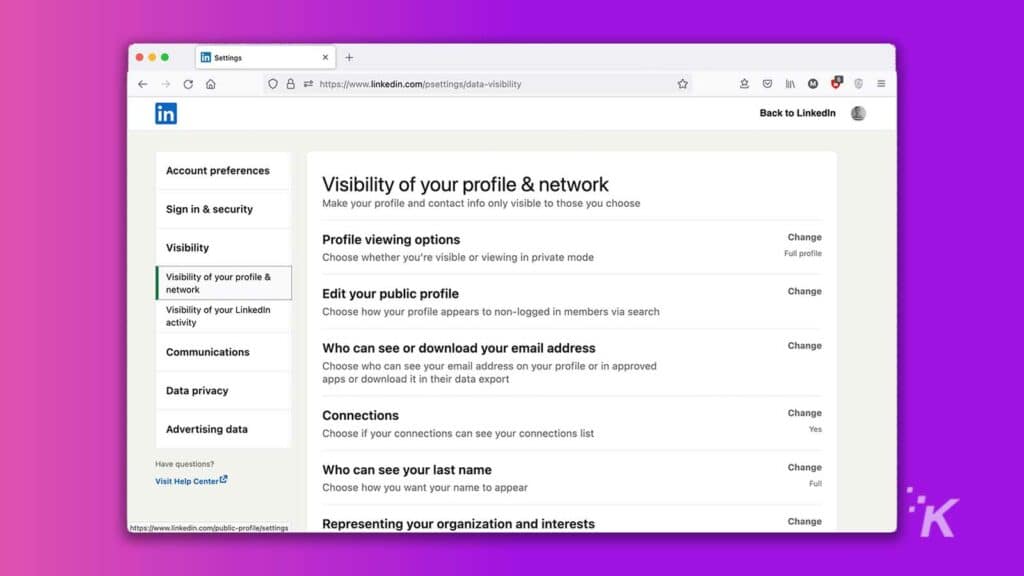
Finally, if you don’t want your connections or anyone else viewing your email address, you can alter the visibility and have it remain a mystery. Realistically, anyone who needs to contact you can do so on the platform, and leaving your email public can lead to spam and other unwanted communications.
Here’s how to hide your email address on LinkedIn:
- Go to LinkedIn.com
- Click your Profile picture in the top menu bar and select Settings & Privacy
- Go to Visibility > Who can see or download your email address
- Set visibility to Only visible to me
Stop LinkedIn notifications – most aren’t necessary
Whenever you join a social media platform, customizing your notification settings can save you a lot of frustration and wasted time. Most of us don’t need to be notified about every little thing that happens, and email alerts flooding your inbox can distract from more important things.
Social media companies want to lure you in whenever they can, but you can take back some control by switching off notifications and only checking in when it suits you.
Have any thoughts on this? Let us know down below in the comments or carry the discussion over to our Twitter or Facebook.
Editors’ Recommendations:
- Here’s how to stop ‘allow site notifications’ pop-ups in just about every browser
- How to mute words on Facebook
- Here’s how to make Alexa listen for running water and beeping appliances
- How to block message requests on Instagram
- How to customize your LinkedIn URL