Business
How to turn off automatic updates on Windows 11
Typically, you shouldn’t stop Windows 11 updates, but if you need to, here’s how.
Just a heads up, if you buy something through our links, we may get a small share of the sale. It’s one of the ways we keep the lights on here. Click here for more.
Quick Answer:
– Go to Control Panel, then open Windows Update.
– Click on “Change settings” under the Automatic Updates section.
– Uncheck the box next to “Install updates automatically (recommended)”
– Go to Control Panel, then open Windows Update.
– Click on “Change settings” under the Automatic Updates section.
Windows 11 is the latest operating system from Microsoft, and the company consistently pushes out updates for users.
While these are usually helpful, there might be times when you don’t want to update. For that, you’ll need to know how to stop automatic updates on Windows 11
Typically, you should avoid pausing automatic updates on Windows, but there are instances where it might be the smart thing to do.
Maybe you have a big presentation and are worried the update will start before you present.
It’s also possible that some of your programs may have issues after updating, and you need those programs for work or school. There are numerous reasons, honestly.
READ MORE: How to change your username in Windows 11
That said, Microsoft’s updates are still important and can help protect your data, so only pause updates if you are sure it is something you need to do.
If you fall into this category, keep reading below, as we’ll review multiple methods of turning off automatic Windows 11 updates.
How to pause automatic updates on Windows 11
The first method we’ll go through will let you pause upcoming updates on Windows 11.
This is our recommended method because it makes updating your PC easier whenever you’re ready. Follow along below:
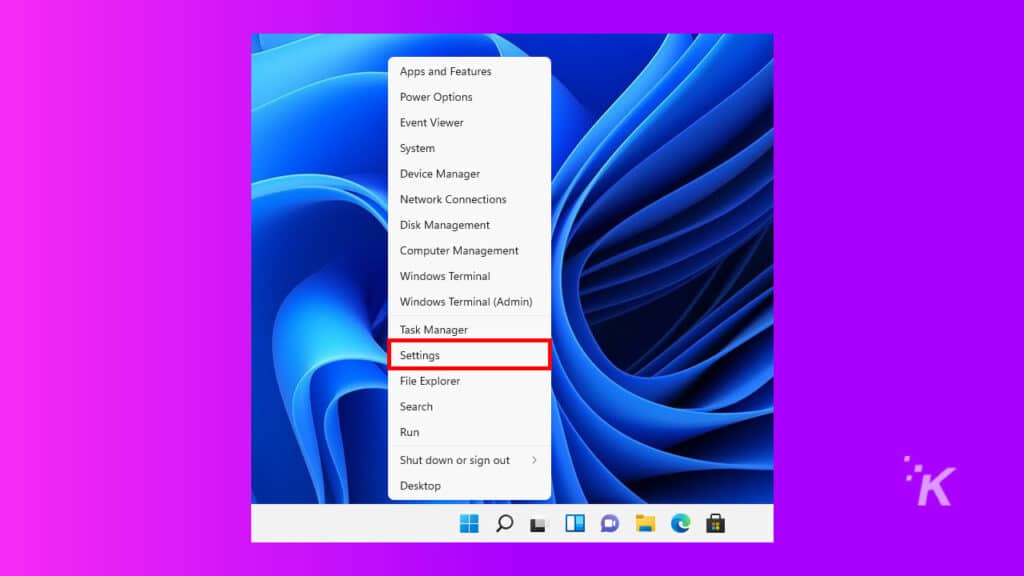
- Go to Start and then Settings, or right-click on the Start menu and select Settings
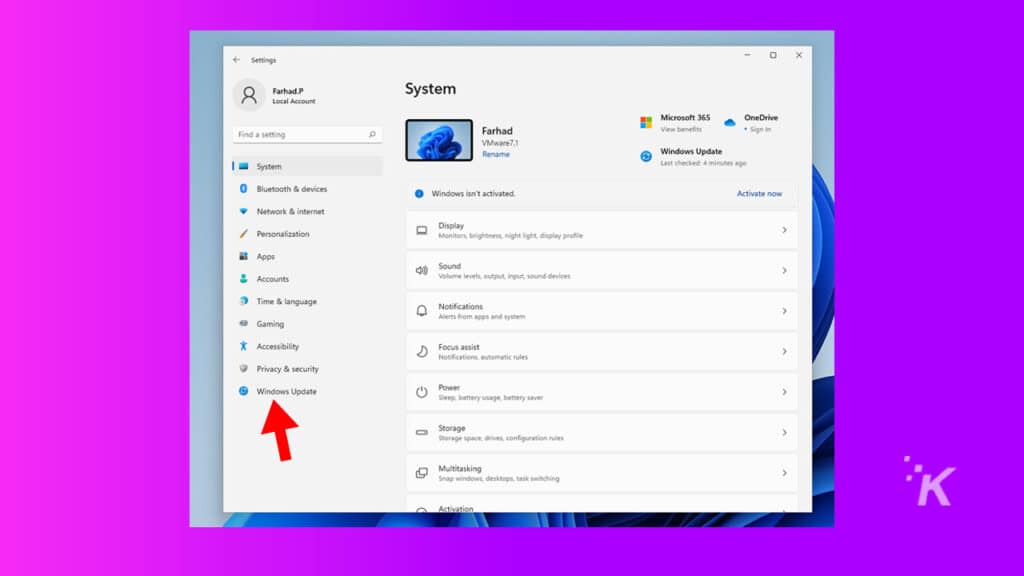
- Next, click on Windows Update
- To pause updates, click the Pause updates drop-down menu and specify the duration of the pause
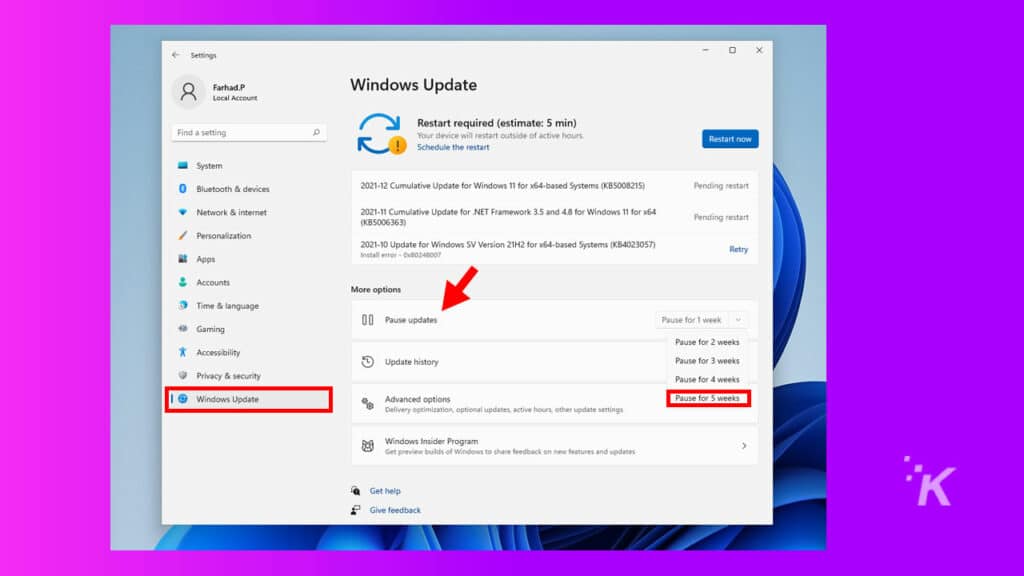
Once the pause period is over, Windows will automatically install new updates. So don’t forget to pause the updates again if you find it necessary.
READ MORE: Windows 12 release date — when is it coming out?
But again, updates are often important, so we don’t recommend waiting too long.
Disabling Windows updates using the Services command
If you wish to disable Windows 11 automatic updates permanently, you may stop the whole Windows update service. To do this:
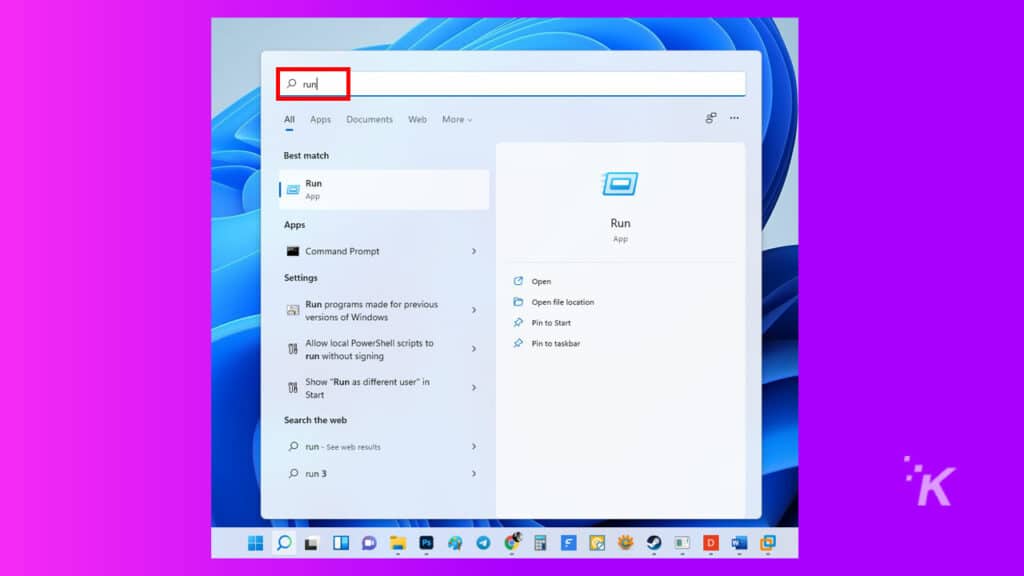
- Go to the Start menu, type Run, and then press Enter
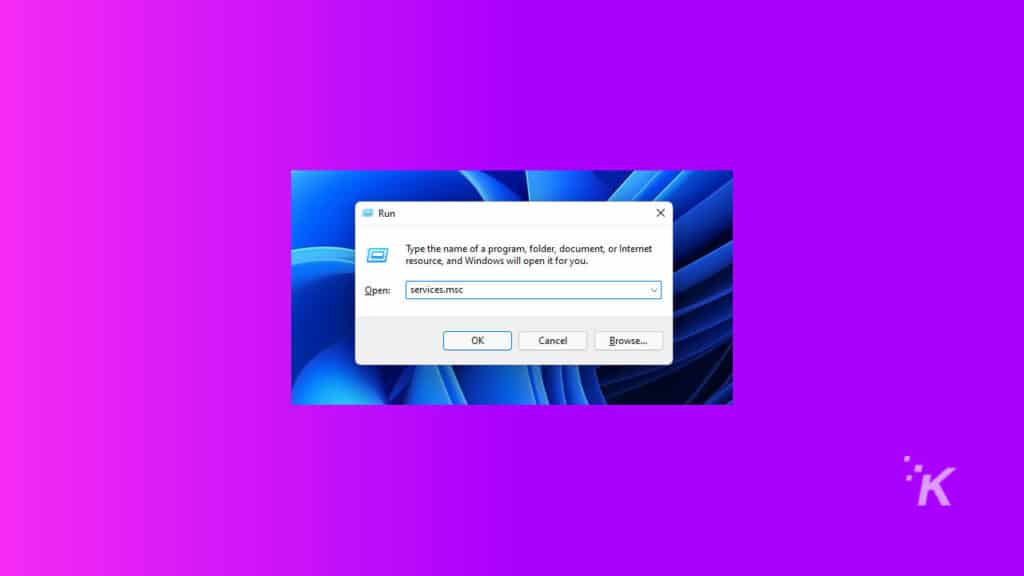
2. Next, in the Run app, type services.msc and press Enter
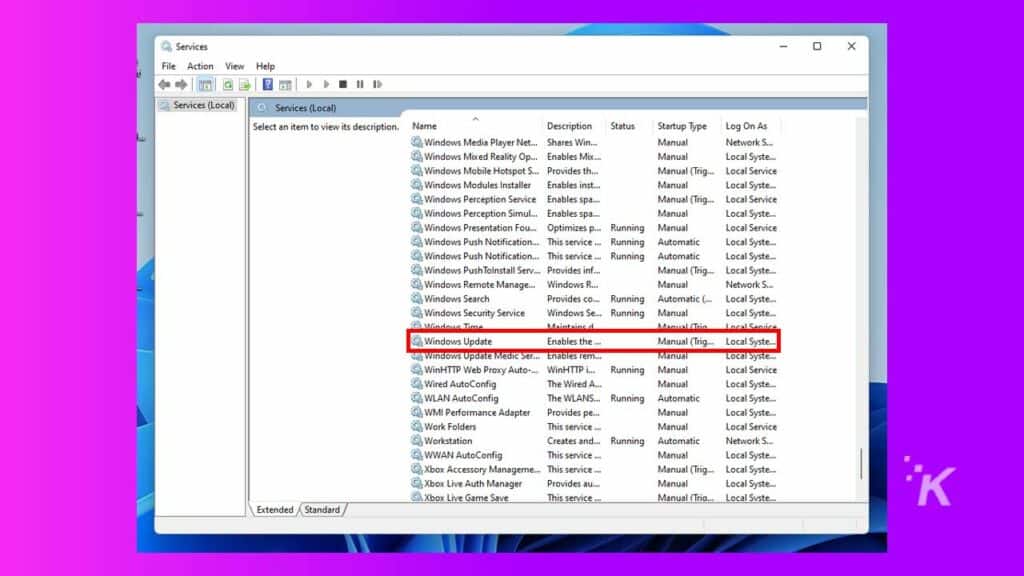
3. In the service window, look for Windows Update and double-click on it
4. In the Windows update settings, select Disabled from the drop-down menu beside Startup Type
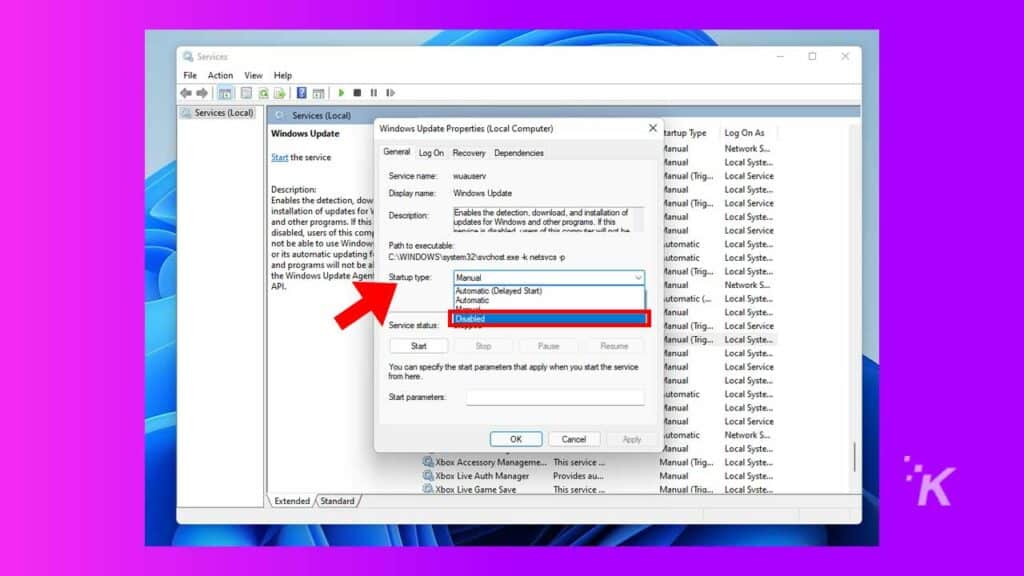
5. After that, click on OK and restart your PC to put the changes into effect
READ MORE: How to create a virtual desktop in Windows 11
Windows updates can be enabled again by following the same process listed above. Simply change the Startup type back to Automatic.
How to disable Windows 11 updates using the registry
Disabling automatic updates in Windows 11 can also be accomplished by making changes to the registry.
⚠️ This is a more in-depth method and should only be used if you feel comfortable making large changes to your operating system.
If you prefer this method, follow the steps below:
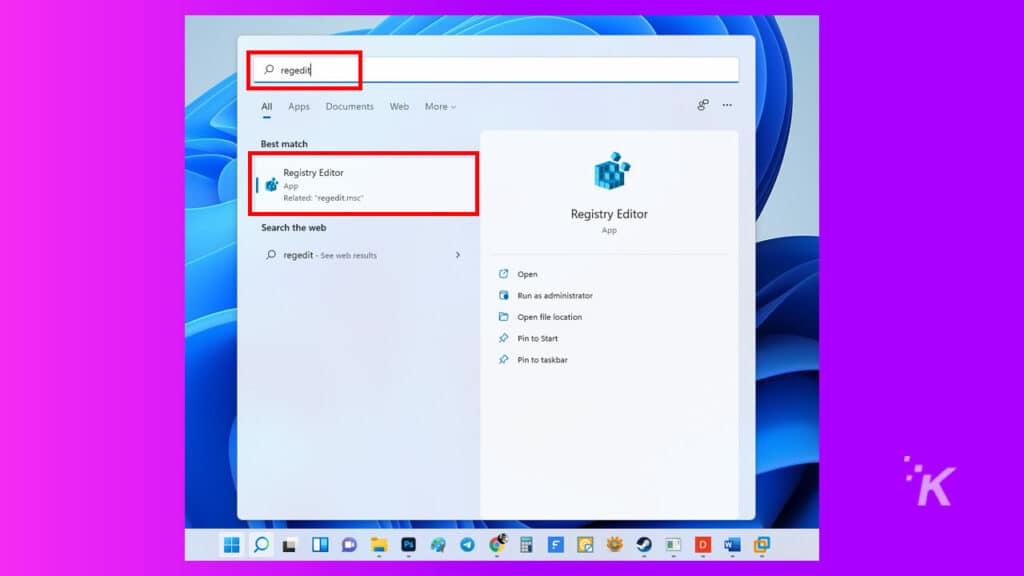
- Go to the Start menu and type regedit and then press Enter
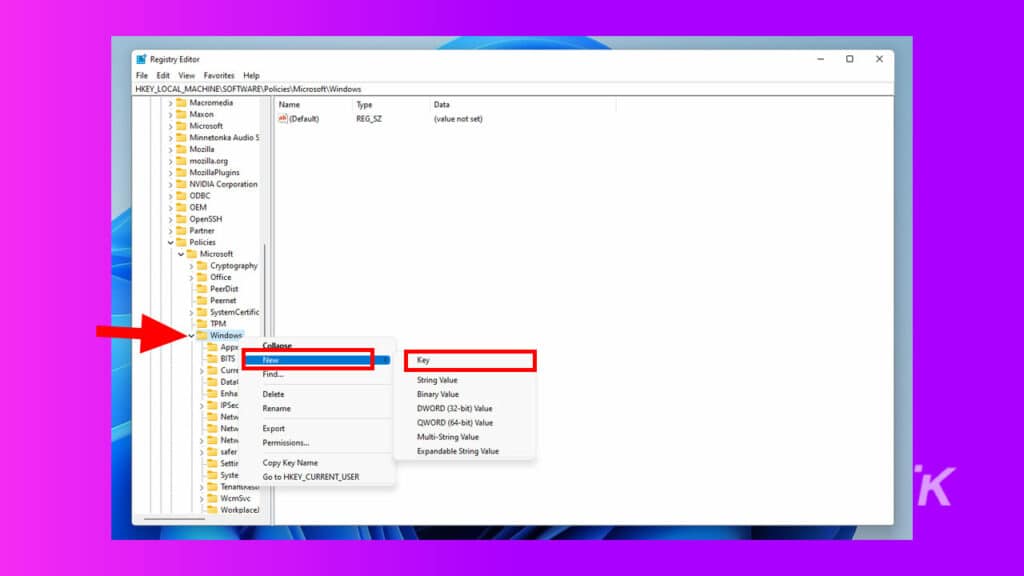
2. Go down this path: HKEY_LOCAL_MACHINE\SOFTWARE\Policies\Microsoft\Windows. Alternatively, copy and paste the path into the Registry search bar

3. Right-click on the Windows folder in the sidebar and then select New > Key
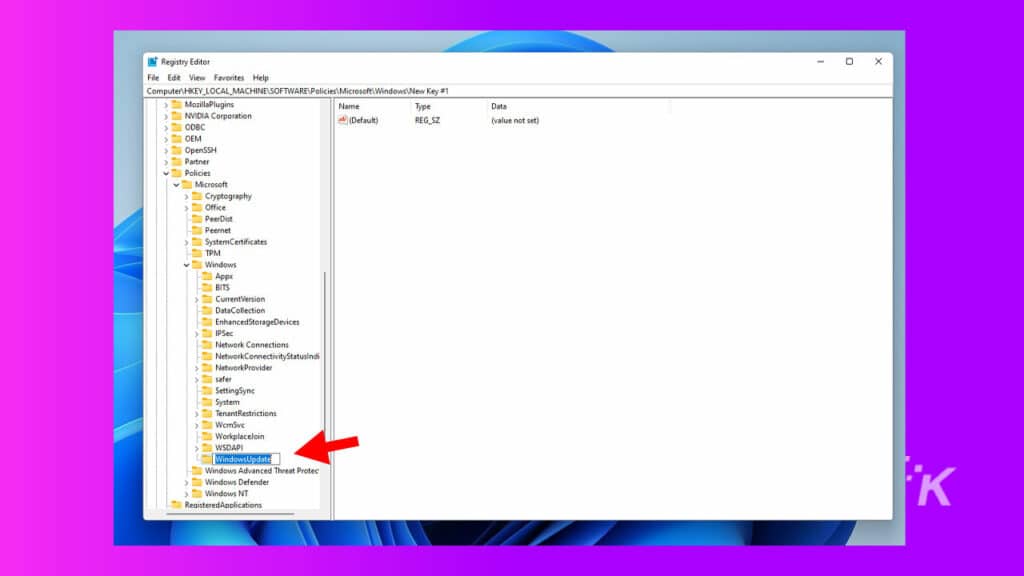
4. Name the key WindowsUpdate and press Enter
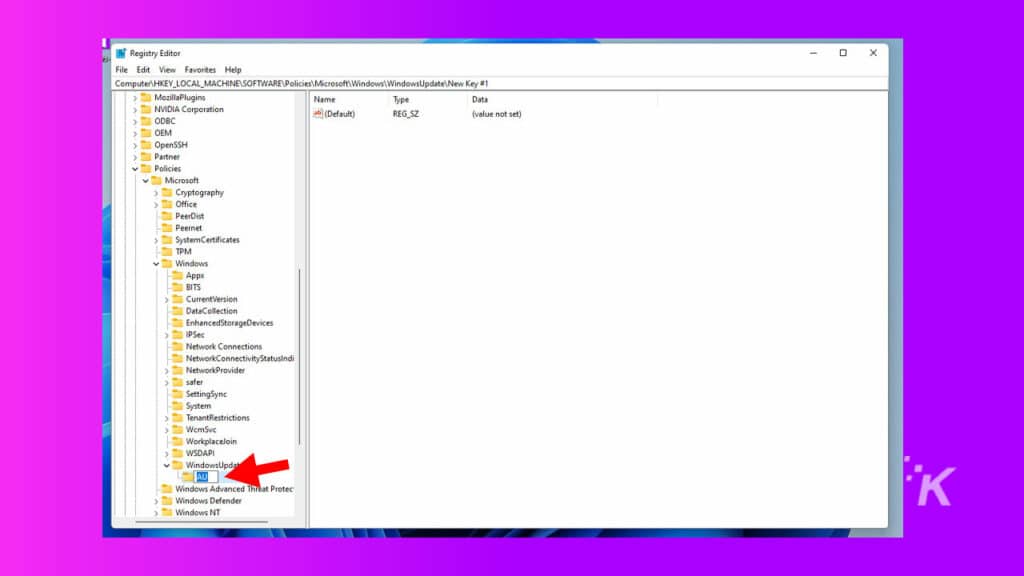
5. Now, right-click on WindowsUpdate and again create a new key. Name it AU and press Enter
6. Right-click anywhere on the right panel and select New > DWORD (32-bit) Value
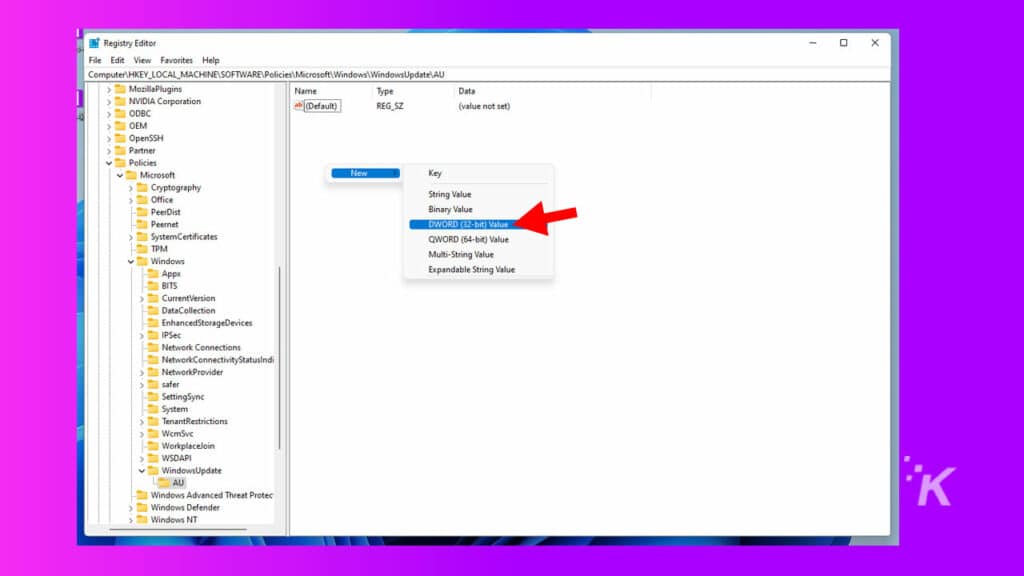
7. Name the key NoAutoUpdate and press Enter

8. Double-click on it and change the value from 0 to 1
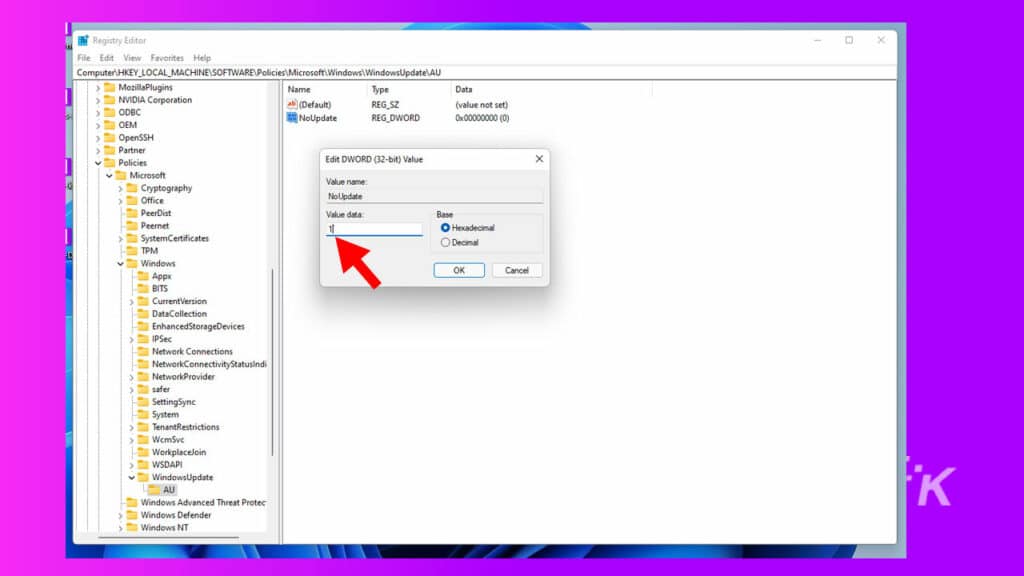
9. Close the Registry Editor and restart your PC
This method will completely disable Windows updates, but again, this method isn’t recommended unless you are very comfortable with making changes to Windows.
Disabling Windows updates through Group Policy
This is another in-depth method to disable automatic updates in Windows 11. Only use this if you are comfortable diving deep into System folders and making changes.
READ MORE: How to change the scroll direction in Windows 11
In this guide, we’ll be using Group Policy to accomplish the task. Here’s how:
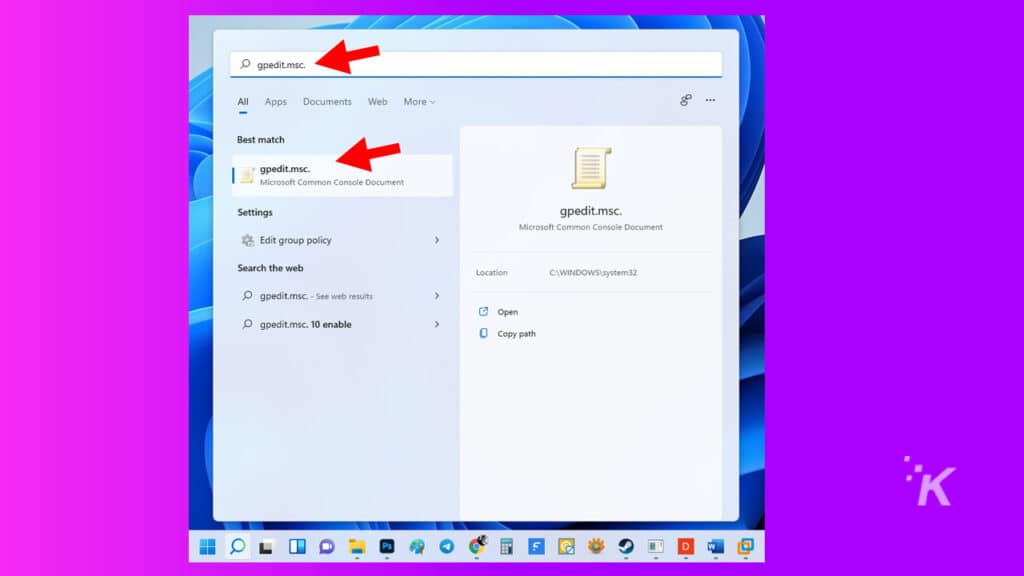
- Go to the Start menu, type gpedit.msc and then click on the Group policy editor in the search results
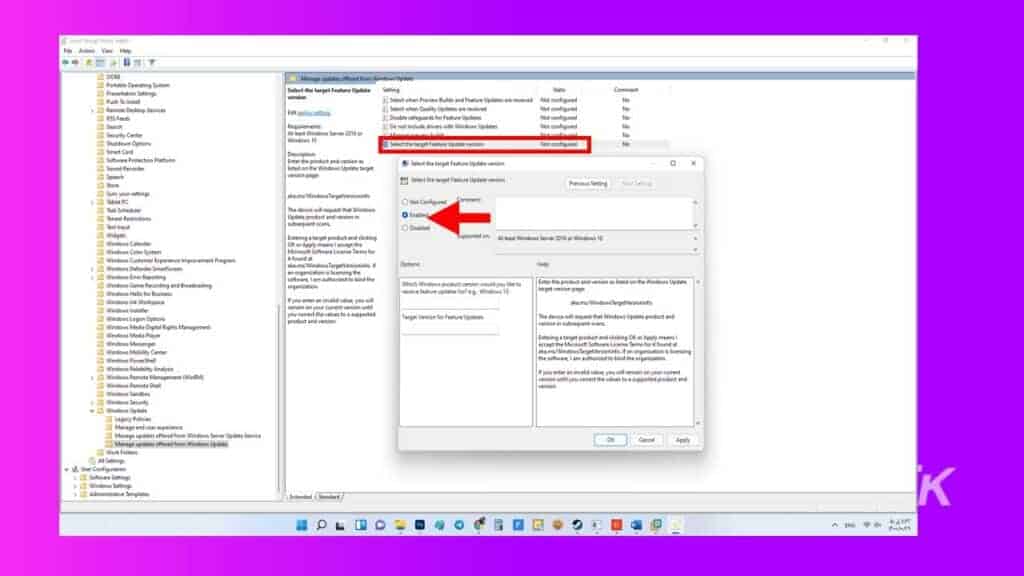
2. Navigate to the following path: Computer Configuration > Administrative Templates > Windows Components > Windows Update> Manage updates offered from Windows Update
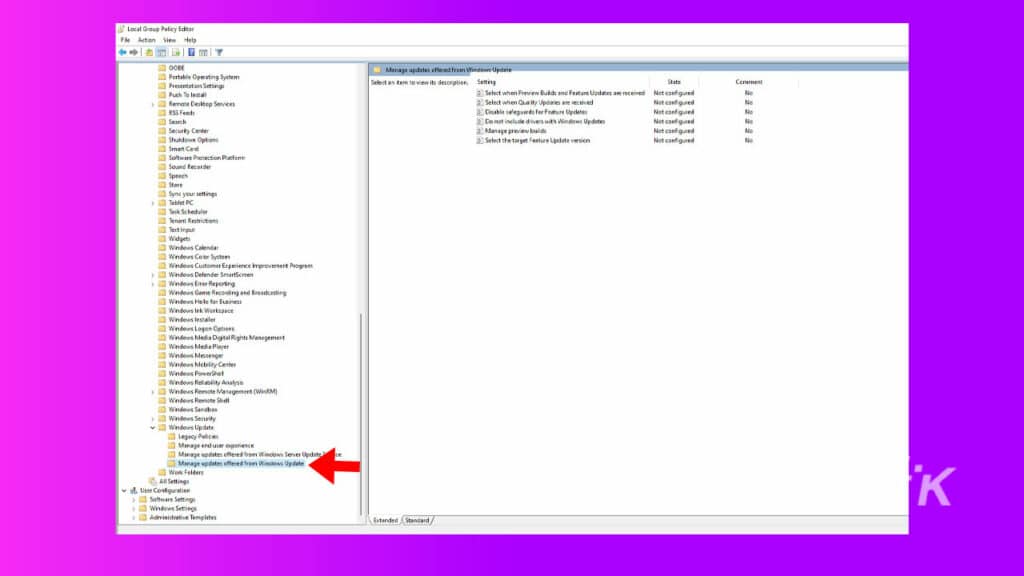
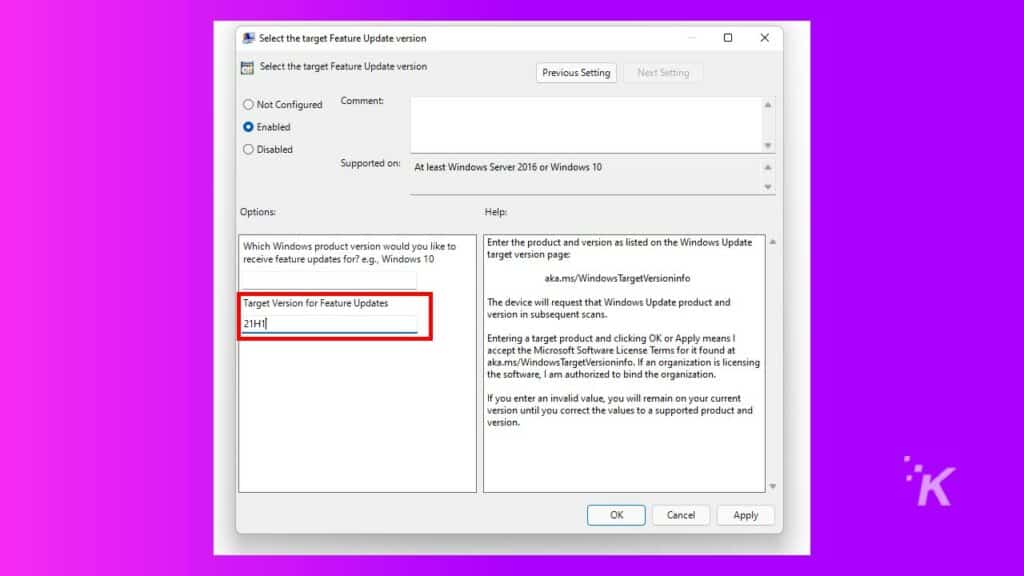
3. Double-click on Select the target Feature Update version and select the radial Enabled button
4. Next, type 21H1 into the Target Version for Feature Updates and click on OK
Doing this will stop updates from being pushed to Windows.
Typically, this method is only used for companies that can’t afford to take a chance on updates that break their sensitive programs.
For casual users, this method is not recommended.
Disabling Windows updates with a third-party app
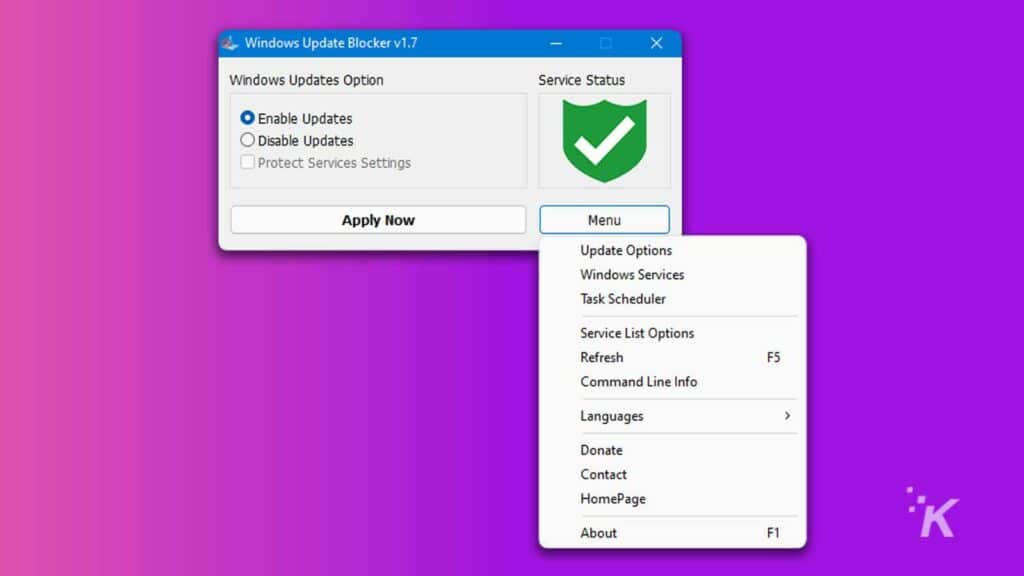
The app we’ll be using to stop Windows 11 updates is Windows Update Blocker, whose sole purpose is to prevent updates from being installed.
If you don’t have much computer knowledge and want to disable Windows updates with an app, this method is for you.
- First, download Windows Update Blocker
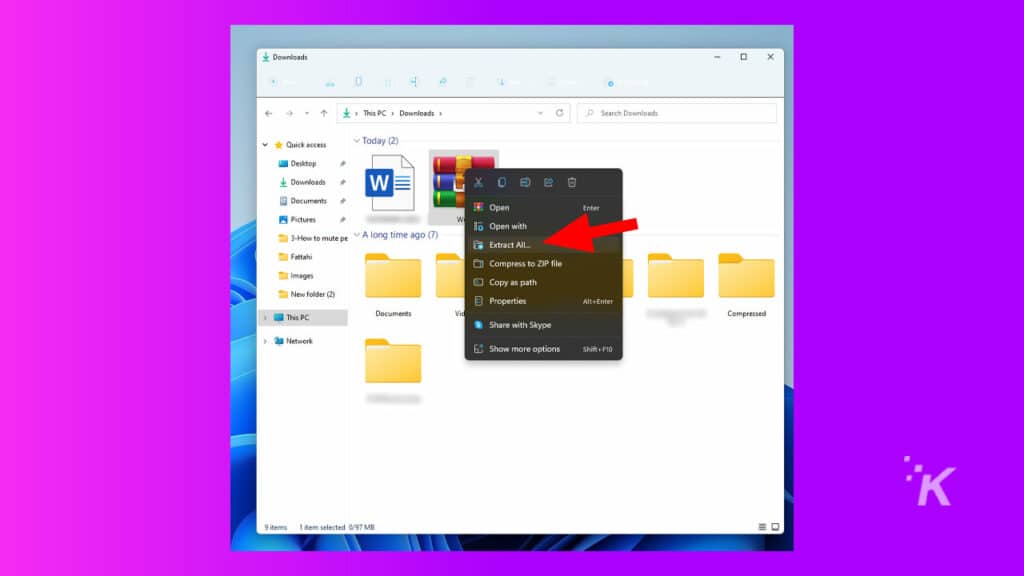
- Next, extract the Windows Update Blocker file
- Run the .exe file, select Disable updates and check Protect Services Settings
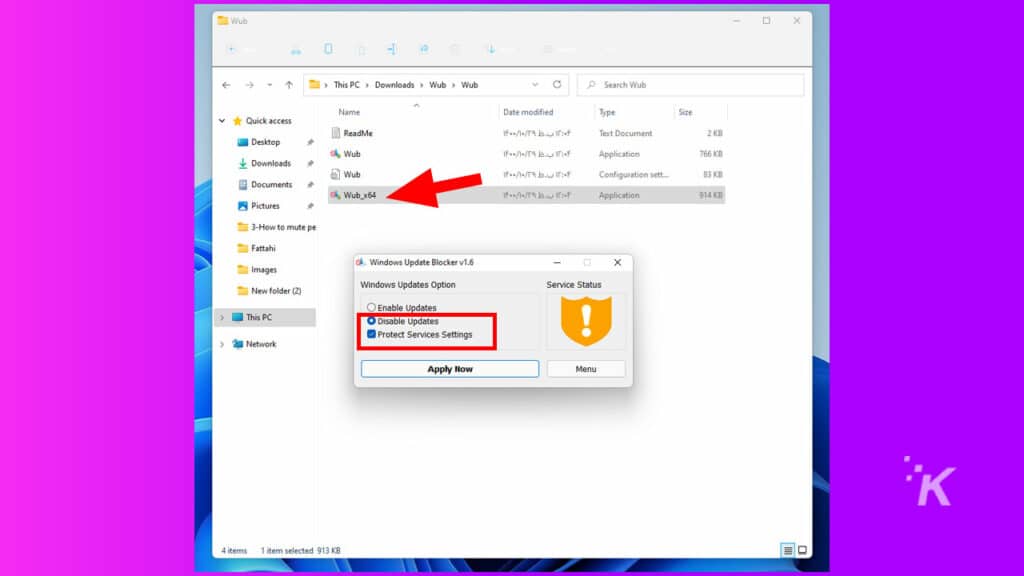
- Click on Apply Now
You have successfully switched off automatic updates on Windows 11.
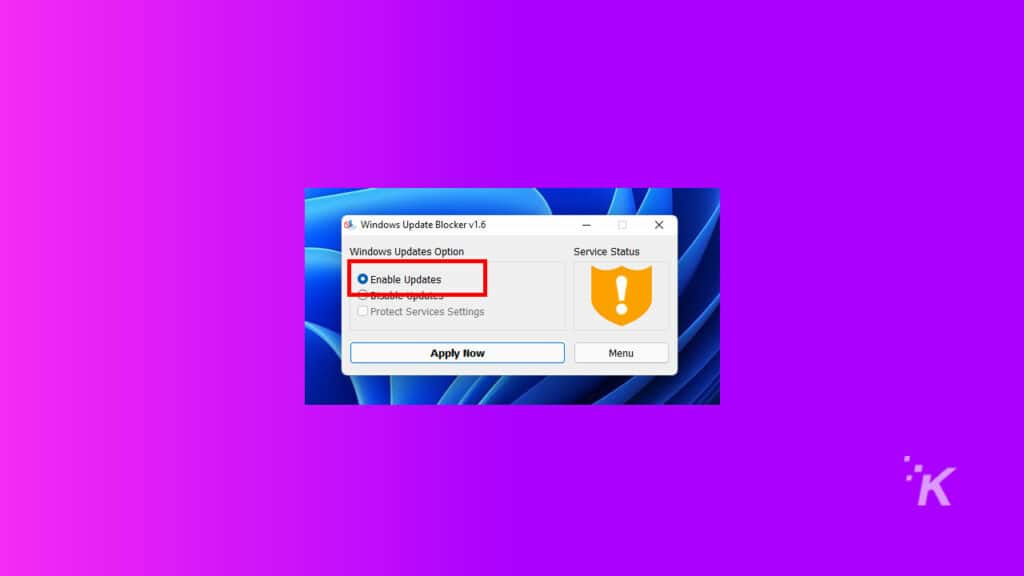
Additionally, you can reactivate the updates by selecting the Enable Updates option in Windows Update Blocker if you change your mind.
Disabling Windows updates is not always the answer
Disabling Windows 11 updates using the Registry and Group Policy Editors should be done cautiously. If you mess up any of the steps, it’s possible you’ll cause serious problems with your operating system.
In addition, the updates are typically for your own security, as they often include patches that protect you from vulnerabilities.
If you don’t want to risk causing damage to your operating system or simply need to pause updates for a little while, using something like the Windows Update Blocker app is recommended.
Have any thoughts on this? Let us know down below in the comments or carry the discussion over to our Twitter or Facebook.
Editors’ Recommendations:
- How to automatically free up disk space in Windows 11 when storage runs low
- How to create, customize, and delete Google Chrome profiles
- Here’s how to open multiple websites with a shortcut in Windows 11
- How to uninstall Windows 11 updates
- (Yet another) issue has popped up with Windows 11